|
|
Glen
Experienced Roboteer

Joined: 16 Jun 2004
Posts: 9481
Location: Where you least expect


|
The sordid tale of the chinese laser (k40 laser engraver)
Here's a build thread of a different nature for you all and hopefully one of use to anyone else that finds this thread through google  . I picked up this laser cutter 2nd hand off ebay for a fair price with the intention of using it purely to make bits to sell, with some secondary robot prototyping on the side. . I picked up this laser cutter 2nd hand off ebay for a fair price with the intention of using it purely to make bits to sell, with some secondary robot prototyping on the side.
I'd heard they were pretty crappy electronically, but mechanically quite good, and as robot builders we all like to think we can make something of nothing, plus i needed a good project to learn about electronics/programming. So this is the story of how its come together so far with some rather interesting insights into chinese bargain manufacturing on a level i've never come across before 
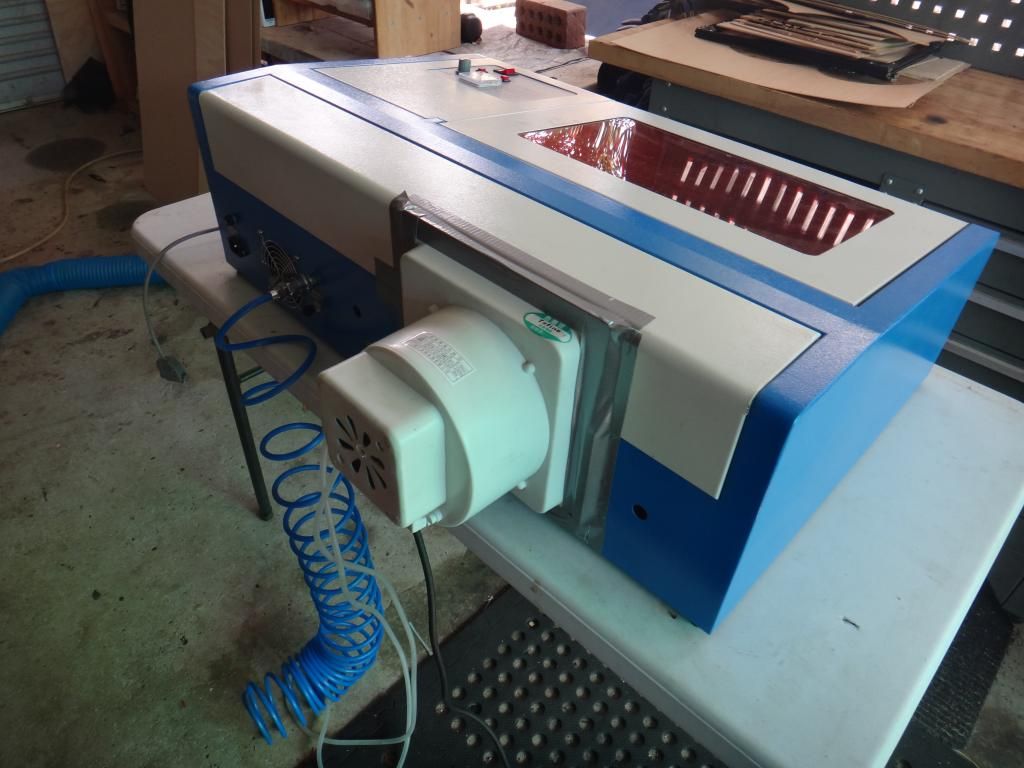
I accidentally wiped my camera with heaps of pics on it so theres not as much in here as i'd like, but whatever, Here she is the day we bought it home. The seller mentioned they'd used it at low power for a few hours till it started making banging noises, and it never cut well but engraved okay.
We were lucky in that this one seems to be an upgraded version of this style of machine. Other reports online show they rectified some of the really bad design issues.
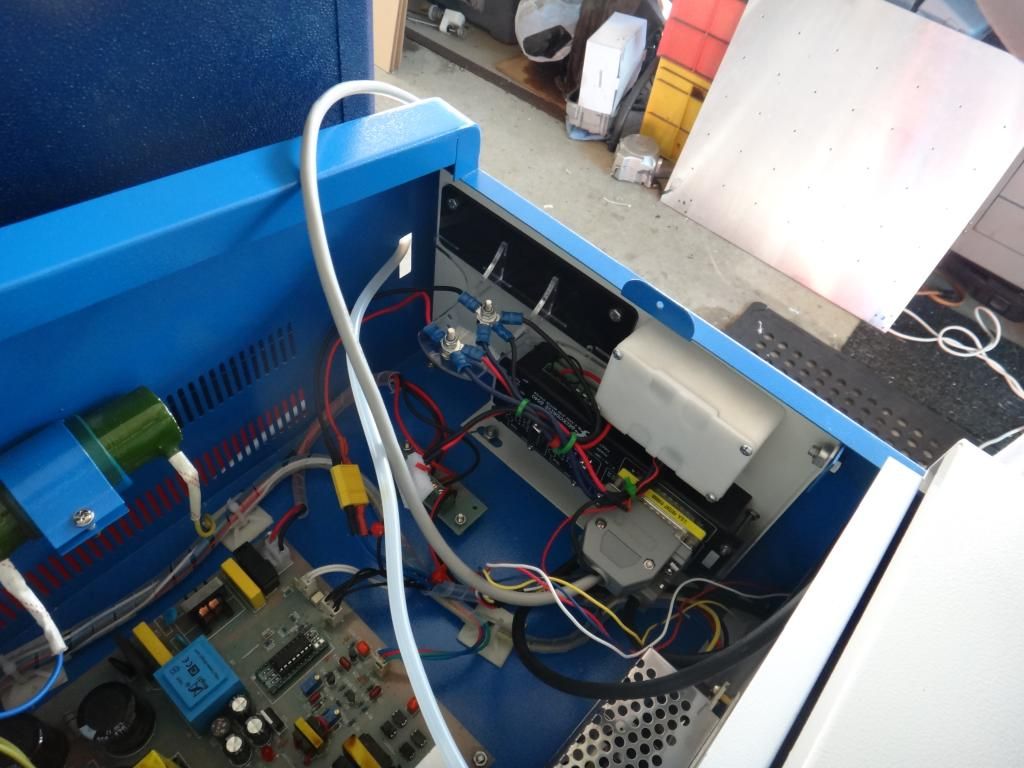
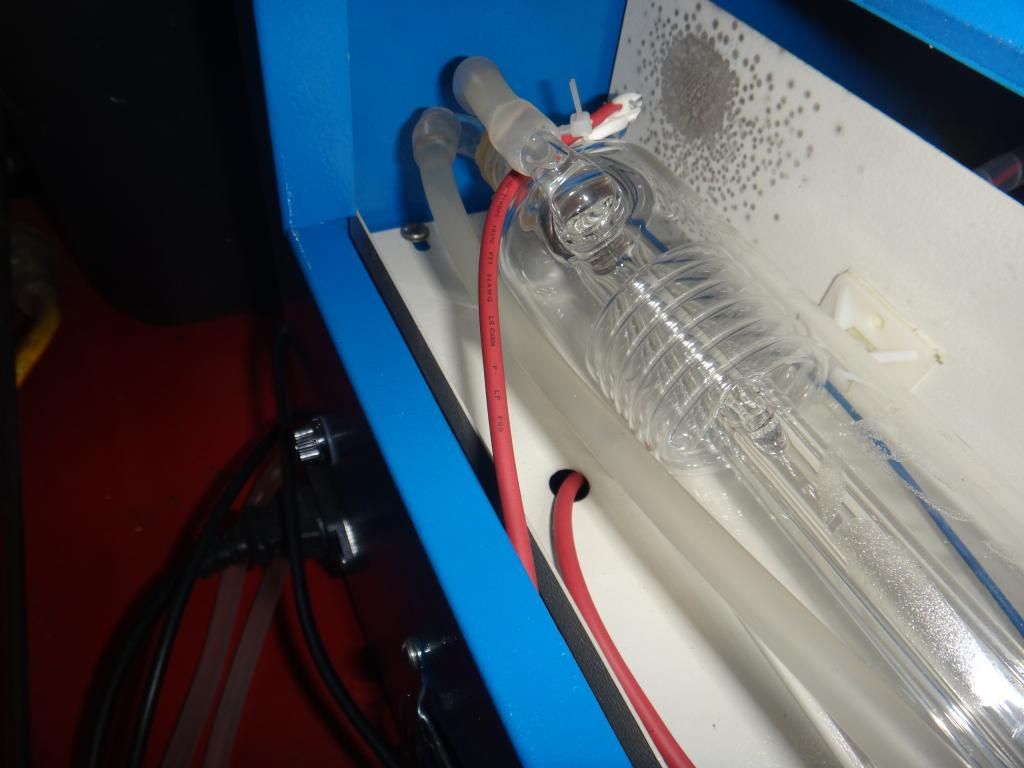
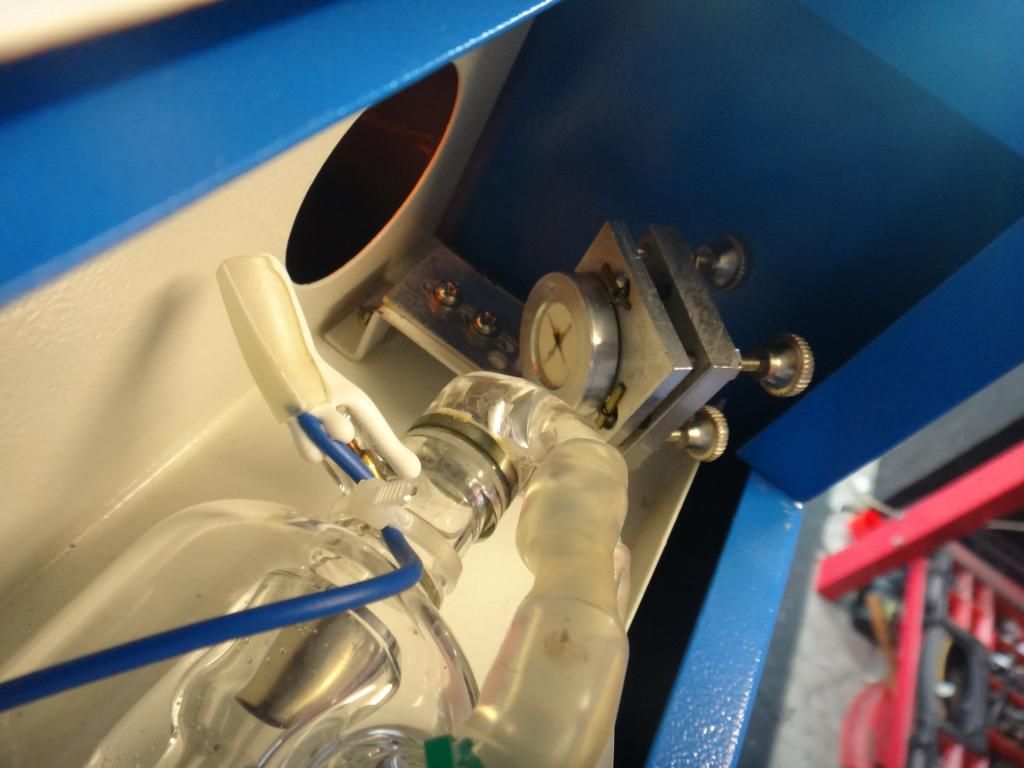
Yet still they left others unsolved. For example the 25,000v laser connection was uninsulated and was arcing freely to the (non grounded) case, which was the banging the last owners heard. Nice! Another theme is the wiring being mashed between 1mm steel panels edgeways and high voltage wires passing through holes without grommets.
Note that the above wire is actually white, they just painted it XD
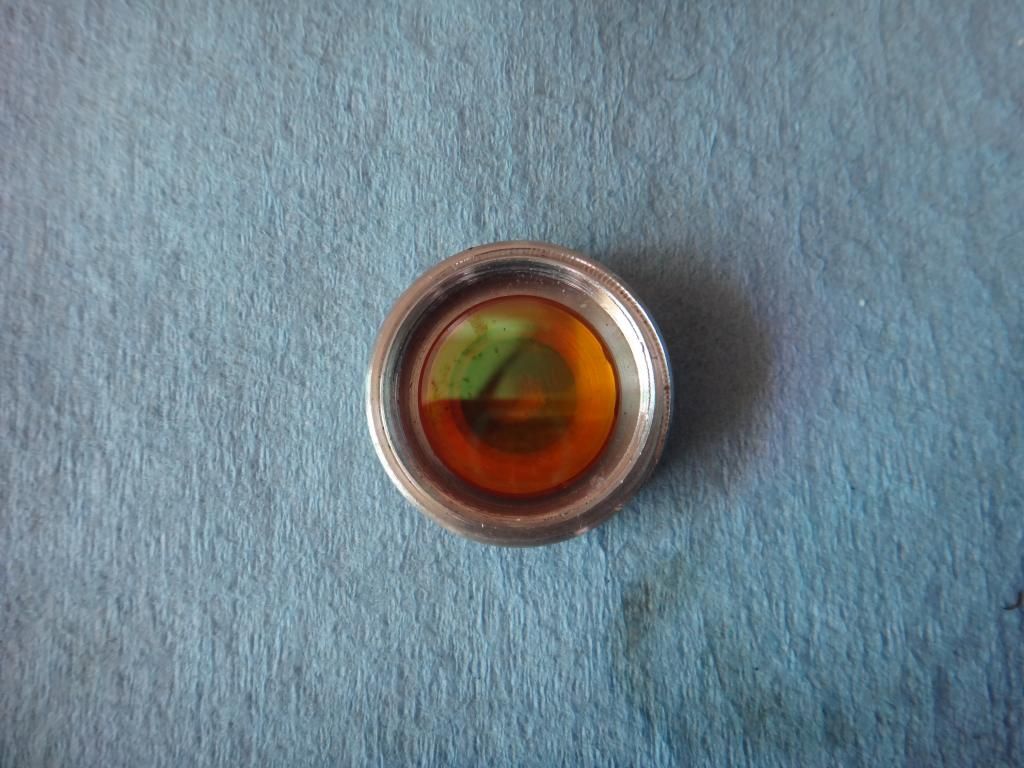
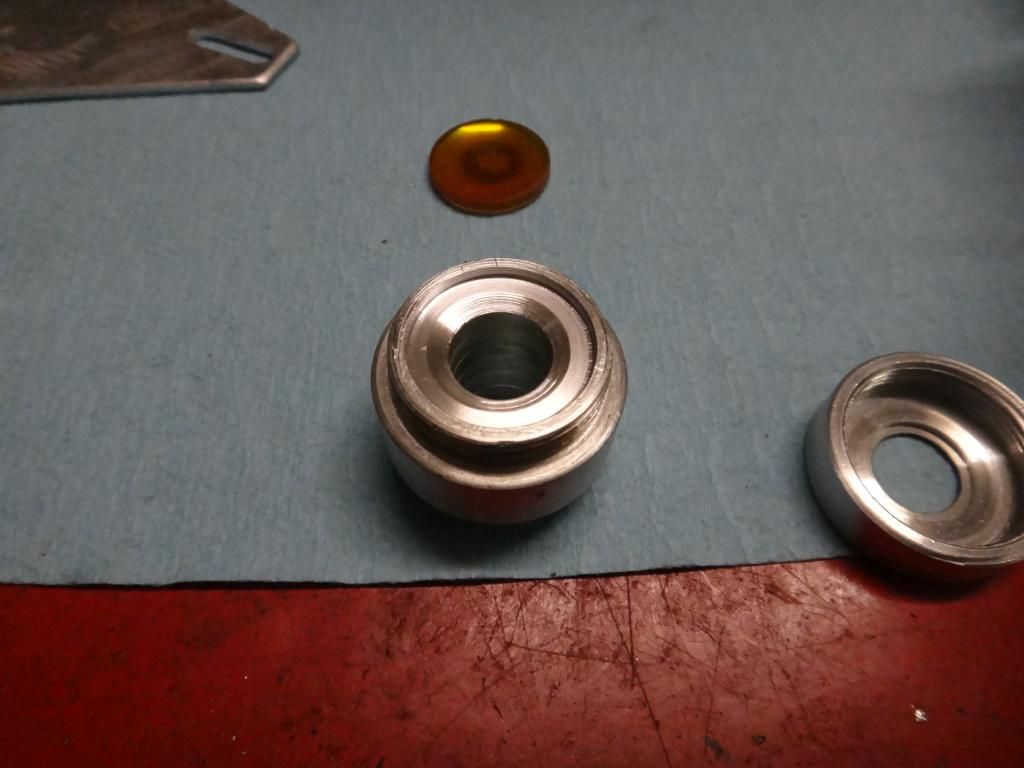
Onto the laser optics. The reason it engraved well but didn't cut well. Though it really did nothing well lol. The lens has to be perfectly centered so the beam falls on the center. Rather hard for that to happen when the lens is 18mm and the holder 21mm. The optics were all covered in crap too from them not using the extractor fan or air assist (which blows vapour away from the lens to stop it getting dirty)
By machining an 18mm recess into the holder, that centered the lens and allowed the cap holding it in to properly thread on too.
I think they could use some drilling practice in the ole factory D:
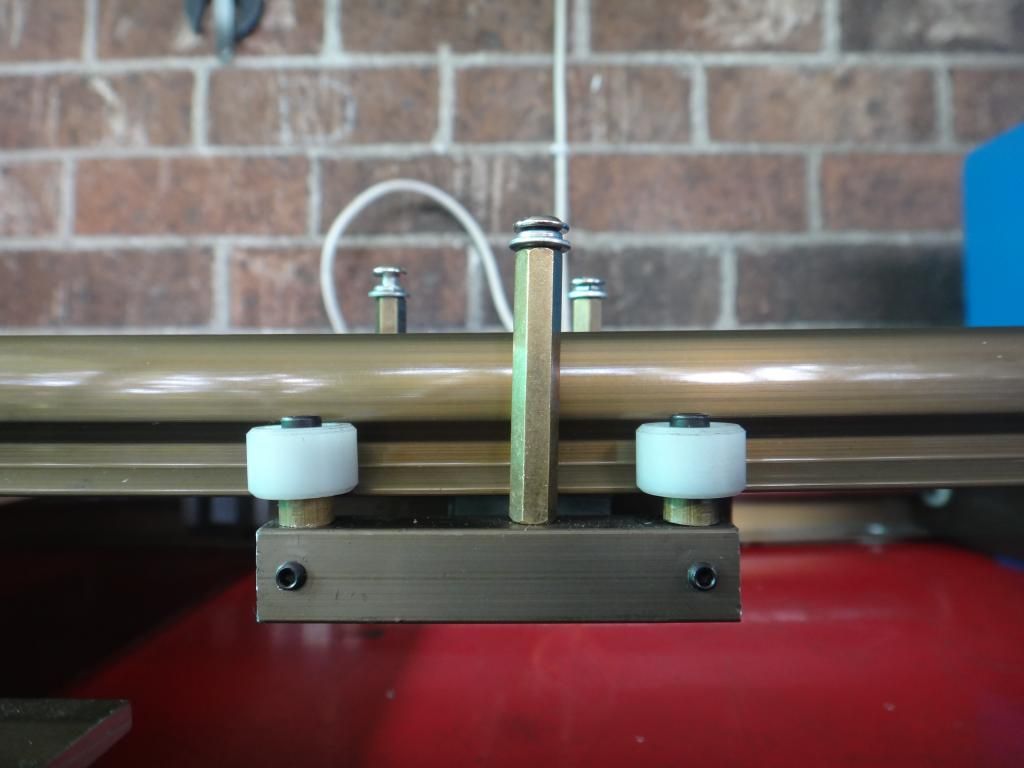
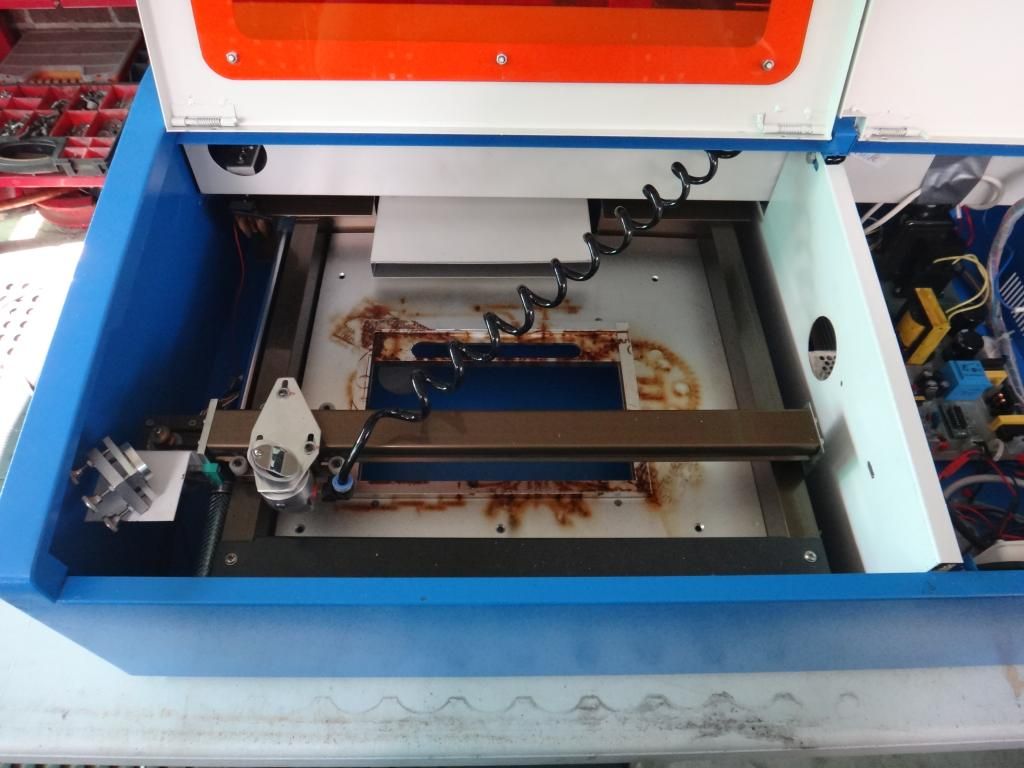
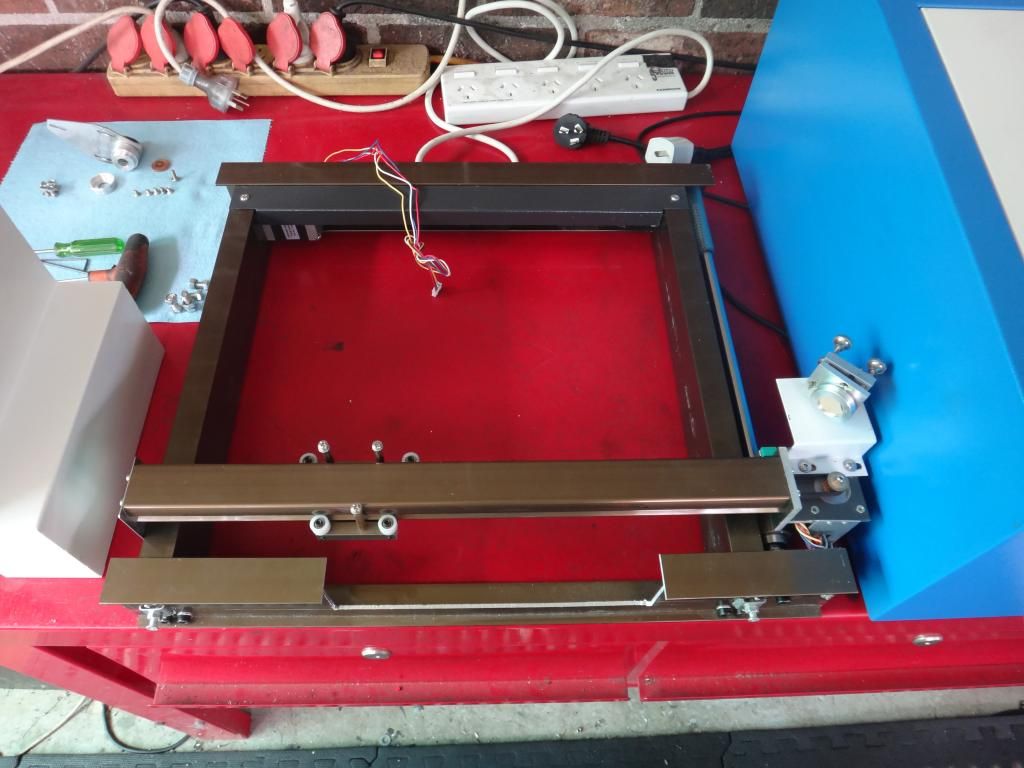
The actual moving bits - which are honestly not that badly made. I'd even say quite well made. The belts are legit brands, they have well made tensioner mechanisms, the beams are all drilled accurately etc. Not bad at all.
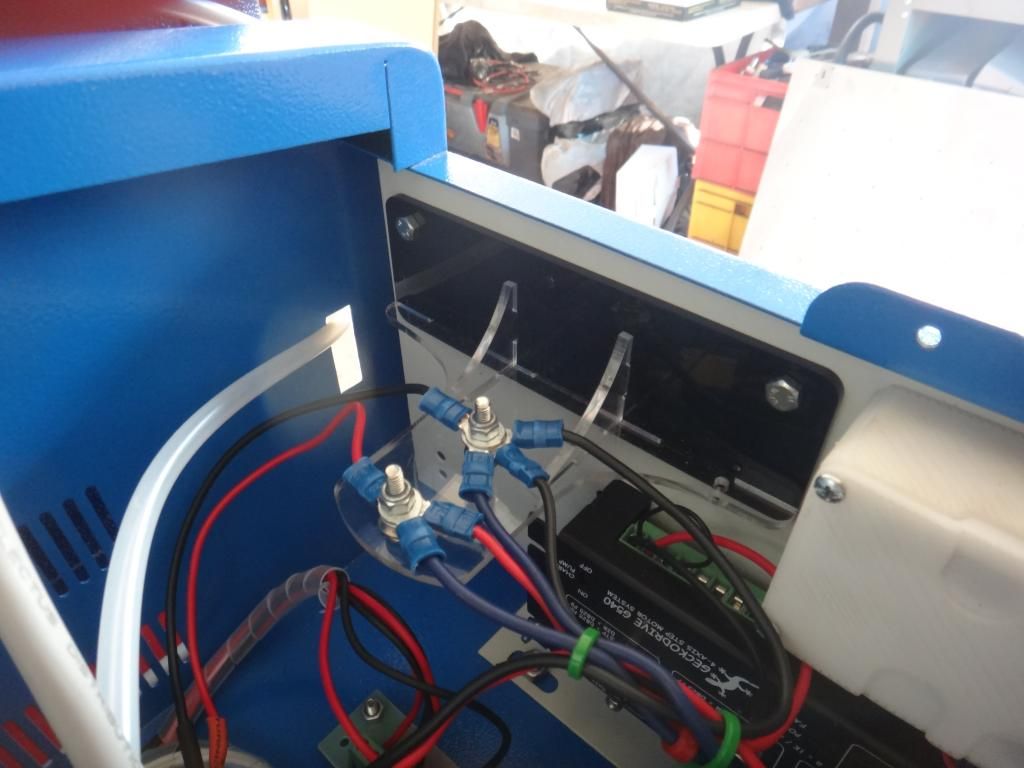
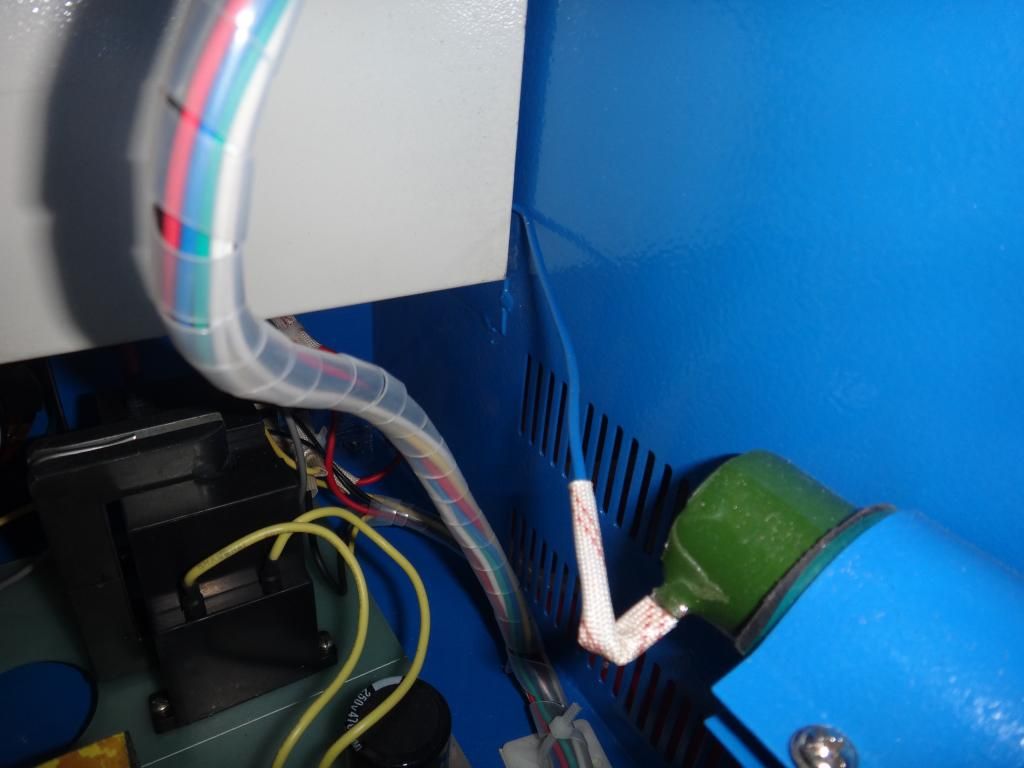
Now the two best bits. The cord on the extractor fan was so weedy and plug so nasty i felt instant death was at hand if i dared plugging it in, which lead me to find -

Arhgghh wtf is that. All the insulation was pulled back like that and everything. My eyes my beautiful eyes!?
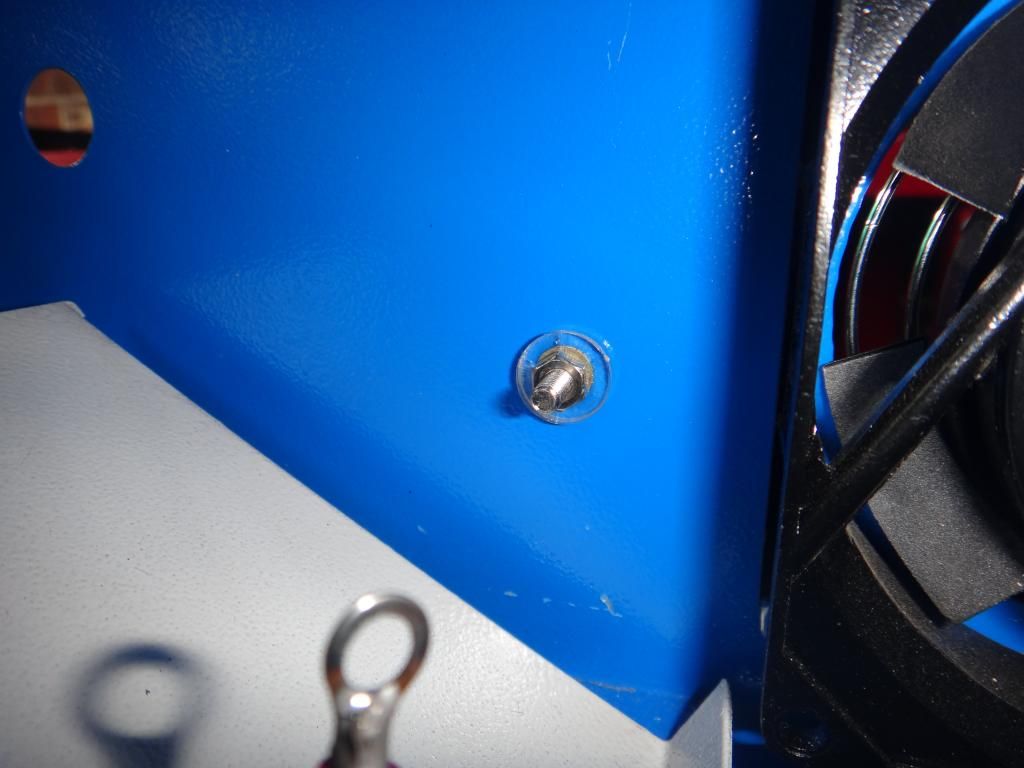
I have no idea why the case ground is completely insulated with acrylic washers. What possible reason could there be for that? If someone touched the case with the laser tube arcing as it was then.. kablammo. not good. The fuse was also on the neutral not live, which if my bodgy tafe edumocation is anything to go by, is pretty bad.
But anyway thats most of the horror dispensed with, this is where i lost my pics. But we got some better silicone jacket 50,000kv wire to replace the old hv wire with, installed grommets on all the neccessary points and cleaned it all up.
The laser join was done by wrapping the hv wire around the tungsten terminal, then taking individual strands of copper wire and wrapping them around the lot really tight. a spark plug boot was pushed over that to insulate it and it seems to work darn well so far.
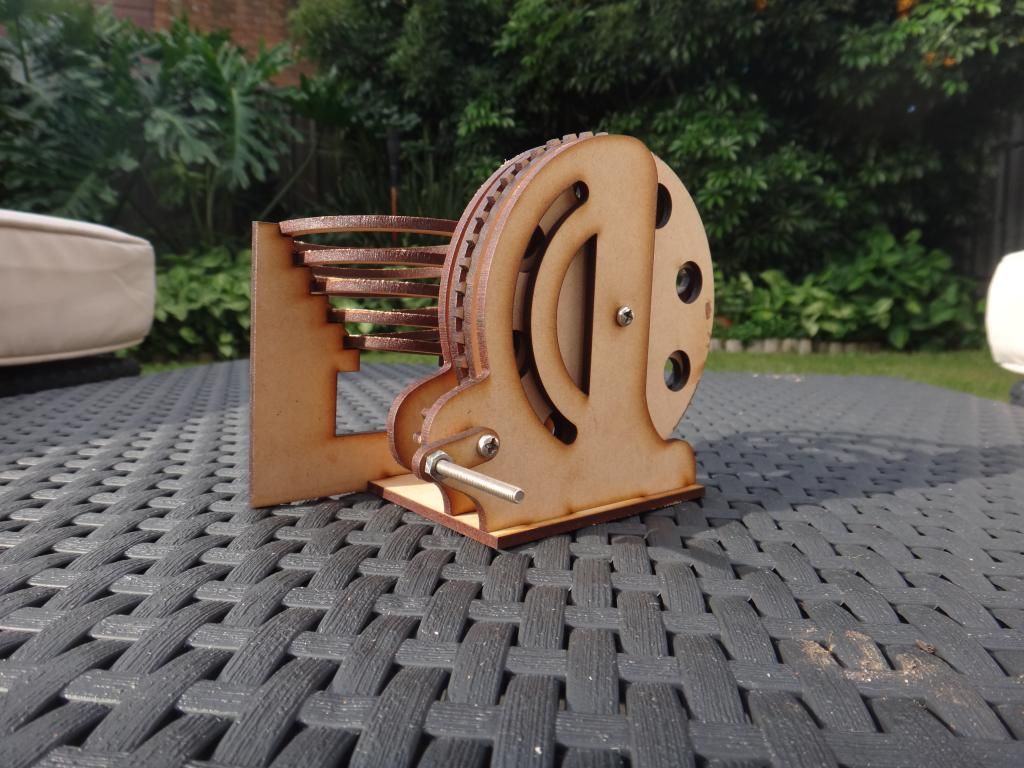
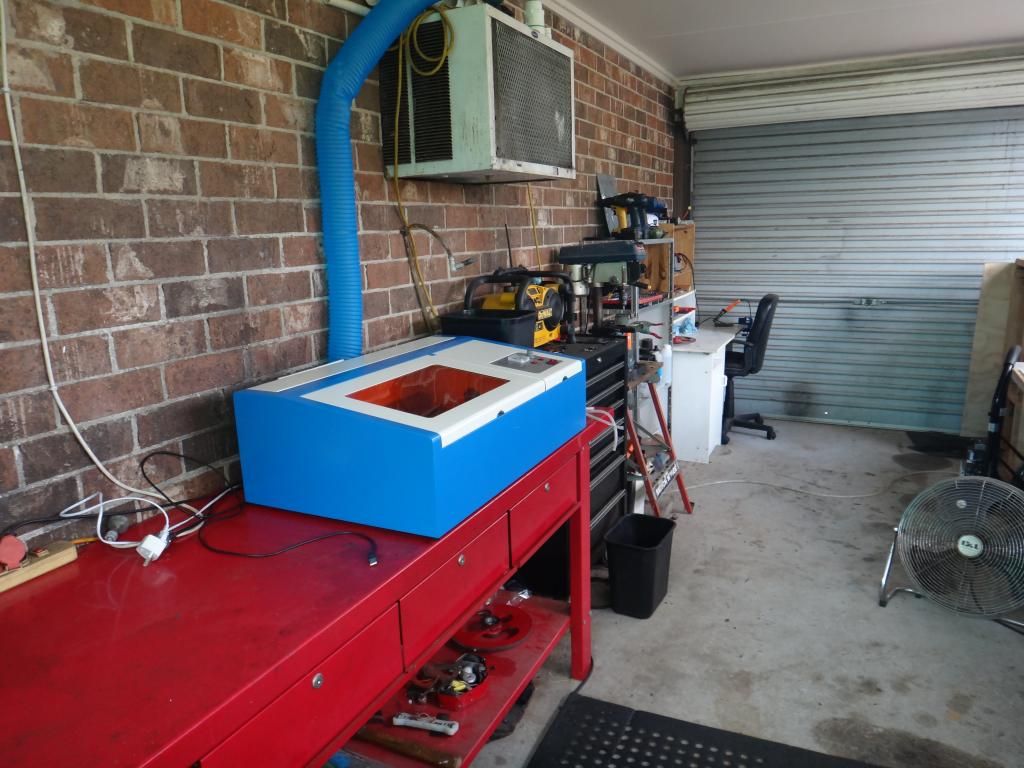
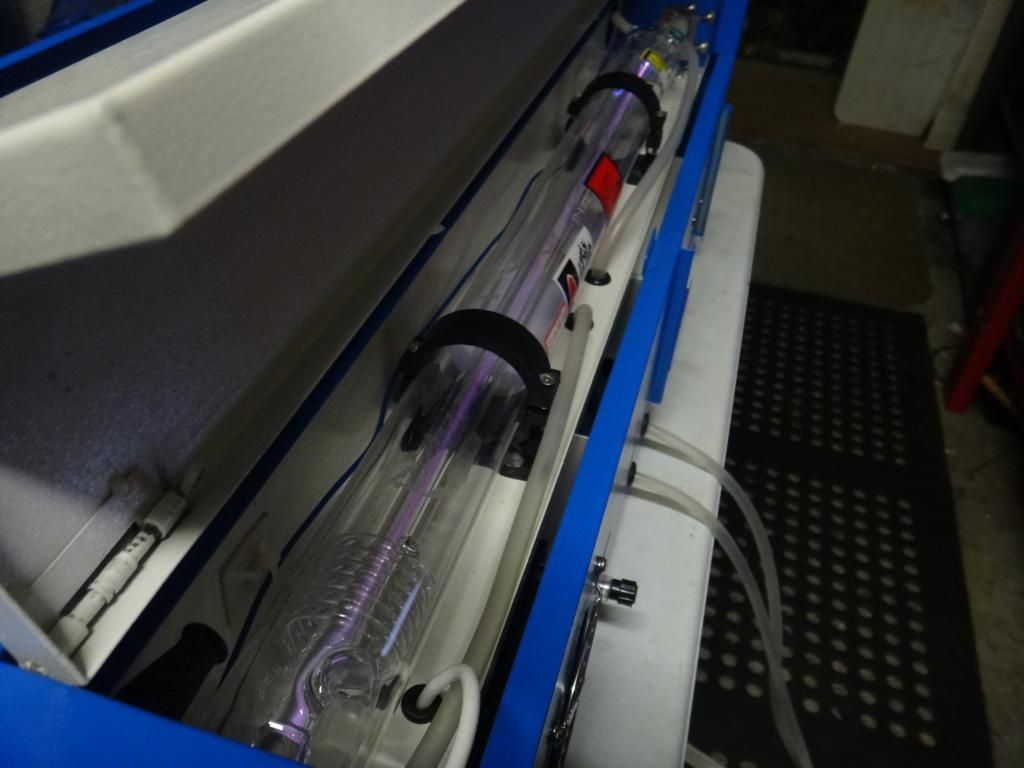
With a sigh of relief - it works! MMmm lasers.

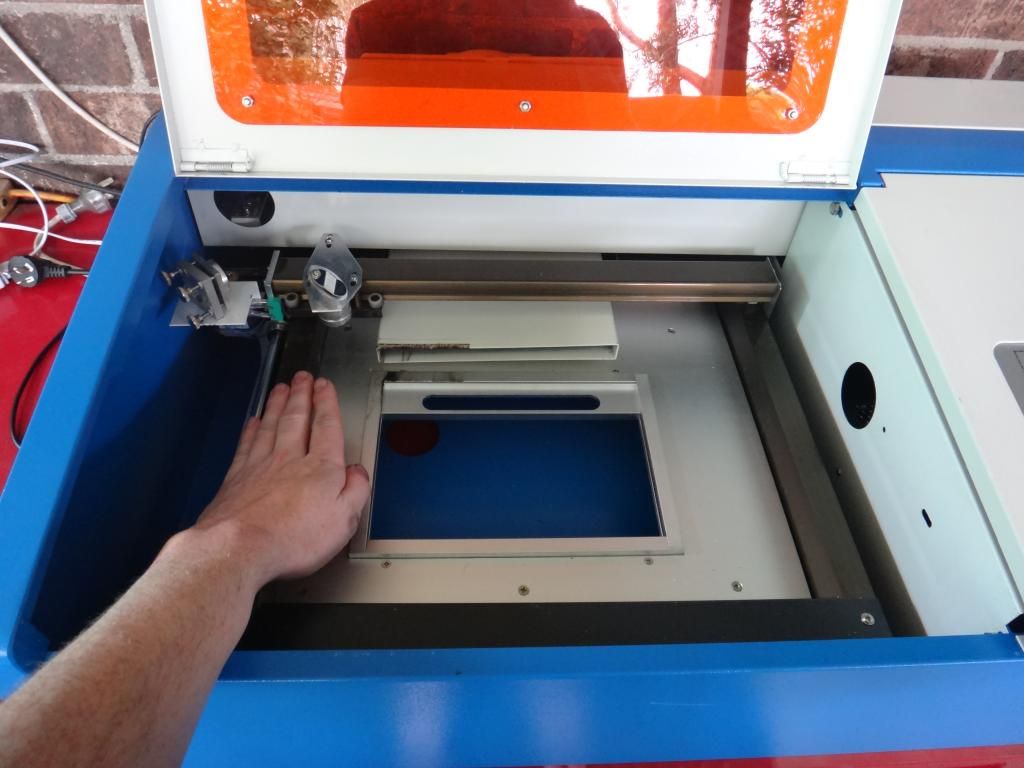
Next up is aligning all the optics. There are 3 mirrors that reflect the beam from the tube into the cutting head that need to be aligned so that with the cutting head in any position, the laser beam always falls on the same point of the lens.
Easiest way is to shove some packing tape over the mirror holders and fire the beam at low power, centering it up. Then you just keep adjusting and doing that till it always falls on the same point regardless of the mirrors position 
And it worked!
Sort of! for about 5 minutes. Until the "moshidraw" control board died in its infamous failure mode. Steppers locked on but totally unresponsive. Apparently the main 40 pin chip just dies if you look at it funny. Oh well, we kinda expected that.
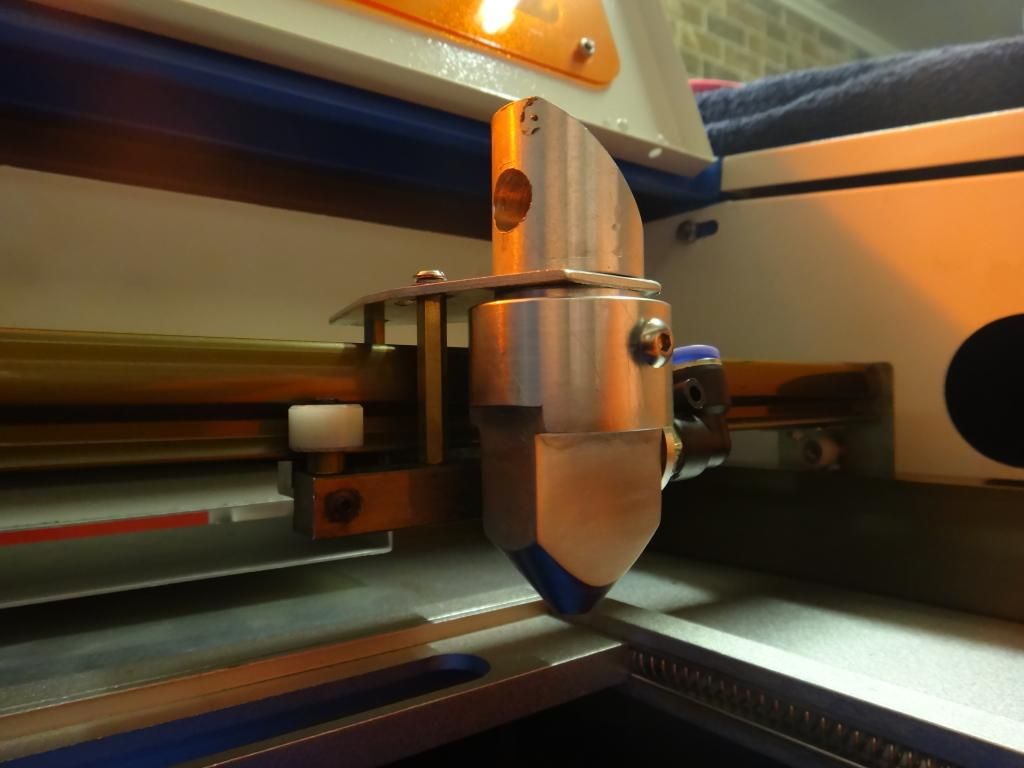
I found a newlydraw board on ebay that was the alternative, reported to be alot better and more reliable even though it used an old as hell centronics connector. for $25 why not! While waiting i cooked up the air nozzle out of aluminium. It stops the vapourised smoke from the material being cut diffusing the laser beam (i think) and stops flame flare ups and such dirtying the lens. An essential add on.
Some twiddling of thumbs for a few days and the newlydraw board came  Look at that cutting edge tech. (the green board) Look at that cutting edge tech. (the green board)
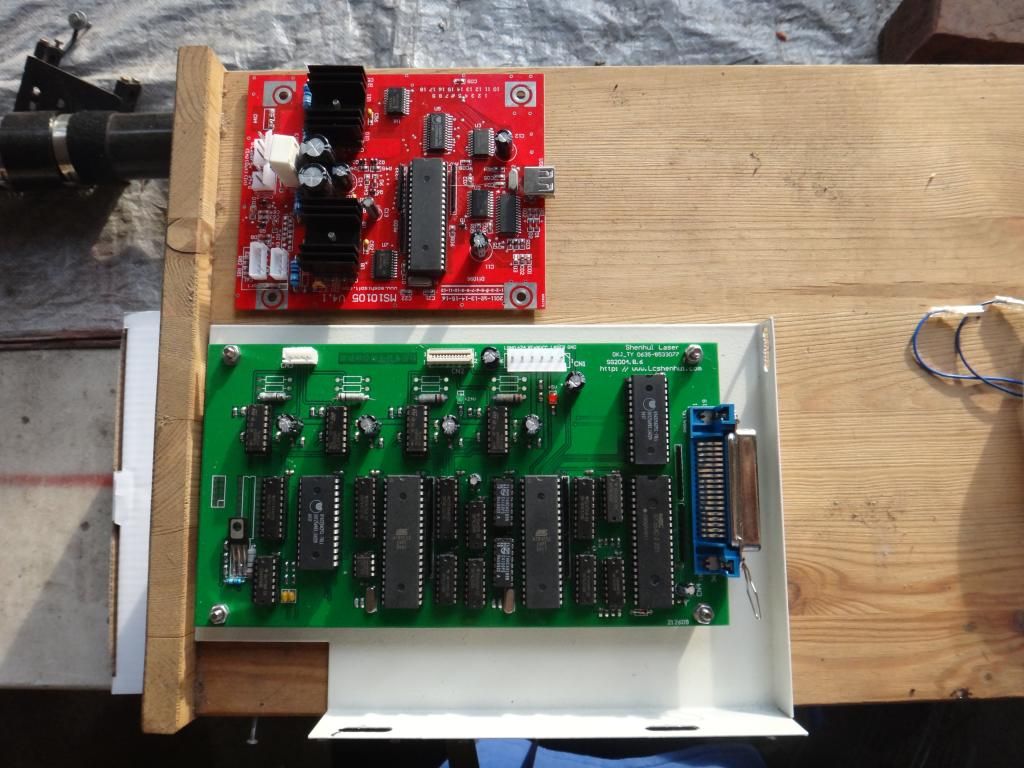
Unfortunately i pretty much got scammed because its a dongle based driver board, but for newly-SEAL- not newlydraw which is COMPLETELY different (and useless, its for engraving stamps) and nowhere in the add did it mention anything about newlyseal. The dongle wont work with newlydraw either so its basically totally useless.
So pretty pissed off about that, will be having words then doing a paypal charge back on that one. rarrgh!
At that point, there was two options. Pack it away till i can afford the DSP laser controller (~$500) or use linuxcnc with some serious hackage to make it at least cut for now. So thats what i did.
Heres the run down of how you go about doing it for anyone interested in the conversion. Theres tons of info out there on getting them to run off mach3 (which is shit imho) but next to nothing on linuxcnc/emc2.
You need 1x 2 axis stepper driver. I'm using the gecko G540. Definitely needs microstepping. the more the better in this application as its basically direct driving the gantry off the stepper motor.
The steppers are both happy running off of 1A current limit at 24v. you could run a little more on the gantry stepper if you want but no reason to really. I'm running at 11,000mm/m max velocity and 300mm/s^s acceleration (ill double check but i think thats it) both could be more with a higher current limit on the steppers but yet again, laser cutting is sllllooowww so theres no point going much faster than this.
Controlling the laser beam is where it gets tricky. my laser psu board is like this guys.
http://www.andyslater.com/laser-cutting/controlling-the-laser-beam.html
And indeed the connections he shows are correct. 5v on the two wires shown activates the laser and 0v is off. I connected them directly to ground and pin 17 on the LPT port itself via a home brew breakout cable which is mapped as spindle on and off in linuxcnc.
When the spindle is commanded on in gcode, pin 17 goes high and this enables the laser. HOWEVER. this works only if your lpt port puts out 5v. Mine, annoyingly, only put out 3.3v So needs something else.
You could do this tons of different ways but i used a 5v BEC and an arduino nano (had it laying around lol) to change the 3.3v to 5v. I'll upload the code and wiring for that in a bit.
If done right you should have a lovely safe and neat wiring scheme as shown XD
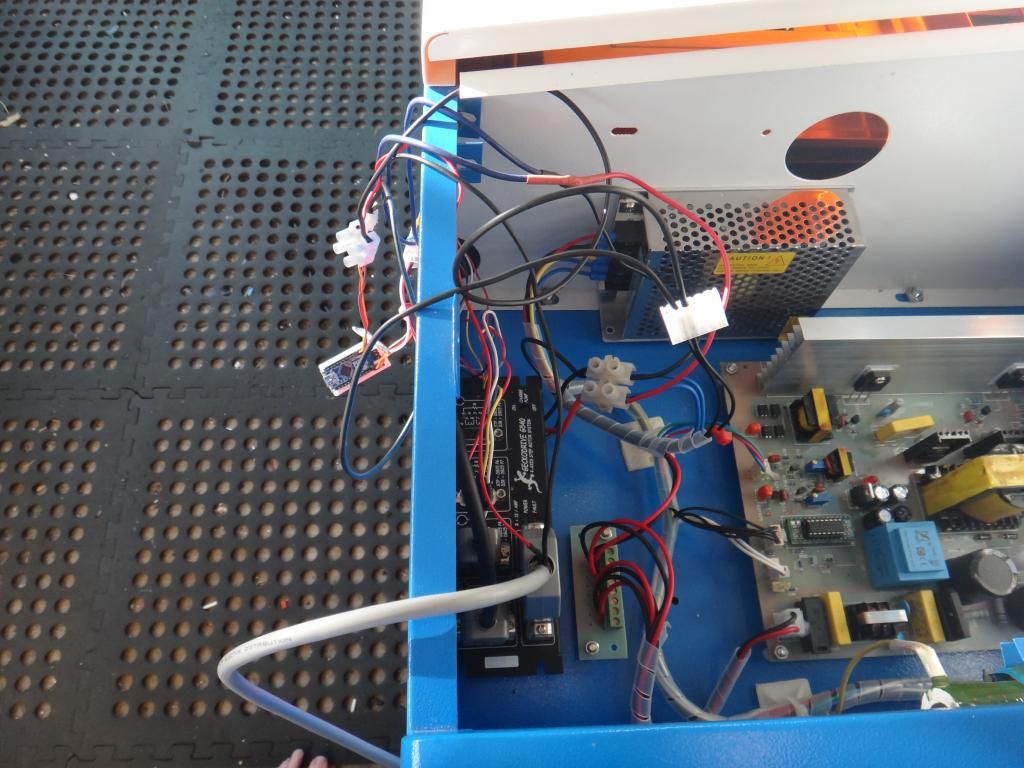
I should probably neaten that up and finalise it soon heh.
Now for Cam, i used cambam because its simple, cheap and easily modded for this purpose. Now, how to set it up. You have to use the start and stop post processor macros that cambam has just for lasers and plasma cutters.
Find the post processor macros tab and add the following: (will add a pics of all this tommorow)
$start=M3
$stop=M5
Then go to system tab>post processors>emc2 and add this to the start cut:
{start}
Dont put anything in the end cut box. I think its a bug in cambam that causes it to put an indefinite M0 pause in the end of the gcode before the laser off command comes, which leaves the head stopped with the laser still on, thats bad, real bad!
Now in the machining options set the spindle to off, the spindle speed to 1 (or whatever, if its 0 the laser wont turn on, another bug in cambam i guess)
stock surface needs to be 0, target depth should be a tiny minus value like -0.001 and clearance plane a tiny positive value ala 0.001. This is because the start and end cut macro is enabled when the z axis goes below and above z=0. Read up on it more in the cambam documentation if you want to know more.
cambam should now fire the laser only on G1 moves and such and turn it off for G0 rapids, which is just what you want.
And with that comes one functional laser cutter! Here you can see the air assist nozzle isnt perfectly centered, so the beam is reflecting off it, i just drilled it out a tad more to sort that -
First test at arbitrary speed and power settings -
Without air assist there is SO - MUCH - FIRE. You have to have it.
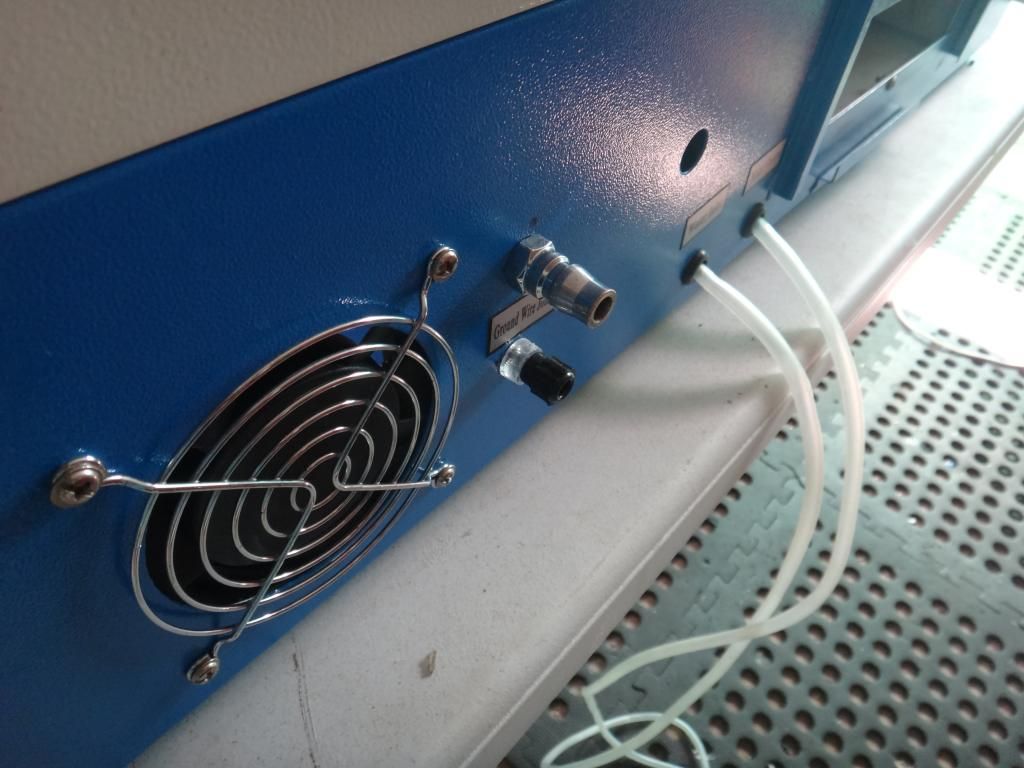
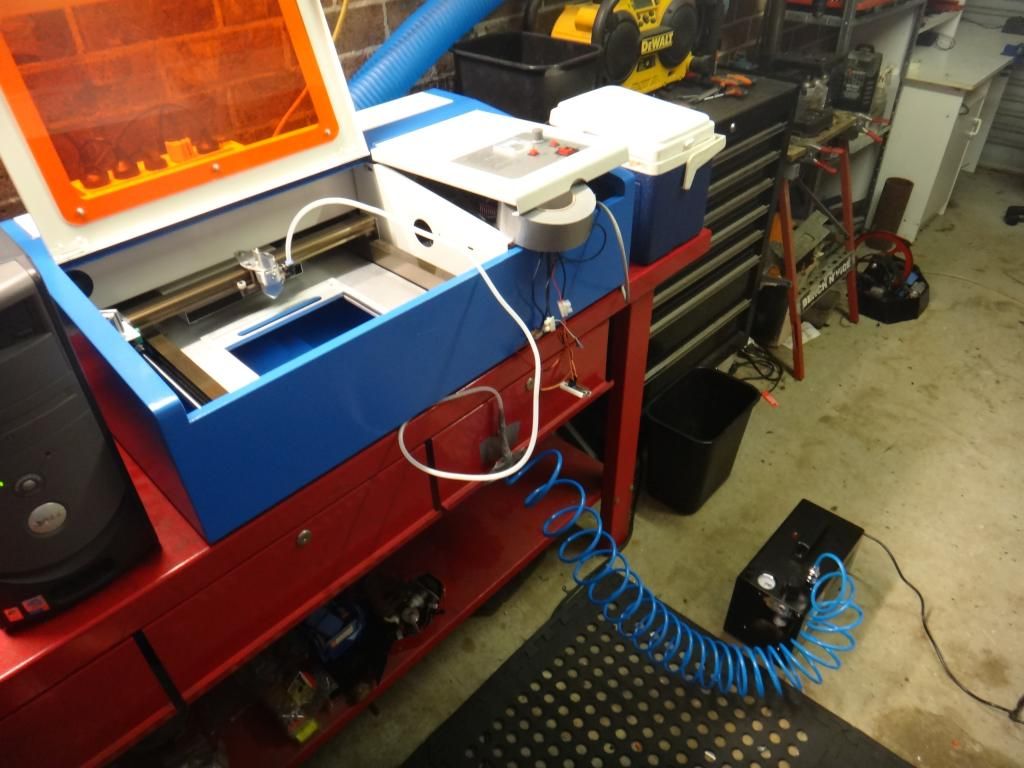
So here it is hooked up haha. Temporary only i assure you... maybe.. but its an airbrush compressor with a piece of tube i found on a surface spray bottle. Take that OH&S!
*weeps quietly* :")
And thats pretty much where i am now. I still have to clean that all up big time, make a proper adjustable height table and set up some proper extraction.
I'll definitely come back to this post and add more screenshots on the linuxcnc and cambam setup though so others that find this post via google and whatever can reference it. Cause getting this thing going has been an uber pain in the ass. But none the less, thats it for now
_________________
www.demon50s.com - Minimoto parts
http://www.youtube.com/user/HyzerGlen - Videoooozzz
|
 Sat Mar 09, 2013 11:18 pm
 |
|
|
|
|
|
|
|
|
|
|
|
|
|
|
|
|
|
|
Spockie-Tech
Site Admin
Joined: 31 May 2004
Posts: 3160
Location: Melbourne, Australia
|
Very Nice Work.. Blueprinting Laser Cutters ! Well done.
you should work out a price to upgrade the cheapy lasers to working status, since I know quite a few people who have sprung for the super-cheapy chinese specials and encountered all the same sorts of troubles you did..
You could probably make quite a biz making them work properly for a package-price. In fact, I'll have to point Jason Cowley (The IBC builder) at this page, he bought one and last I spoke with him a month or two ago still hadnt got it working yet.
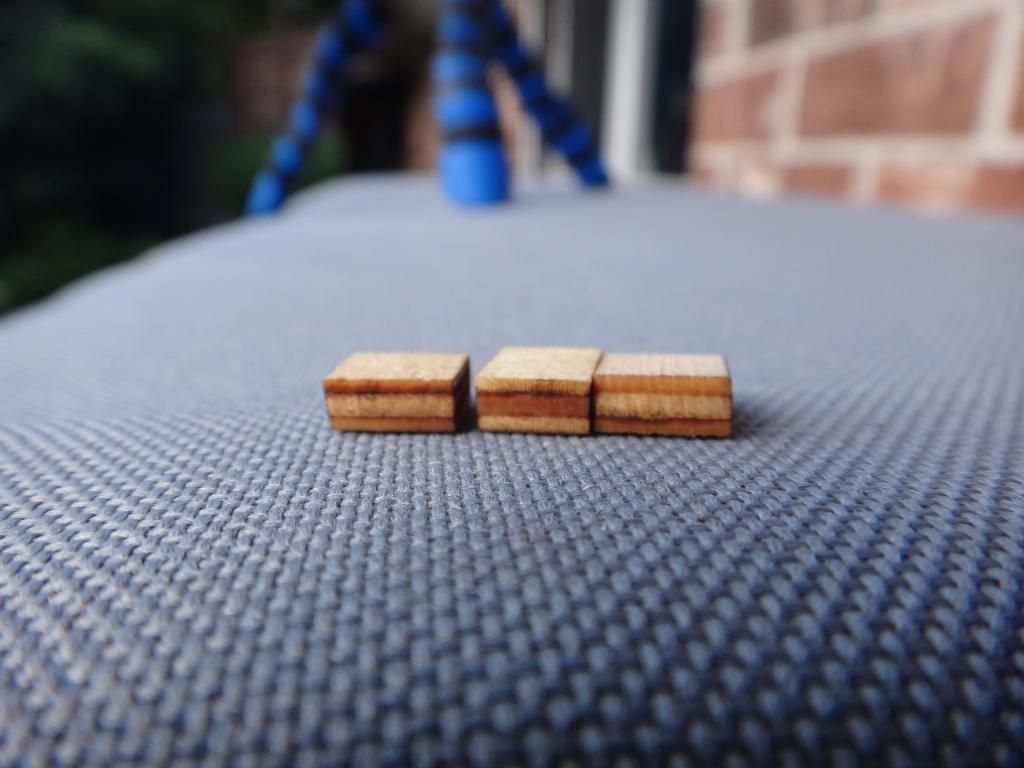
Also, Jaemius (Giant Spider Robot Man) has quite a few videos on his "Laser Blaster" trials much the same way you have, and a few nifty tips like using plywood to cut gears out of so the wood grain is in alternating directions to resist breakage, and coating the wood with thin cyanoacrylate to give it a much stronger wearing surface, fiddling with angles and power/cut speeds to get straight teeth on gears and a few nifty tips like that. Well worth watching his videos on the subject.
If you're still under employed and want some additional income, seriously, work out a few price options for different packages, I know of at least 2 people with non functional chinese laser cutters and probably another 2 who would buy one if they worked properly.
Well Done.
_________________
Great minds discuss ideas. Average minds discuss events. Small minds discuss people
Last edited by Spockie-Tech on Tue Mar 12, 2013 9:27 pm; edited 1 time in total
|
|
Tue Mar 12, 2013 6:15 pm |
|
|
|
|
Glen
Experienced Roboteer
Joined: 16 Jun 2004
Posts: 9481
Location: Where you least expect
|
heh cool, well employement status is sorted for now (woo hoo) but an upgrade or straight up sorted kit could definitely be viable.
Heres a bit more work on it.
Both limit switches are wired up. the mount for the Y axis is a bit crap but i will redo it better whenever i remove the gantry, being able to run the machine to its limits without fear of crashing it is nice, plus setting up jobs is much easier now as Linuxcnc throws up errors if the jobs too big or not placed properly.
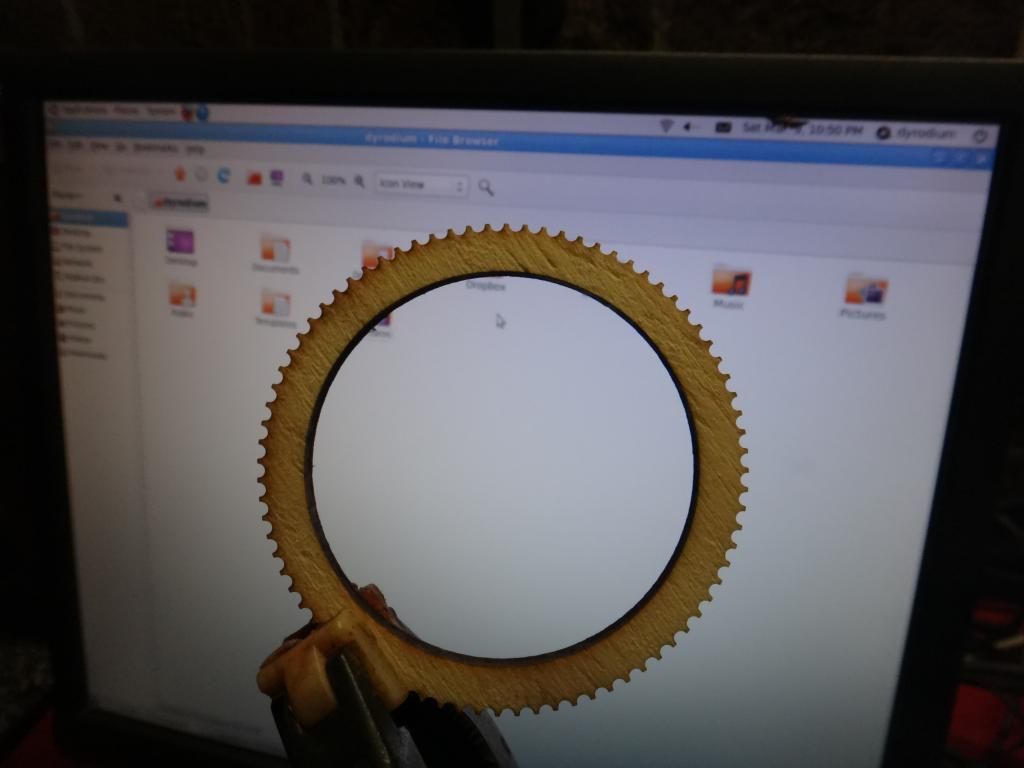
Also managed to make profiles for acrylic and mdf in cambam which automatically accounts for the laser kerf, meaning you can now cut a 3mm circle and have it fit into a 3mm cut hole perfectly. That is a huge improvement over other cheap lasers i've used.
Biggest hurdle so far has been enabling raster engraving. There are three scripts for doing it, and after talking with the writer of one method have that setup now (problems were pretty much with my linux n00bery).
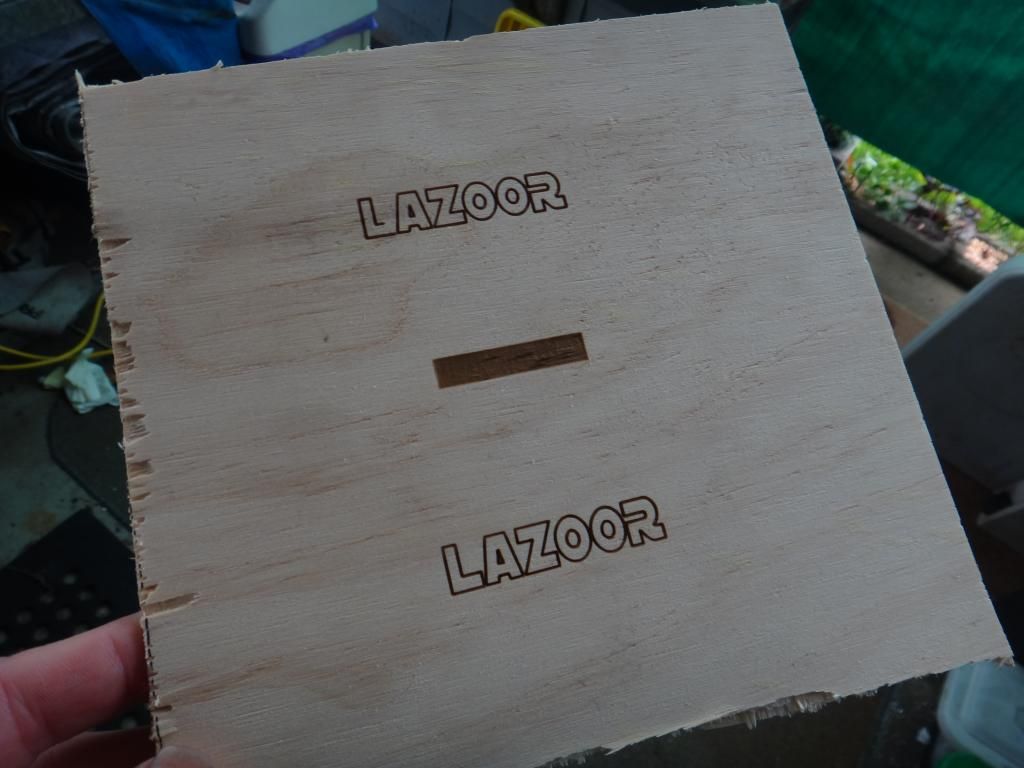
It basically sets the X axis to sweep out a scan pattern while the laser firing is taken care of by an external python script. It's slow going but it works. Hopefully i can speed it up soon. Using it isnt too hard either. Much better than i was expecting really. Here's the results. Need to do some serious setup work to make it look nice but hey, a good start!
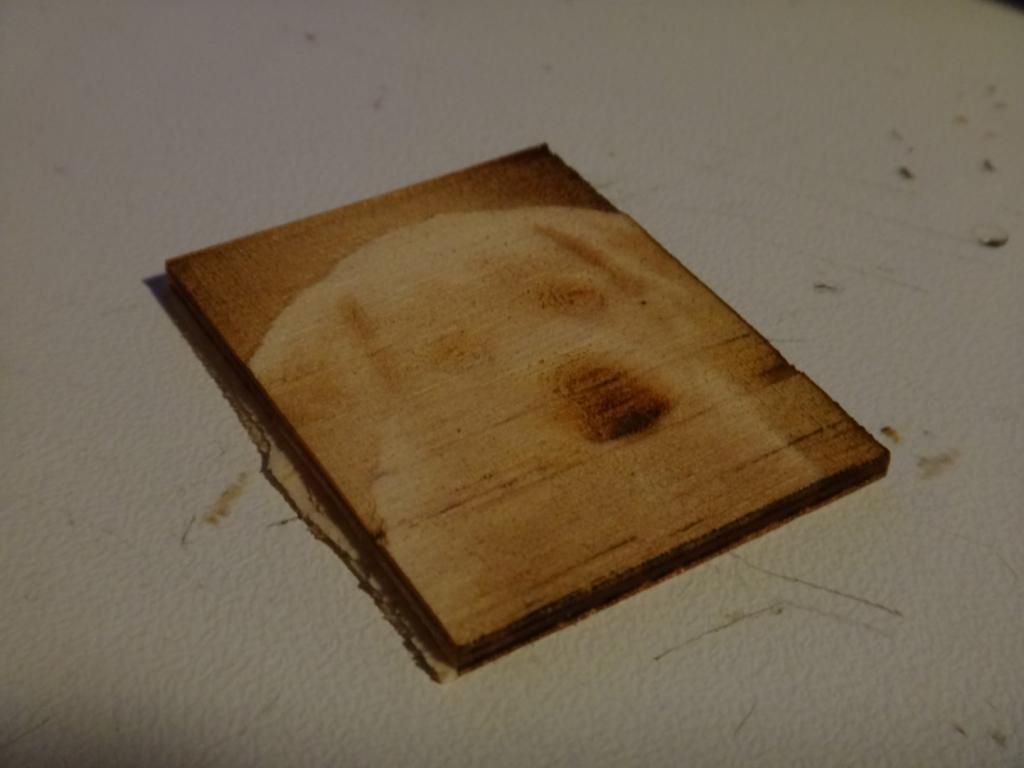
It's this pic - a bit too light to engrave me thinks lol. Plus i had the power all wrong. http://venkaye.files.wordpress.com/2012/06/grayscale_img.jpg
But my favourite in all this has been enabling PPI (pulses per inch) mode for cutting. To put it simply, PPI mode just pulses the laser on and off several times per mm of movement.
This solves a problem with the laser being constantly on and the machine accelerating and deccelerating around corners, causing the laser to burn the material much more reducing accuracy.
PPI decouples the amount of laser power applied in relation to the speed of the laser cutting head so that isnt an issue.
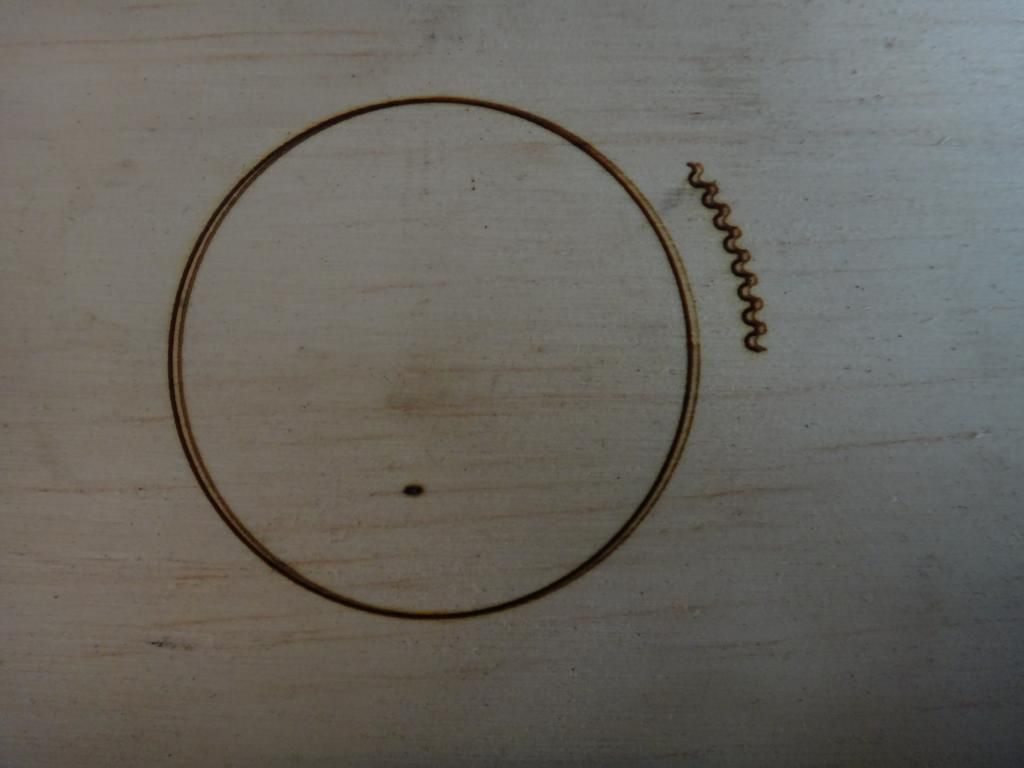
Consider this, where PPI (actually mm in my case) is increased while the feed speed is the same. -

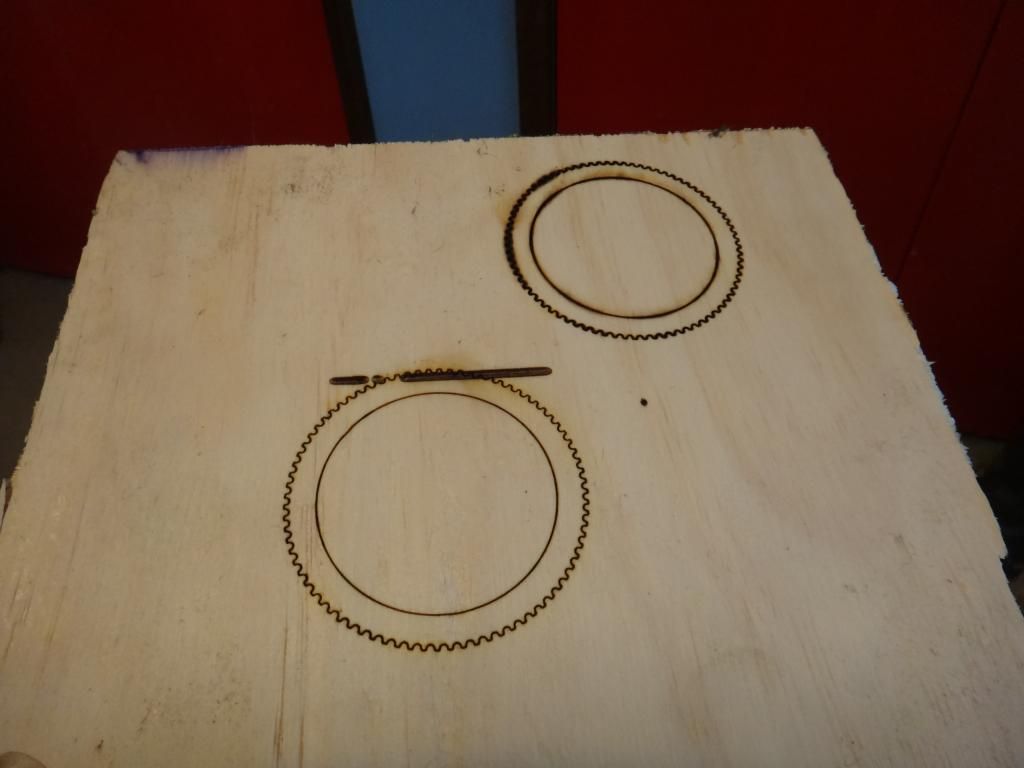
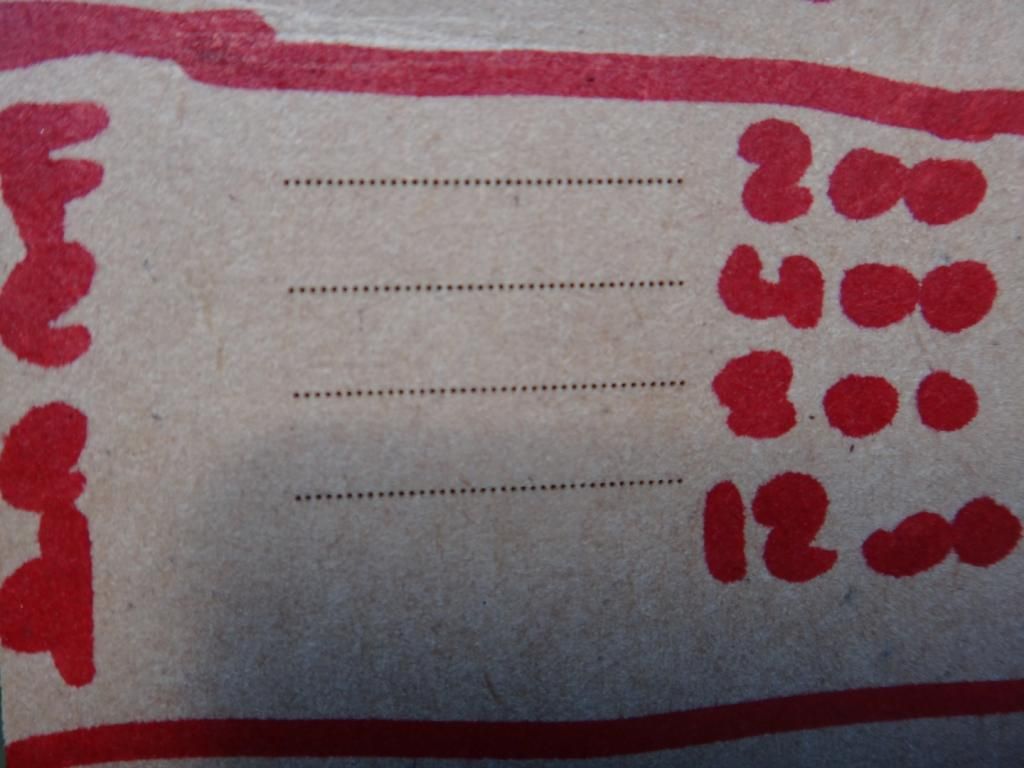
And here the PPI is the same but the feed speed is changed quite dramatically. the top is 200mm/m and the bottom is 1200mm/m, thats a huge change. So you can see that the amount of cutting power the laser gives out is no longer dependant on the speed of the feed itself.
Another cool thing with PPI is it essentially gives you more peak power. As the laser tube strikes the power shoots quickly over its rated max before settling down to its set power. PPI fires the laser in intervals that keep it in this high power zone.
Setting the ppi right, where the dots are only slightly overlapping leaves you with much much less burning on the piece, tons less smoke and smell too. It's really win win and more win.

Here's the page it was all derived from - http://www.buildlog.net/blog/2011/12/getting-more-power-and-cutting-accuracy-out-of-your-home-built-laser-system/
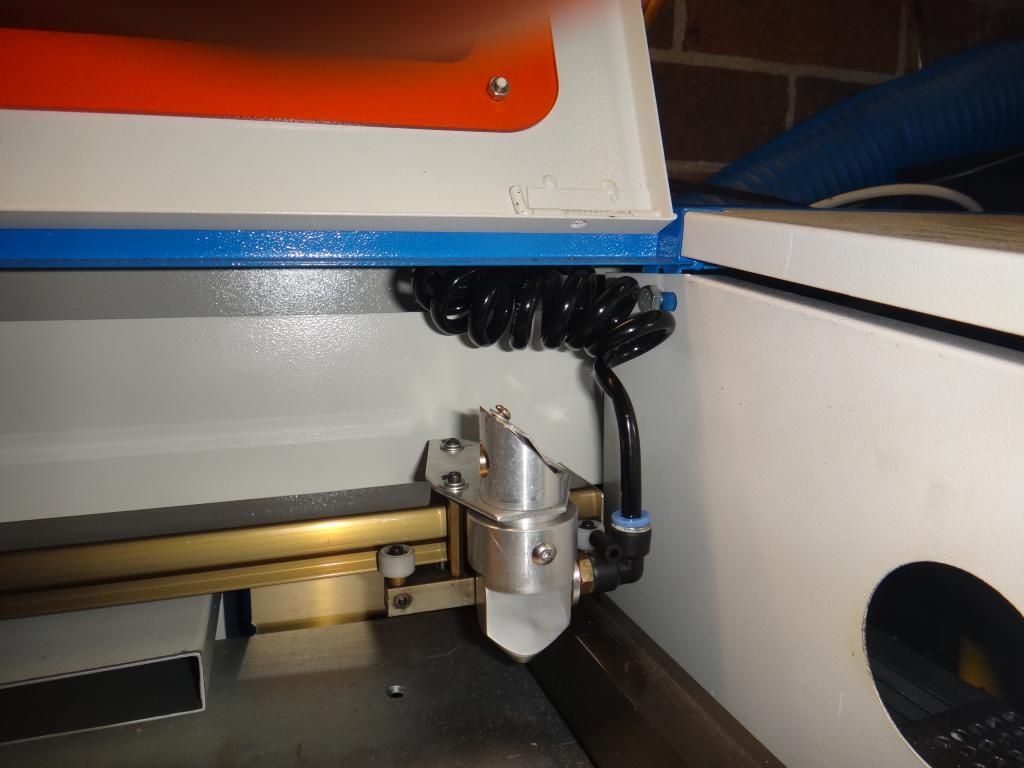
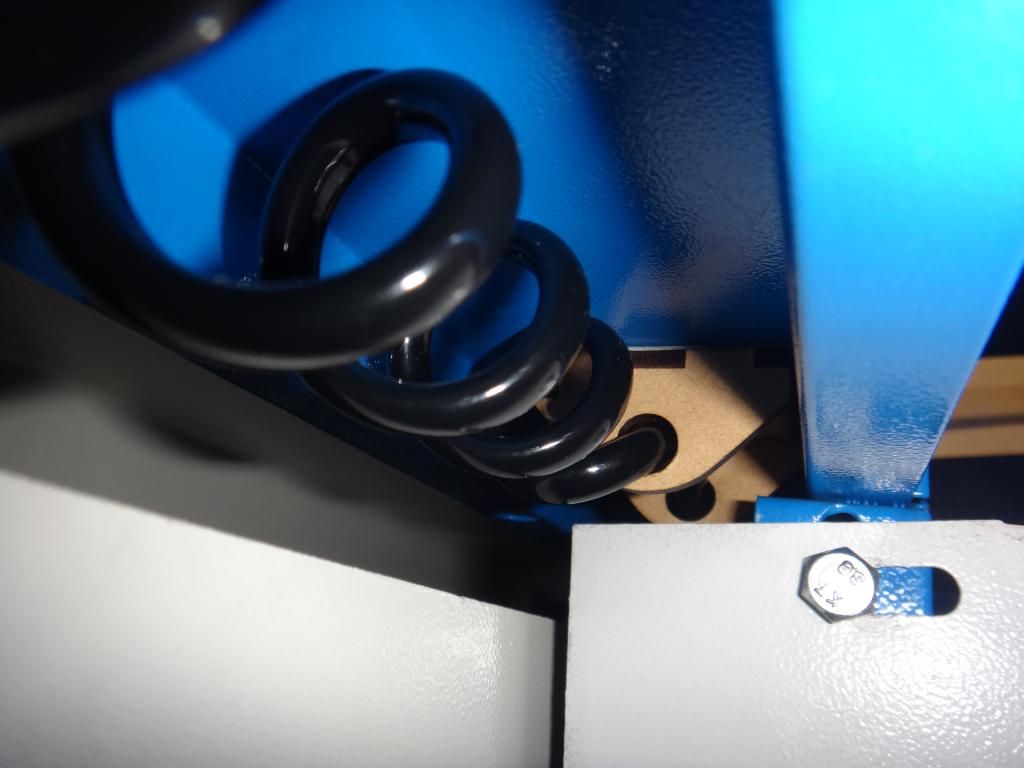
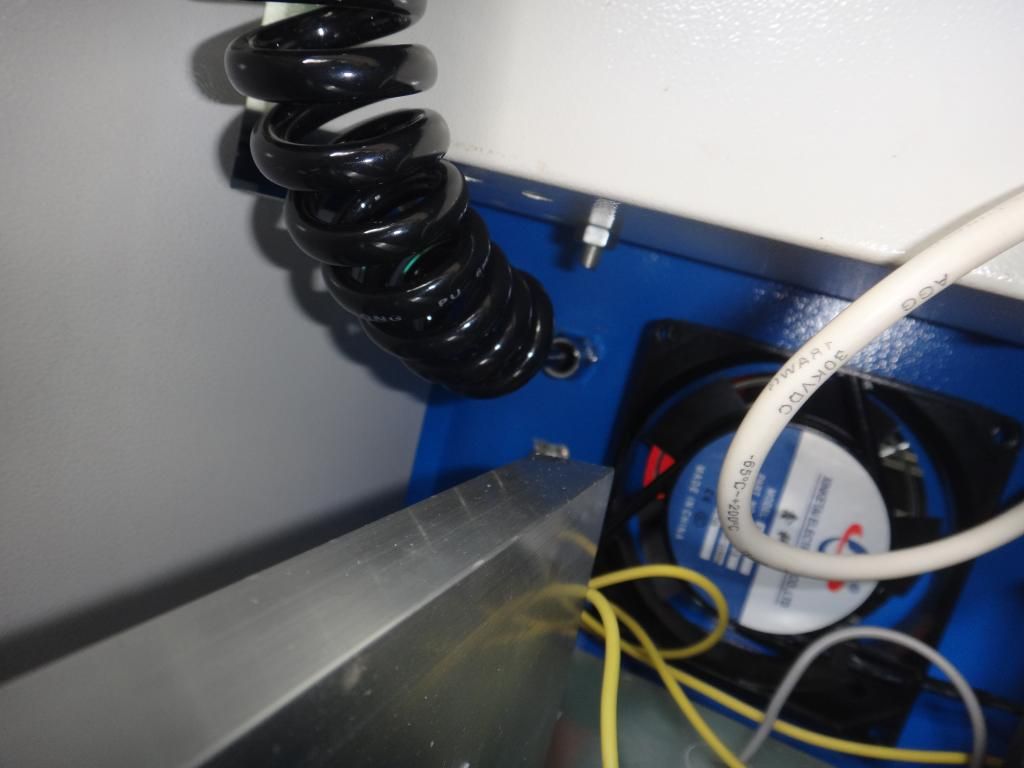
So yeah now i have to install the proper air assist hose that i recieved today and i can ramp up the max acceleration and speed of the steppers (the current air hose tugs on the cutting head quite a bit), look at speeding up the rastering process + dial that in.
Next big thing will be enabling overall power control of the laser via software, it's still done via a pot on the machine and looks like i'll need to dig up some kind of DAC to drive it. Hopefully not too much of an issue
_________________
www.demon50s.com - Minimoto parts
http://www.youtube.com/user/HyzerGlen - Videoooozzz
|
|
Tue Mar 19, 2013 8:21 pm |
|
|
|
|
|
|
|
|
|

 RoboWars Australia Forum Index
-> General Chatter
RoboWars Australia Forum Index
-> General Chatter