Joined: 27 Jun 2004
Posts: 1105
Location: SunshineCoast
Eleanor - Team Ellis - QLD
Robot name : Eleanor
Team name : Team Ellis
Location: Sunshinecoast, QLD
Robot weight(Class): Feather weight
Type of Robot: Wedge/Rammer
Drive system: Team Delta Dewalt setups
Type/size of wheels: 4 X 3X7/8 Colsons
Self-righter: Pneumatic
Speed/motor control: Victors 883
Power: A123
Armour: 4mm steel
Type of radio controller: Spectrum
General comments: Wedge/Rammer one end wedge and the other for ramming. Pneumatic self-righter.
Unusual characteristics: I wanted to build something I hadn't seen before. The pneumatic self-righter fires into the ground, not using any arms or leavers. It also has a power LED in the ram tip for display.
This is my first combat robot I will be competing with and plan to have it completed in about 4 weeks. _________________ Imagination is more important than knowledge. Knowledge is limited. Imagination encircles the world.
Albert Einstein.
Last edited by assassin on Sun Oct 08, 2006 9:18 am; edited 1 time in total
Sun Oct 01, 2006 12:15 pm
assassin
Joined: 27 Jun 2004
Posts: 1105
Location: SunshineCoast
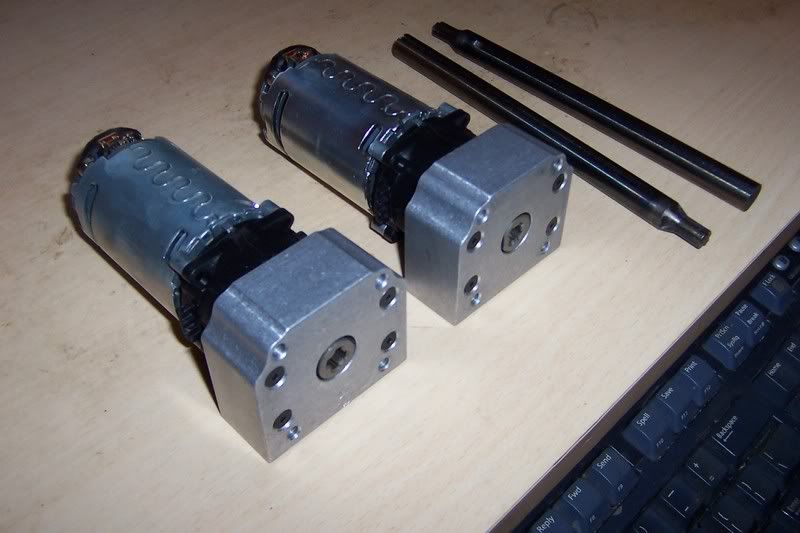
Two thumbs up and a gold star to Team Delta. After placing an order with them weeks ago the dewalt motors were out of stock(thanx Nick ). After being patient, they arrived in stock. Dan halved the shipping cost and sent them out Friday....they arrived today! Thanx again guys.
I hoping the power of the Dewalts should make a dull wedge more exciting and fun _________________ Imagination is more important than knowledge. Knowledge is limited. Imagination encircles the world.
Albert Einstein.
Joined: 27 Jun 2004
Posts: 1105
Location: SunshineCoast
Those puppies put my order on backorder, and in turn saved me money on postage _________________ Imagination is more important than knowledge. Knowledge is limited. Imagination encircles the world.
Albert Einstein.
Joined: 27 Jun 2004
Posts: 1105
Location: SunshineCoast
A little bit more cad work done...Both bearing blocks have changed. The large ones will have rubber between it and the shell and will be the limit of travel from shock loads. The small blocks will be made from ali and are small in size too create clearance for shell mounts. Height adjustable shock mounting from shell to base plate has also been sorted.
Ooooh This "boring" wedge is stating to look quite interesting there young Trent. Do you think you could incorporate some adjustible ground clearance into the bot, something you could adjust and fine tune before a battle to ensure you don't beach yourself on the arena floor like soo many other wedges. _________________ https://www.halfdonethings.com/
Mon Oct 09, 2006 6:25 am
assassin
Joined: 27 Jun 2004
Posts: 1105
Location: SunshineCoast
quote:Originally posted by assassin:
Height adjustable shock mounting from shell to base plate has also been sorted.
About 10mm of adjustment....Also the front and rear skid pads(not Cadded yet) will be adjustable from nil to whatever needed. _________________ Imagination is more important than knowledge. Knowledge is limited. Imagination encircles the world.
Albert Einstein.
Mon Oct 09, 2006 7:40 am
Knightrous Site Admin
Joined: 15 Jun 2004
Posts: 8511
Location: NSW
I was thinking if you made a hinge for the base plate to attach to the shell with, you could just undo the two bolts at the back and just open the bot up like a brief case and work on it
Going with the adjustible caster idea we discussed? Or another idea? 10mm GC is fairly normal, but maybe you might want to just make it so you have it optional up to 20mm. I had 10mm GC on Annihilation and lost a meele because I got beached on some strapnel
Joined: 27 Jun 2004
Posts: 1105
Location: SunshineCoast
Wedge for simplicity, its my first combat robot!
Thanx for tips and ideas, it all helps. Its a new adjuster and I'll put some pics up later to show, it also could have infinite length adjustment easily.
Brief case hinge idea would would remove shock mounting unless you shock mounted the whole hinge. @ the moment all I need do is remove four hairpin cotter-pins and the base separates from the shell, not only will it be easy to work on but it would be drivable too
Yay, now I'm still waiting for timing pulleys . Don't ask about them grrr.
I'm off to cutout the shell mounts now, with the grinder..... _________________ Imagination is more important than knowledge. Knowledge is limited. Imagination encircles the world.
Albert Einstein.
Mon Oct 09, 2006 5:23 pm
Philip Experienced Roboteer
Joined: 18 Jun 2004
Posts: 3842
Location: Queensland near Brisbane
You are going very well, Trent. I'm up to about my tenth bot and they still look like crap. _________________ So even the rain that falls isn't actually going to fill our dams and our river systems
Mon Oct 09, 2006 5:28 pm
assassin
Joined: 27 Jun 2004
Posts: 1105
Location: SunshineCoast
Mounts are done, within 0.25 of mm again. Those 1mm cutting disks are great, thanx for the tip Glen!
I'll will make a jig for welding them to the shell tomorrow, and maybe even weld them as well.
Thanx Phil, I reckon your new bot looks like a cross between Marauder and Hellcat. So I'm guessing you can't go wrong! _________________ Imagination is more important than knowledge. Knowledge is limited. Imagination encircles the world.
Albert Einstein.
Mon Oct 09, 2006 7:09 pm
Knightrous Site Admin
Joined: 15 Jun 2004
Posts: 8511
Location: NSW
Thems bits are lookin too fancy there young Trent, throw them away and do them properly! If they don't look ghetto, your gonna cop it _________________ https://www.halfdonethings.com/
Mon Oct 09, 2006 9:20 pm
Glen Experienced Roboteer
Joined: 16 Jun 2004
Posts: 9481
Location: Where you least expect
hahah spiffy.
is there a weld nut or something welded into the tabs? looks like you need to get a spanner into the body to do it up in the cad lol
cant help but think it would be better to shave off all the excess base plate and make flanges on those inner vertical parts to bolt the shell onto. those tabs look awefully cantilevered and flimsy. the ones i had on kang holding the base on snapped off as soon as someone hit the thing (it was aluminium but none the less heh).
can you jack the back of the chassis up and down the adjust the clearance?
You cannot post new topics in this forum You cannot reply to topics in this forum You cannot edit your posts in this forum You cannot delete your posts in this forum You cannot vote in polls in this forum

 RoboWars Australia Forum Index
-> Builders Reports
RoboWars Australia Forum Index
-> Builders Reports