Having felt the bore with my own hands, I don't think it even needs a hone. _________________ https://www.halfdonethings.com/
Tue May 19, 2015 9:51 am
Glen Experienced Roboteer
Joined: 16 Jun 2004
Posts: 9481
Location: Where you least expect
Ahoy robo peoples, More progress.
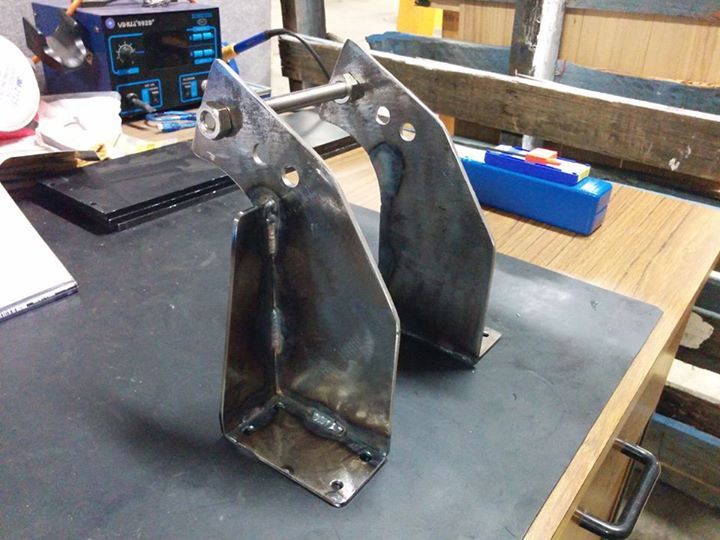
Drilled the mounting holes for the ram. 10x m6 ought to hold it. God help us all if not. Of course, it would be about 10mm too tall to fit in my mill. Gah. Had to start a collection of chopped down end mills and drill bits just for it.
Drilled the mounting holes in the weapon frame. There's 3 axle holes so i can experiment with leverage ratios. Each one bolts down with 4x m6.
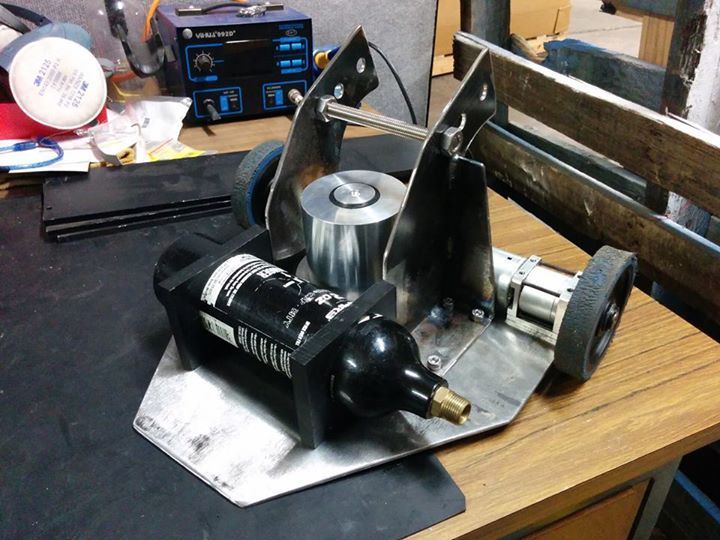
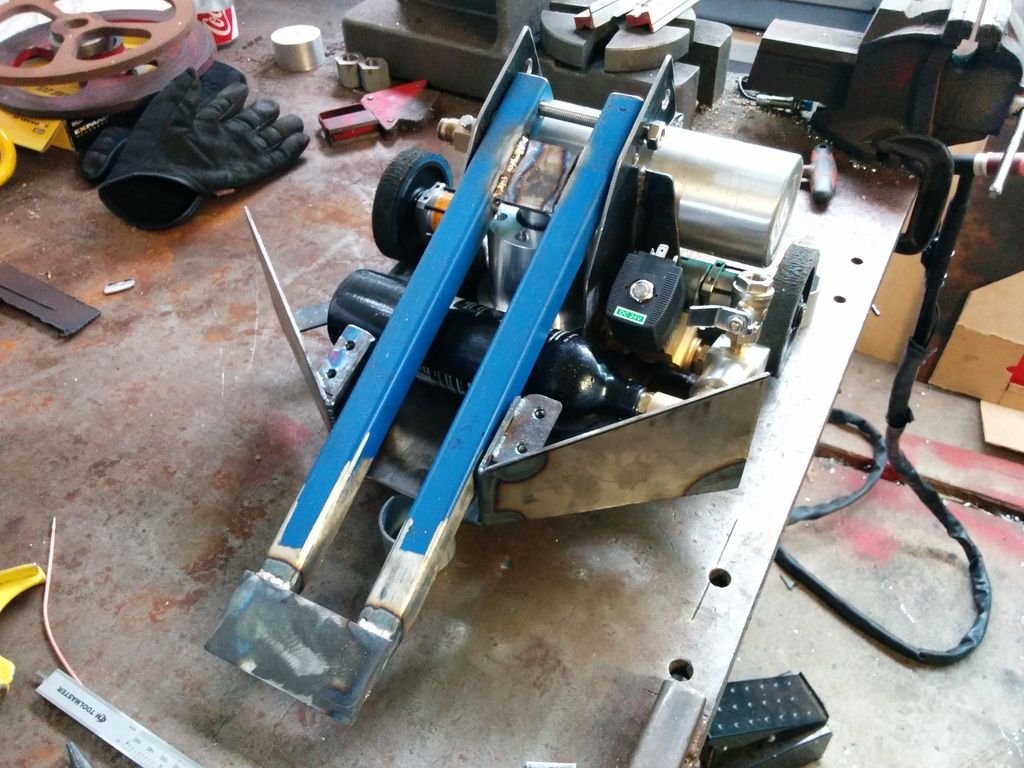
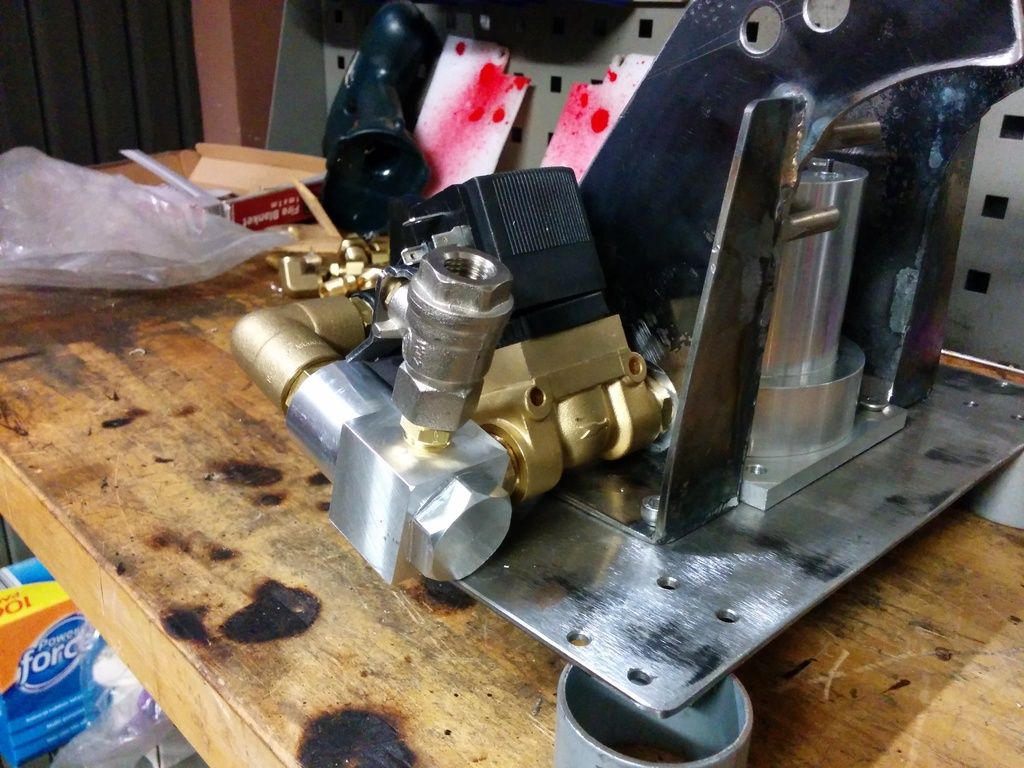
Buffer mounted and everything else in place.
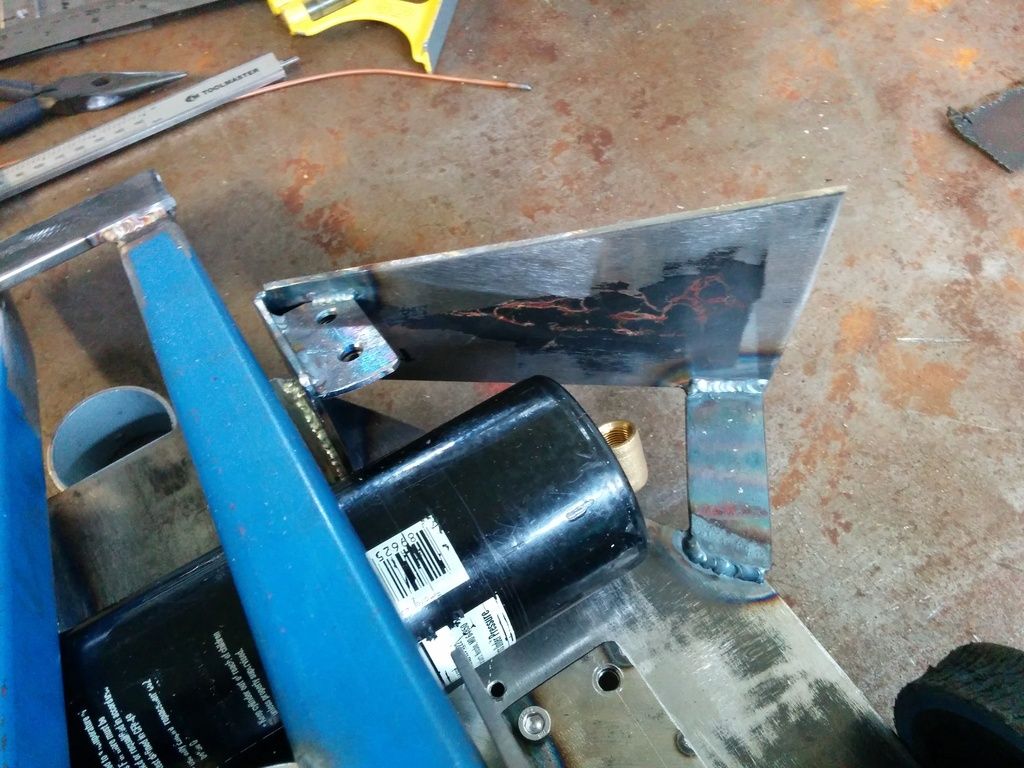
Was uhming and aahing for a few days working out the main tank mount. There isn't much space to get in and unscrew it, but turns out the final result was really simple. 8mm hardened rod welded to the side with some tube slipped over it, then a huge clamp around the bottle keeps it there.
Can also see the 35mm hole i had to bore in the bottom for the valve to poke through. That came out particularly nice all things considered. Really should have put that in before welding it together!
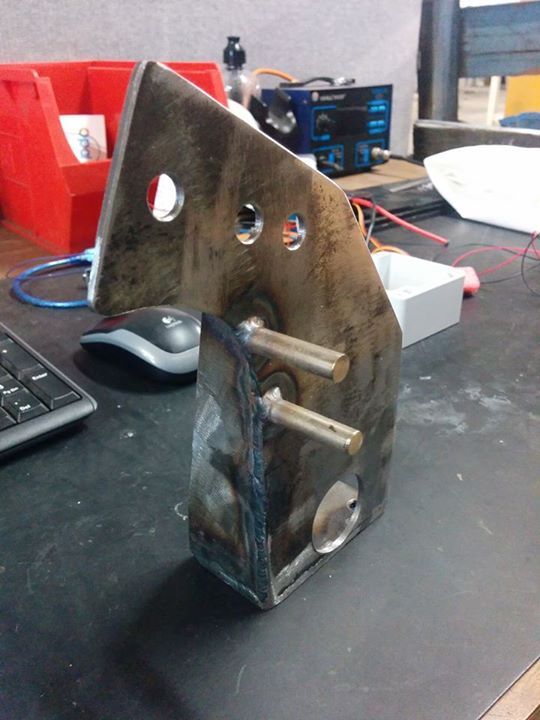
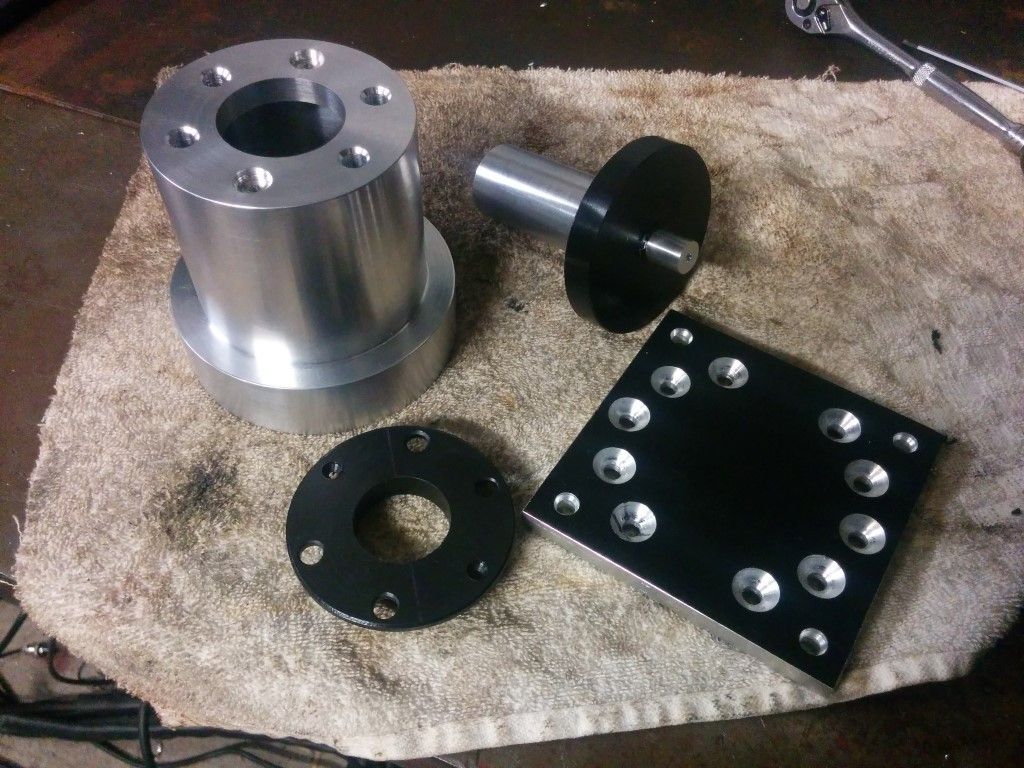
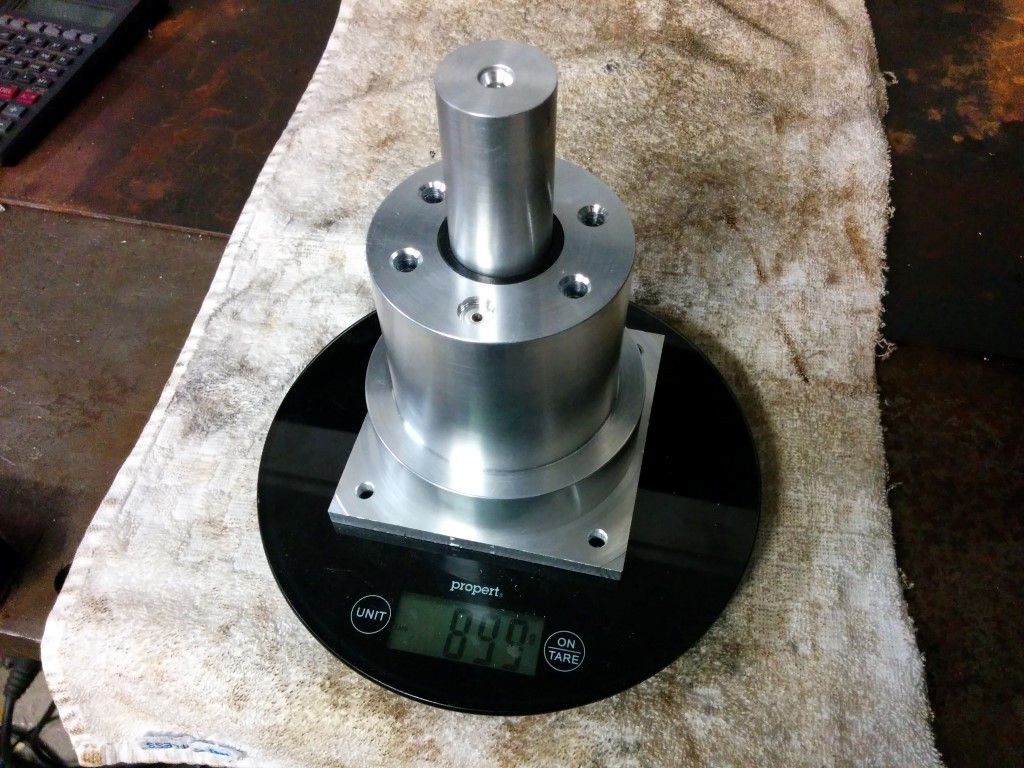
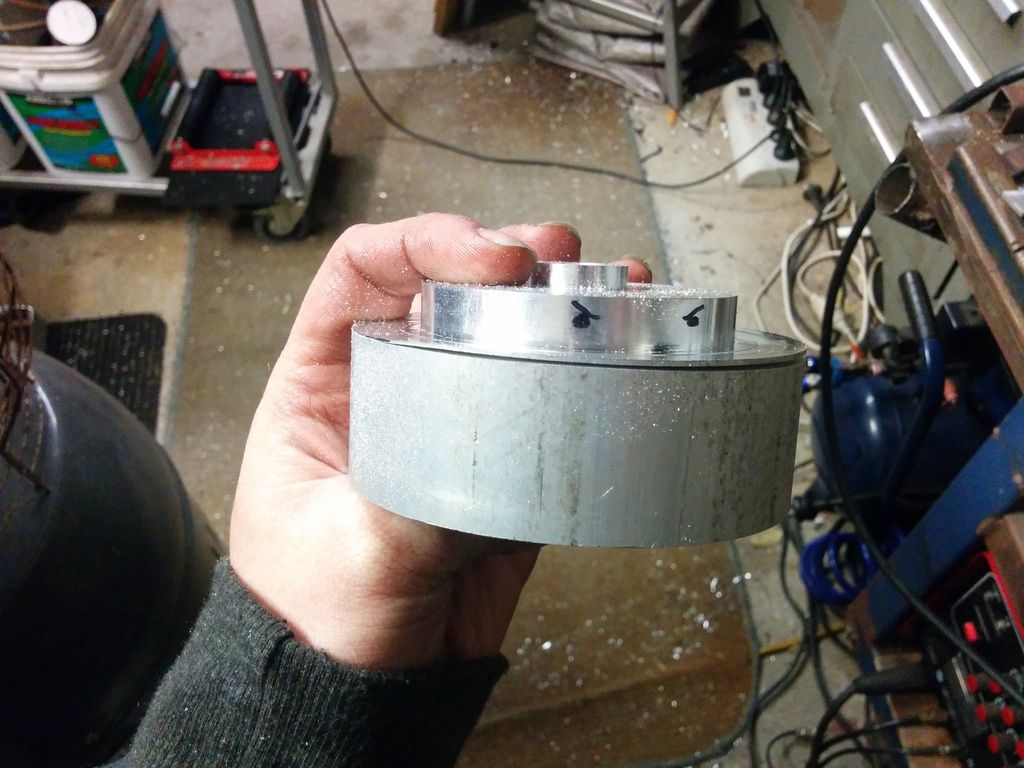
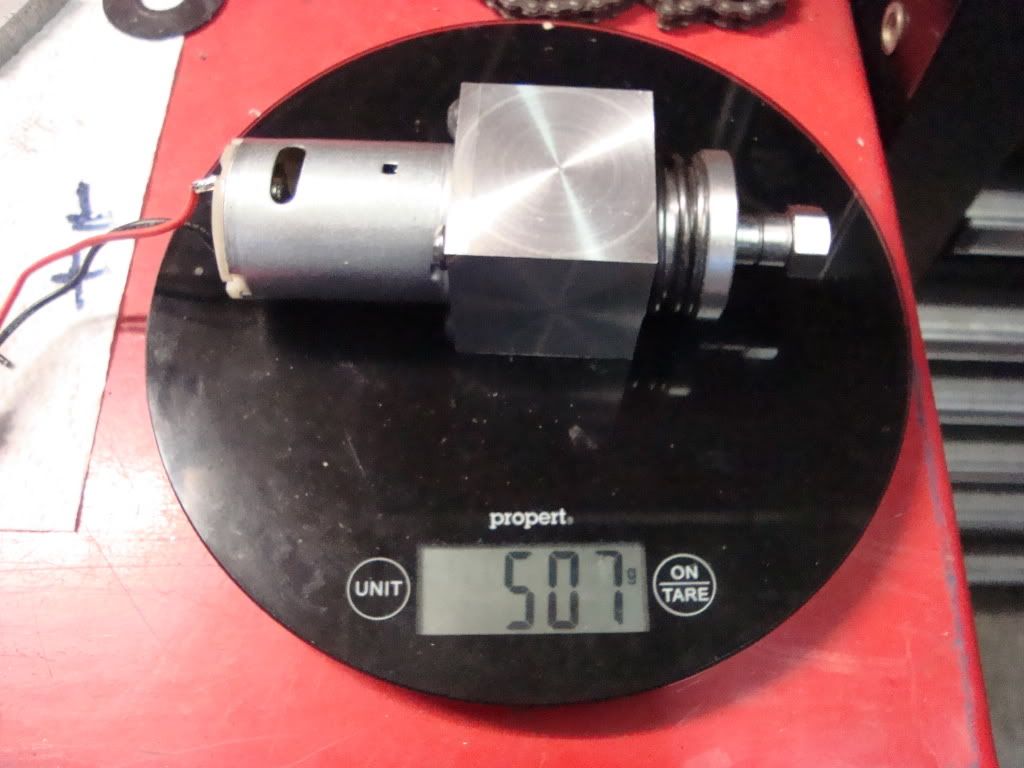
Back to das ram. Finished all the holes tonight and it fits together nicely indeed. The piston ring presses on against a big shoulder on the rod itself, then a circlip should hopefully prevent it from launching out.
Pretty damn good for a 70mm bore ram i reckon. The counterbored holes in the top are for the m3 bolts + nuts that keep the top plastic bushing in place. I didn't like the press fit option.
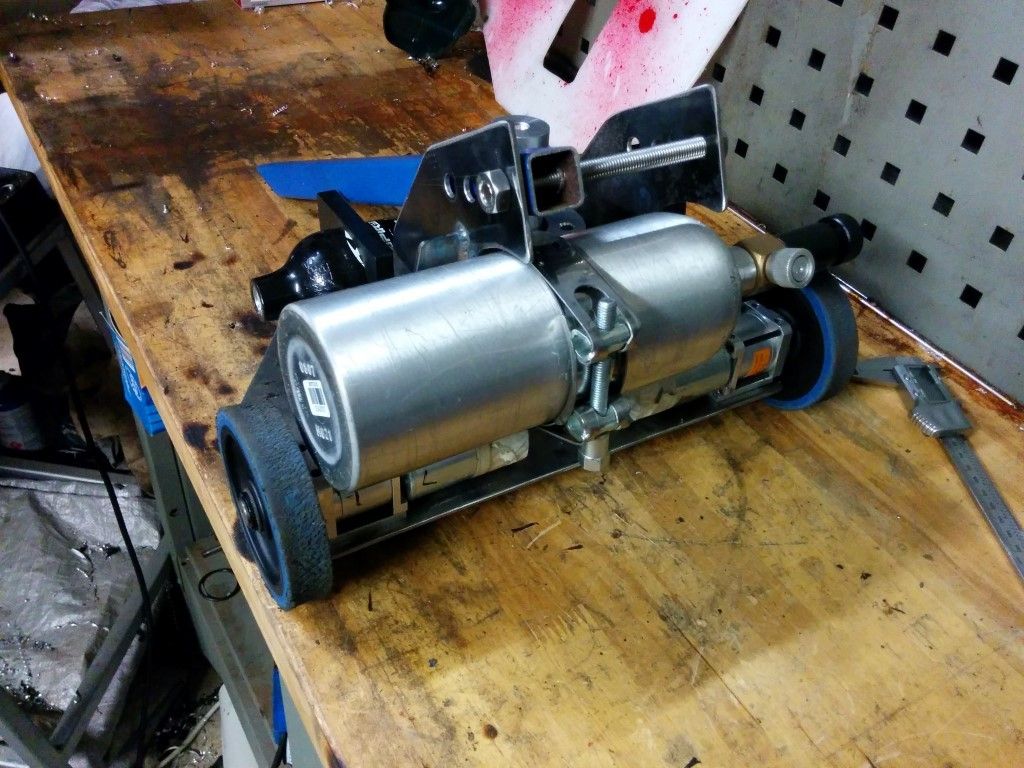
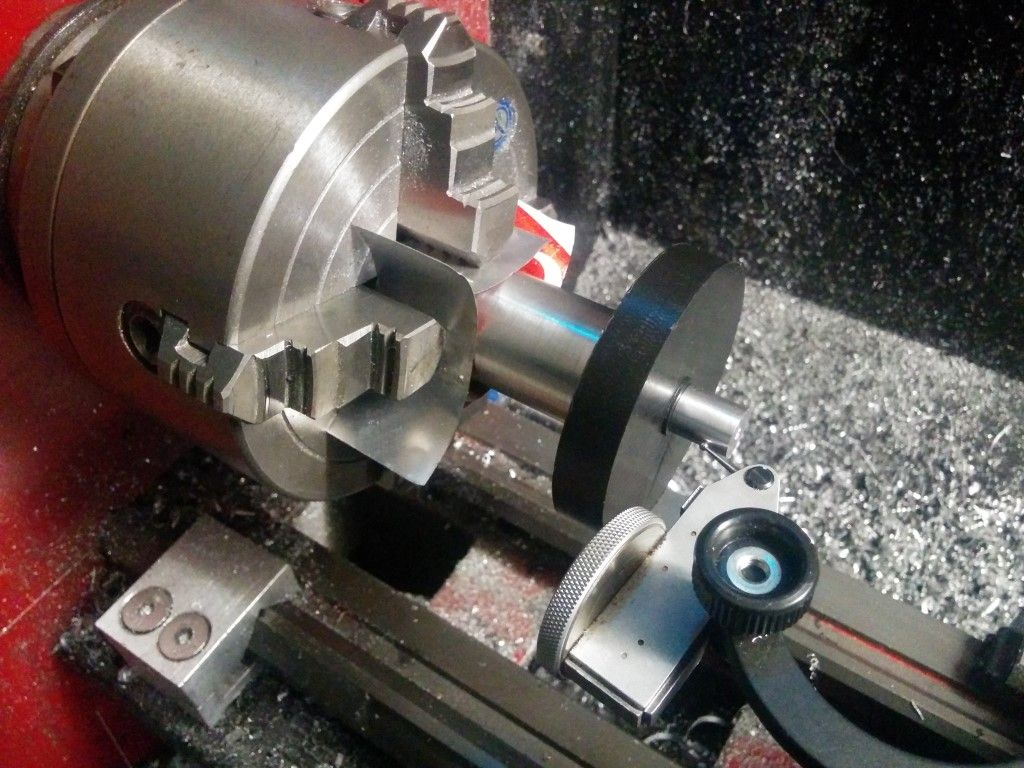
Ended up clocking the ram body and rod back up so i could turn the piston ring + top bushing square. Seems to operate very smooth even without lubrication. Happy days!
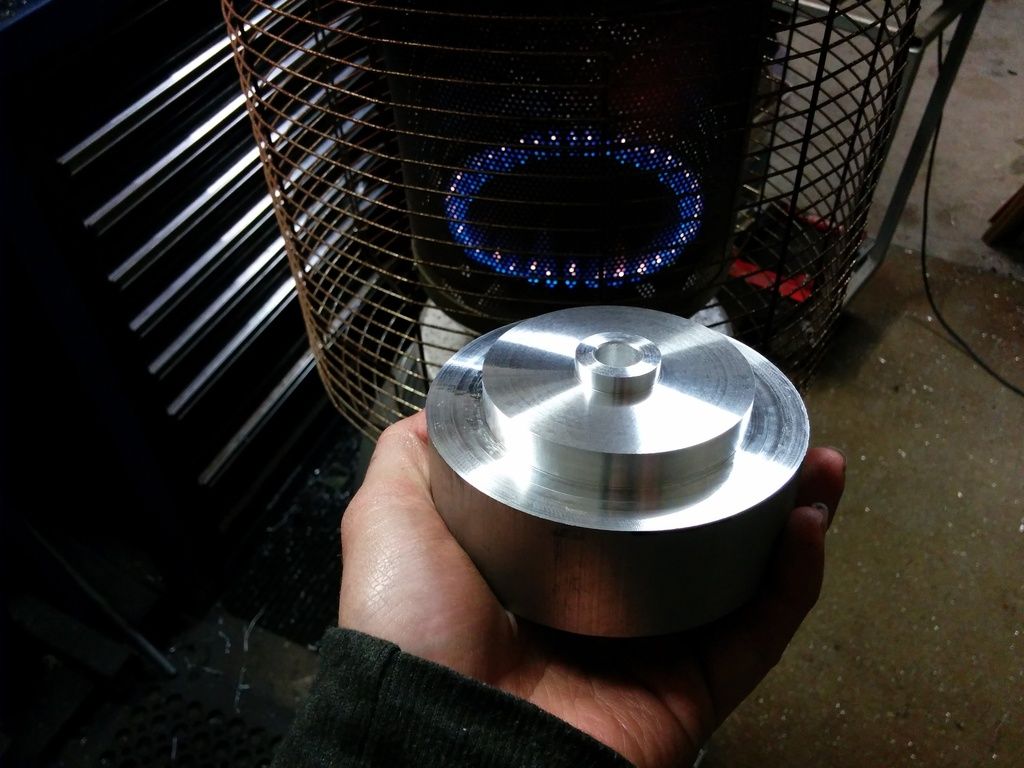
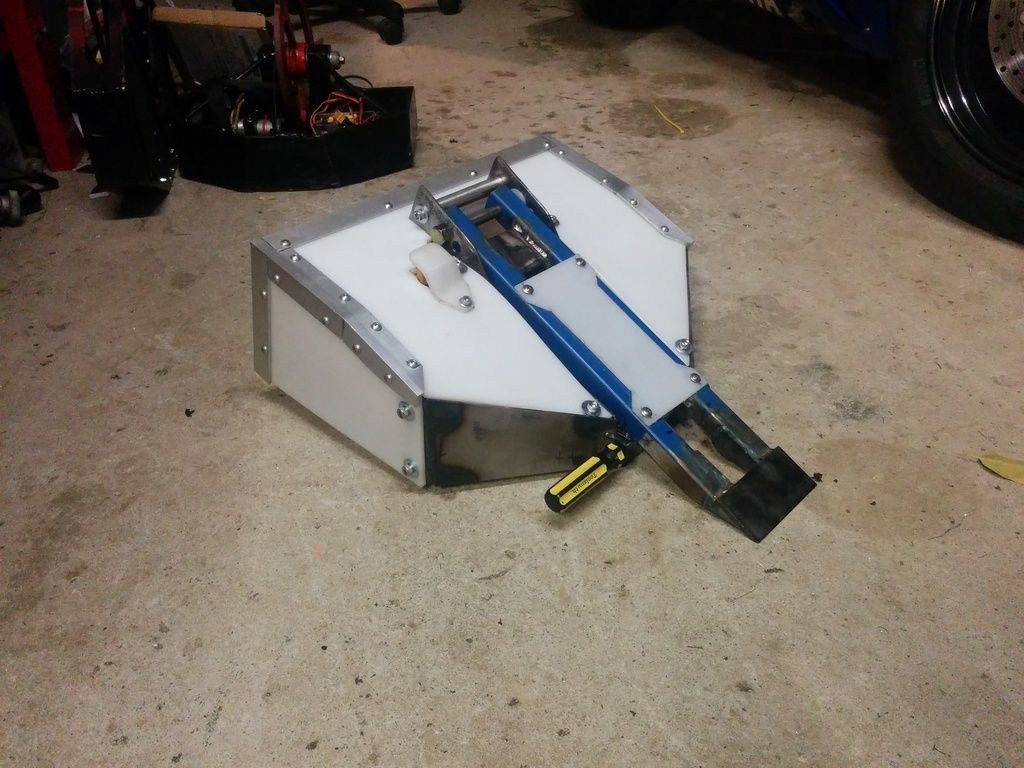
Side view of the arm mockup. Going to have two 25x25x1.6 tubes with a 5mm steel plate on the front. Not sure what to use as a "pusher plate" above the ram. Will either machine up a big round of aluminium that bolts on or weld a section of large diameter pipe in.
Next up, working out how to drill the paintball bottle out to 1/2 BSP and getting the fittings + making the gas manifold. Best make a start on the flipping arm too!
Also best think of a nice way to do the bungees and actually work out how to do the hdpe armour. Oh lawd not enough time! _________________ www.demon50s.com - Minimoto parts
http://www.youtube.com/user/HyzerGlen - Videoooozzz
Thu May 21, 2015 11:10 pm
Eventorizon-GB
Joined: 15 Nov 2013
Posts: 111
Location: Ripon, United Kingdom
Damn... that looks so good! Compact and powerful!
Thu May 21, 2015 11:49 pm
maddox
Joined: 21 Dec 2006
Posts: 786
Location: Belgium
I recognize that kind of layout.
Thu May 21, 2015 11:52 pm
miles&Jules Experienced Roboteer
Joined: 19 May 2010
Posts: 3973
Location: ipswich QLD
Joined: 12 Jan 2008
Posts: 135
Location: Irvine, Scotland
Looking good! It's actually got a bit of a Chaos 1 vibe about it in that last picture, which means its next incarnation will go on to be a double champion with numerous OOTAs _________________ Jamie
RogueTwo Robots
www.rogue-two-robots.vze.com
With great power, comes great reliability
Fri May 22, 2015 2:20 am
Jaemus Experienced Roboteer
Joined: 01 Apr 2009
Posts: 2674
Location: NSW
Good stuff, keen to see some ceiling hits _________________ <Patrician|Away> what does your robot do, sam
<bovril> it collects data about the surrounding environment, then discards it and drives into walls
Sun May 24, 2015 11:10 pm
Glen Experienced Roboteer
Joined: 16 Jun 2004
Posts: 9481
Location: Where you least expect
is it only 2 days till the event? [internal screaming]
Quick picture spam before bed
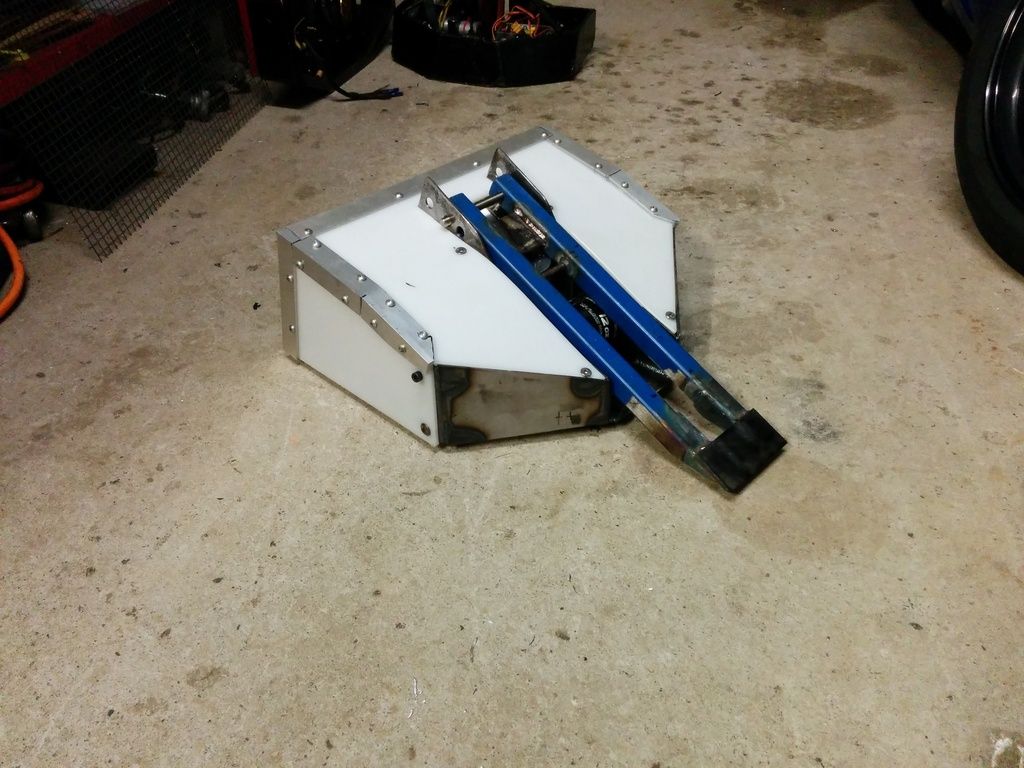
Decided instead of going full hunchback and doing HDPE everywhere, that the front would be a big crumple zone of steel.
Forgive the frightening welds! I only have 3.2mm filler at home which is much too large but you can see the gap between the body and the armour. Considering there wont be any grinding and stuff from what i can tell at the event leaving lots of wiggle room for damage seems a good idea.
Managed to get that all out of one cutting wheel too. Efficient!
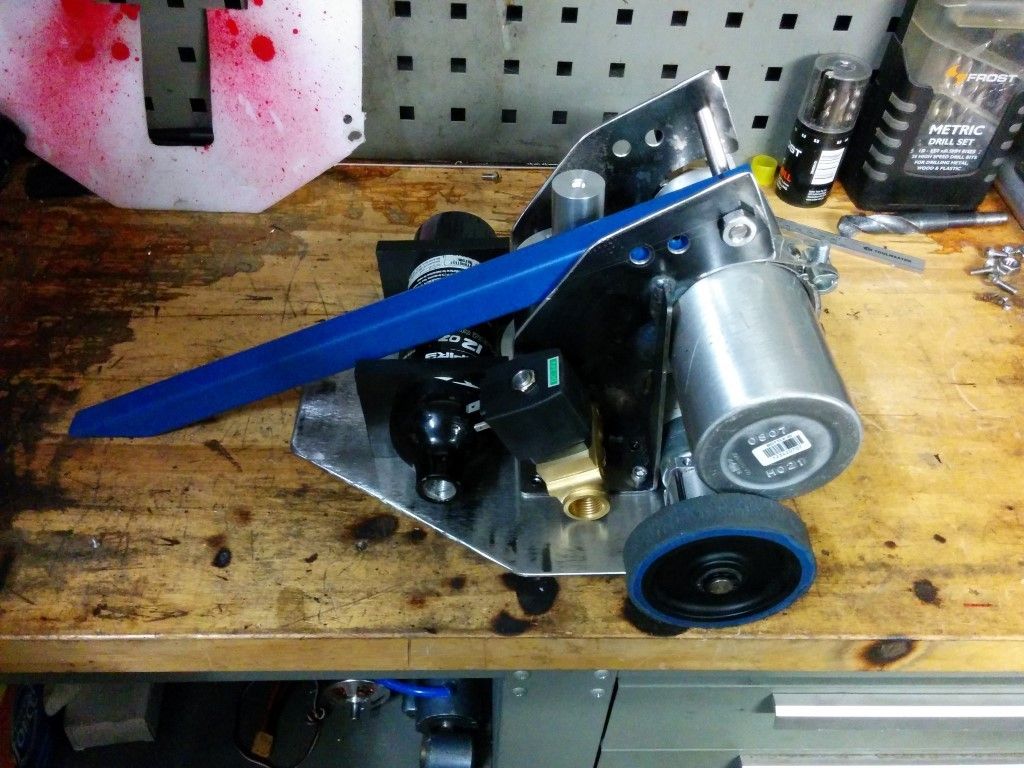
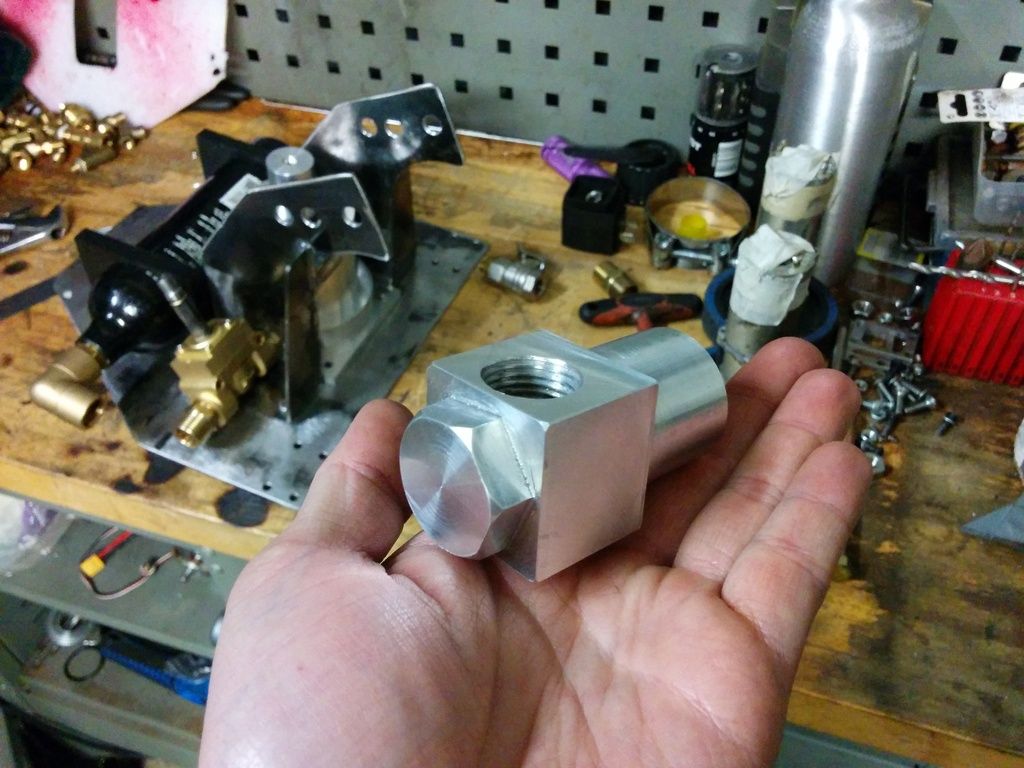
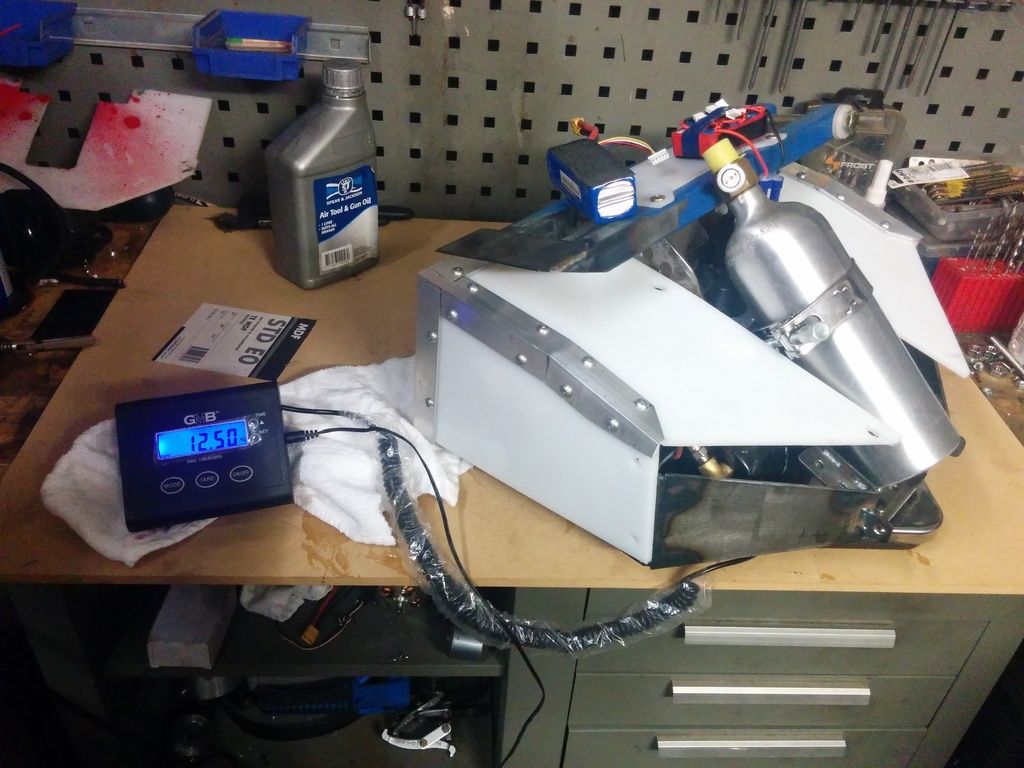
Got the gas works piped up. Made my own 7075 manifold, complete with nut machined into the end to tighten it up
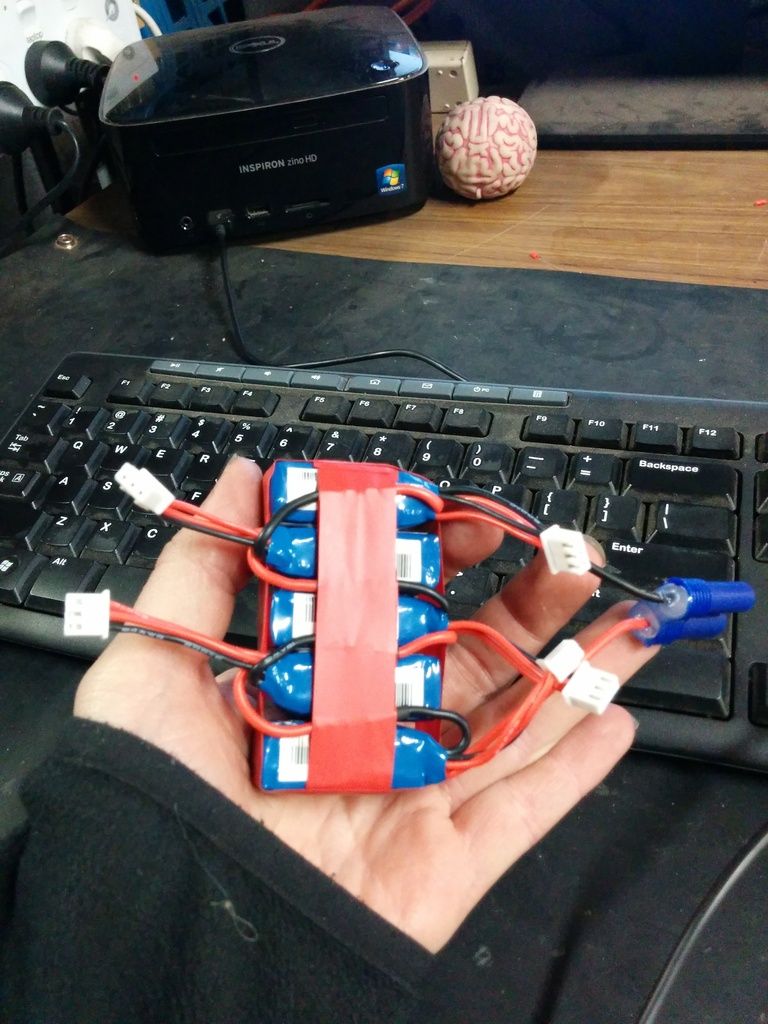
Also made an arduino based flipper controller to pulse the valve. Steve wrote the code and it seems to work sweet. I'll be using 5x 2s packs to drive the solenoid at 36v.
Gave it all a test and seemed to work. but it leaks gas everywhere so i will resort to some old school measures. Thanks to mario and phil for the tips
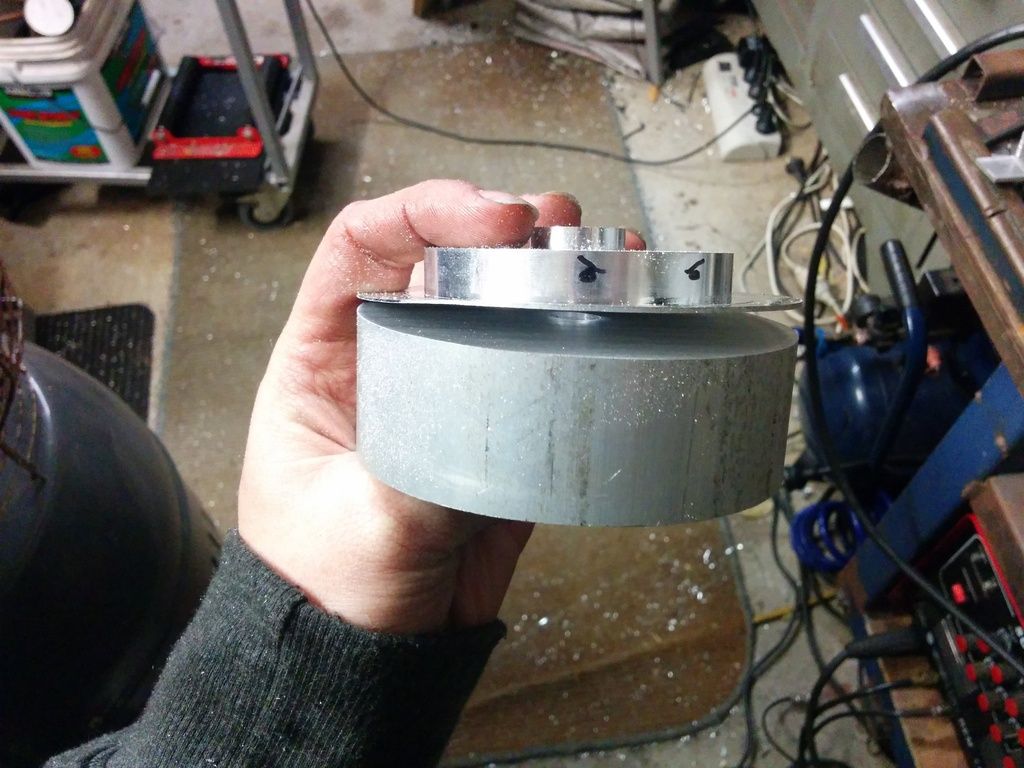
Aside from that i think the UHMW piston has broken as well as the ram wont return the last 5mm. Perhaps its swelled out near the inlet port or some such. I made a metal one anyway as a backup with some SKF o rings. Will install that tommorow.
nom nom
Picked up the "armour" from plastix who once again gave me some fantastic service and great pricing imho. Happy as with that. It's 6mm HDPE this time. Should be a bit stronger than the 4.5mm of the last version.
Note how i know what size to order so it just fits in my bike bag. What a life!
Busted this out tonight - what a struggle! fatigue is really kicking in now lol. Looking foward to a big sleep in sunday
So tommorow i will install the new piston in the ram, install the electronics and drives, then friday seal up the pneumatics and add any touch ups with left over weight if there is such a thing!
Joined: 22 May 2015
Posts: 35
Location: Townsville QLD
looking great mate were do you get the hdpe from
Thu May 28, 2015 12:58 pm
RedKnight
Joined: 22 May 2015
Posts: 35
Location: Townsville QLD
never mind just seen it sorry
Thu May 28, 2015 12:59 pm
Jaemus Experienced Roboteer
Joined: 01 Apr 2009
Posts: 2674
Location: NSW
Know that fatigue feeling. Nice work getting it done man _________________ <Patrician|Away> what does your robot do, sam
<bovril> it collects data about the surrounding environment, then discards it and drives into walls
Fri May 29, 2015 10:22 pm
Glen Experienced Roboteer
Joined: 16 Jun 2004
Posts: 9481
Location: Where you least expect
so much fatigue, going to be asleep on my feet tommorow.
Ermergerd, i made one under the weight limit! Nearly 400g under. Damn, wish i put more armour and a wheely bar under the flipper now. Ah well.
And done. It all seems to work. Still zippy with 4s on the 18v drive motors oddly enough. Even has a locking bar for the flipper and everything. Professional!
With the pneumatics i absolutely had enough with the thing leaking, so i've dumped an entire tube of 10 minute epoxy into the fittings to seal it off. We will see if it works tommorow. If not i will cry in a heap
Joined: 18 Jun 2004
Posts: 3842
Location: Queensland near Brisbane
So, three years on, are you still happy with the design of your self righter and the clutch set up? What is the ratio?
quote:Originally posted by Glen:
... Gearbox! complete and working....
...
_________________ So even the rain that falls isn't actually going to fill our dams and our river systems
Fri Jun 12, 2015 4:39 am
Glen Experienced Roboteer
Joined: 16 Jun 2004
Posts: 9481
Location: Where you least expect
So long ago i can hardly remember! But from what i recall it worked but the motor fell off immediately due to not having a motor support plus the spring wasn't a high enough rate, so it was way too sensitive to adjustment.
I redid the spring and added the motor support which should be documented here then yep it worked fine i will probably put it back on with a small brushless motor now demons a demo robot.
You cannot post new topics in this forum You cannot reply to topics in this forum You cannot edit your posts in this forum You cannot delete your posts in this forum You cannot vote in polls in this forum

 RoboWars Australia Forum Index
-> Builders Reports
RoboWars Australia Forum Index
-> Builders Reports


 ...
...