Hobbyking Radio Mode 1 - 2 swap
Okay so you got your radio and the throttle (the side with no spring return) is on the wrong side for whatever handedness you are, No problems! Its a piece of cake to swap the spring return from one side to the other on these radios, and most of them are similar for that matter, so with a bit of common sense you should be able to perform this mod on any radio.
Parts Needed
- Small jewelers flatblade screwdriver- Phillips head screwdriver
- Patience
First lets grab our $40 transmitter (never thought id be saying that 5 years ago) and rip it apart, 4 screws in the back hold it together and it comes apart easily
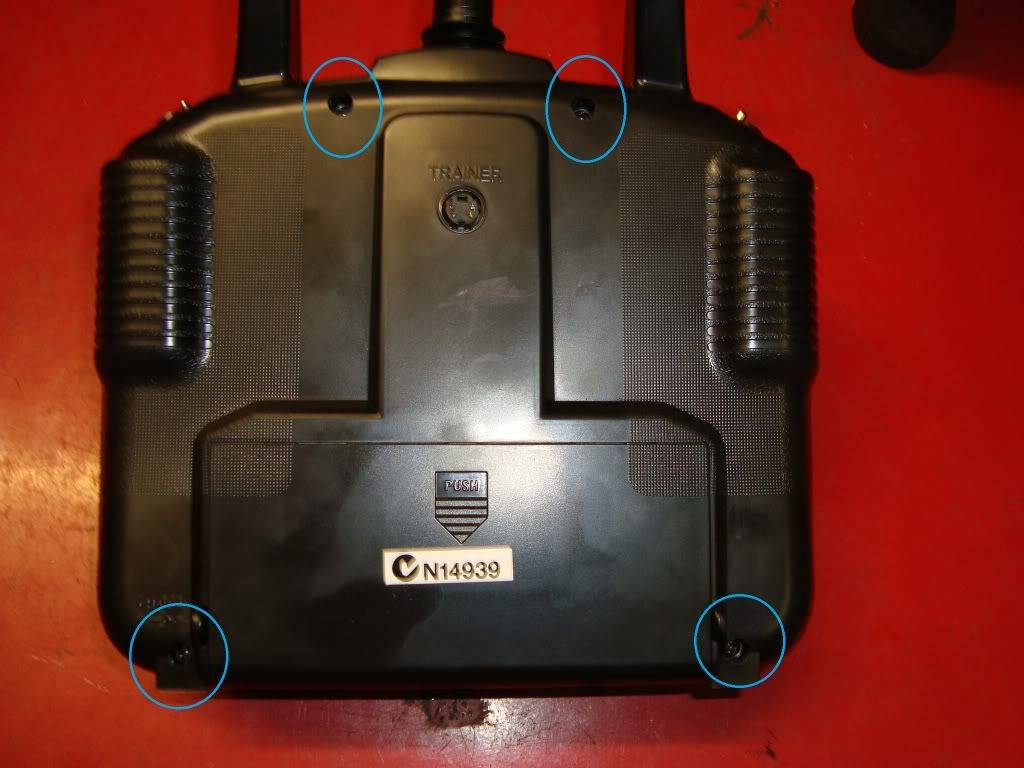
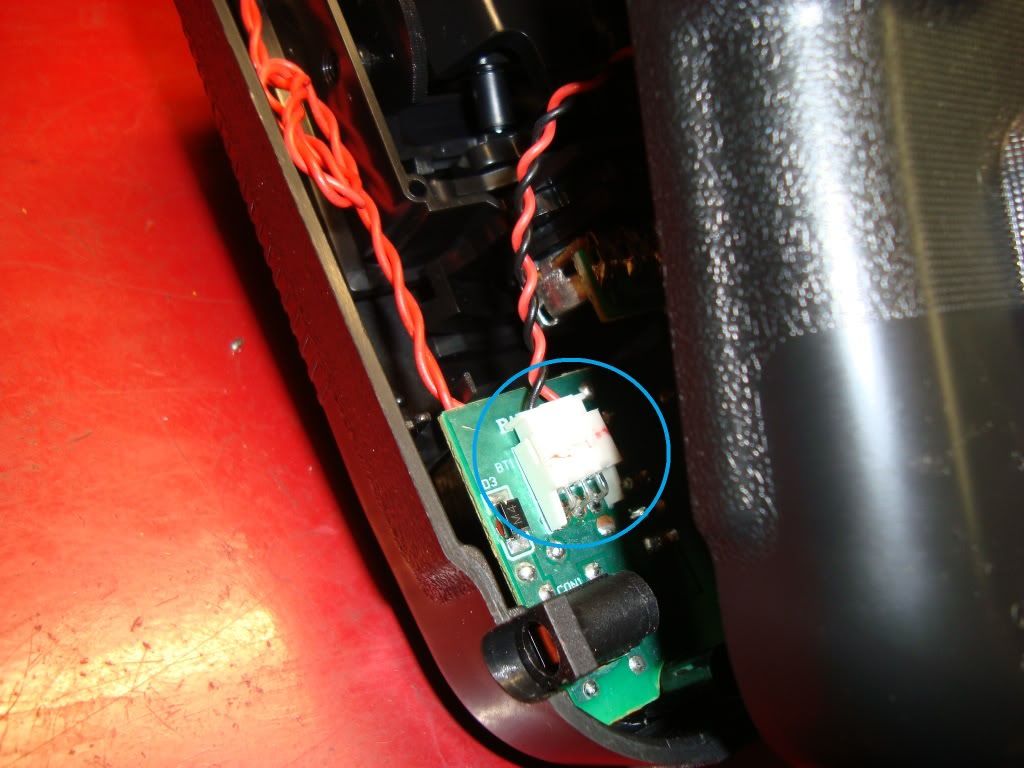
Make sure to unplug the battery connector and set the rear of the radio to the side.
Lo and behold the world of cheap electronics. First task is to swap the throttle ratchet from one side to the other. The throttle ratchet is just a strip of metal screwed to the unit that rides on some ridges cast into the stick assembly. Undo the screw and swap it to the mounting hole shown on the other side. make sure its done up fairly tight because it'll lock up if it moves. its happened to me before! Be nice if they added two screws to it but that's the kind of cost cutting that you deal with in budget items.
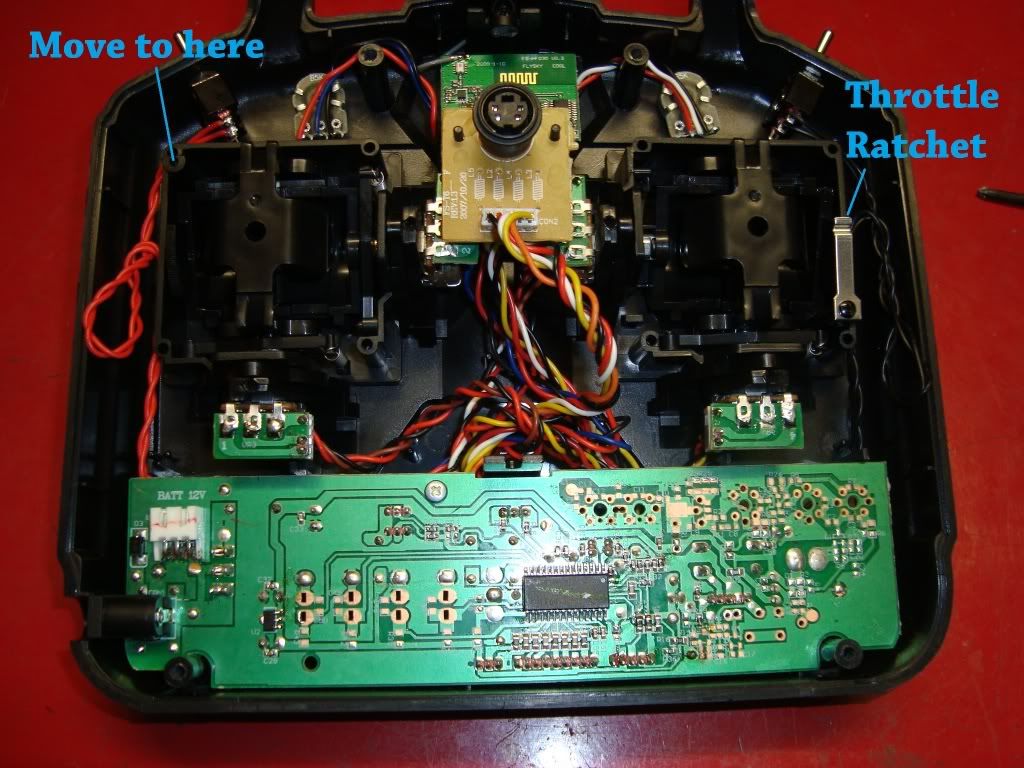

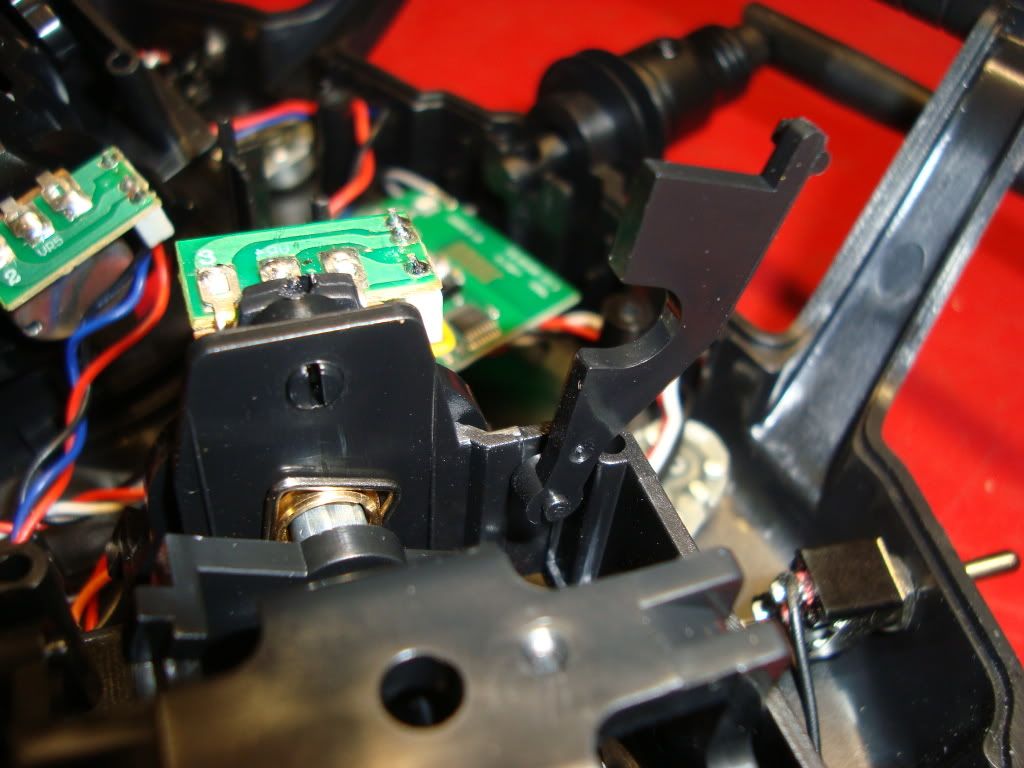
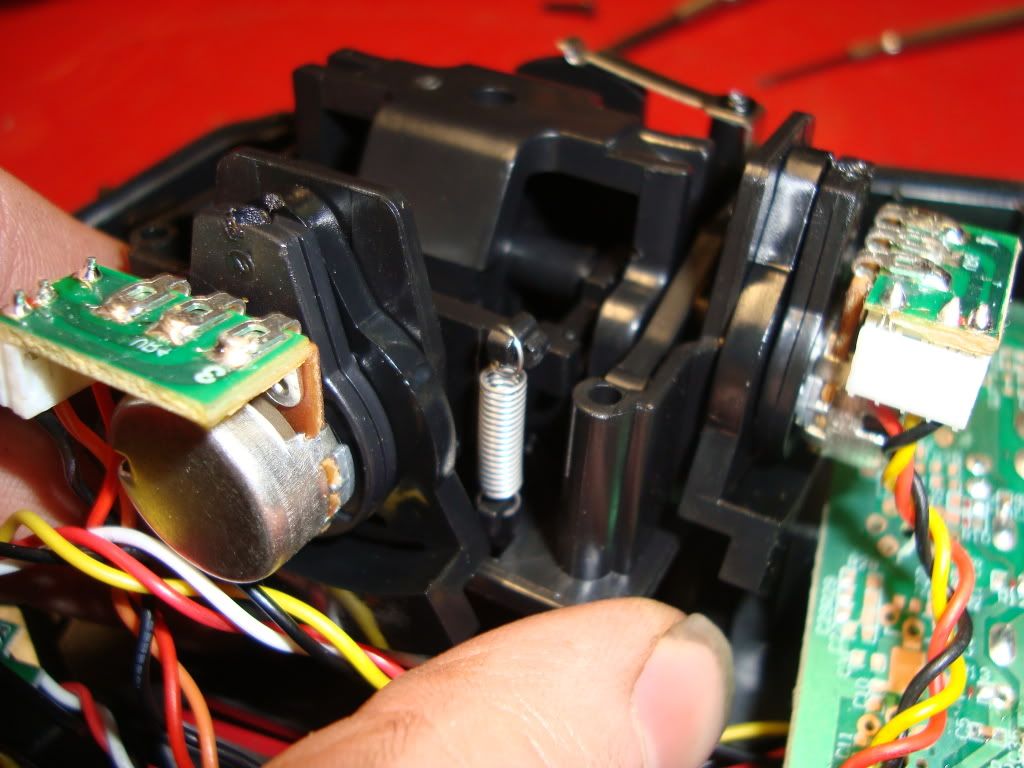
With that all taken care of its time to swap the centering spring bits from one side to the other as well. To do this i found it easier to just remove both stick assemblies, i haven't tried it with it all mounted up.
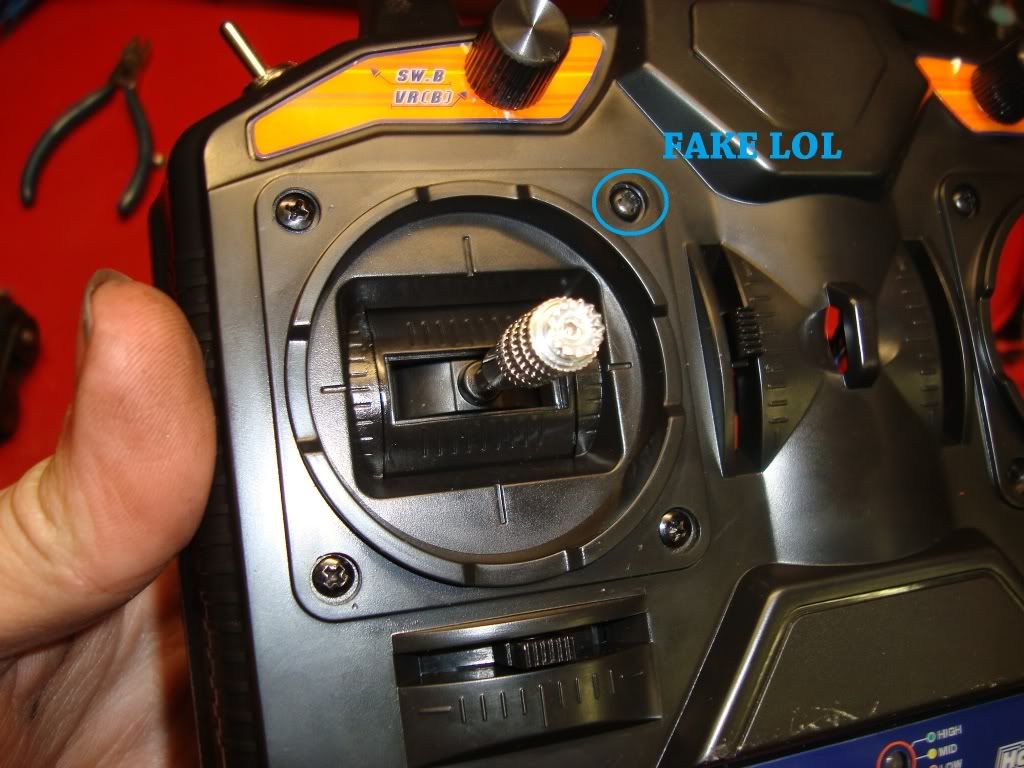
There appears to be 4 screws holding it on but after much effort to remove the last one it turns out its fake and just cast into the front. BAH what the hell? but anyway, take the 3 real screws out and the stick assemblies should lift out, the cables from it run under the bottom PCB so you might have to push them out of the way to get it out.
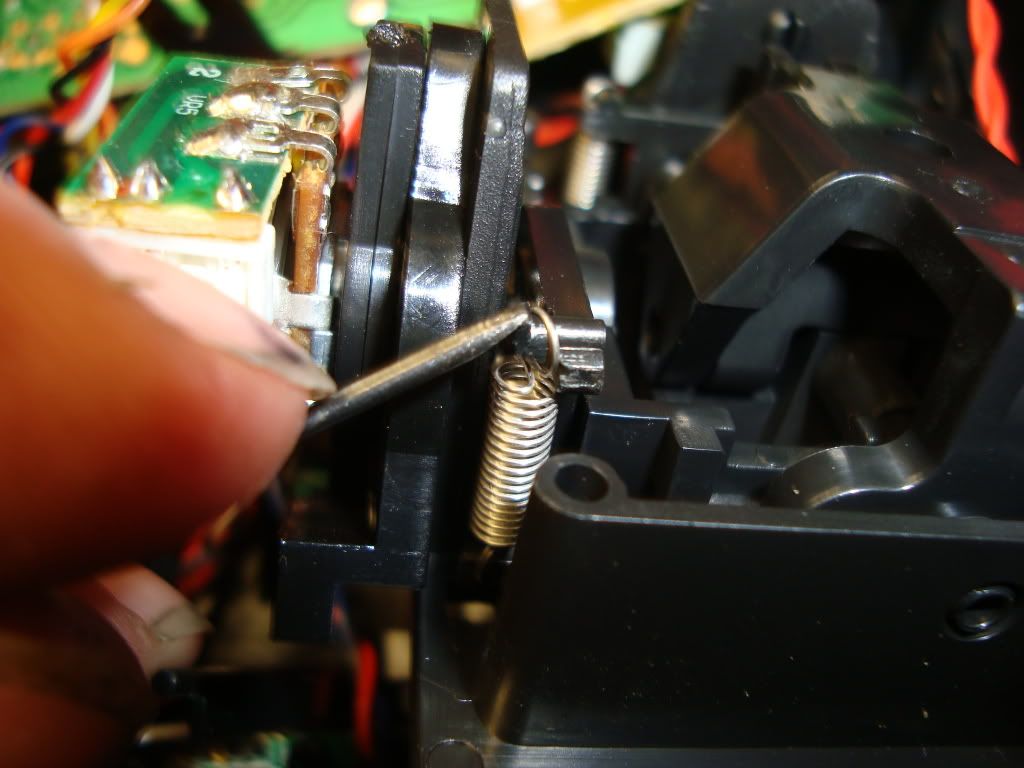
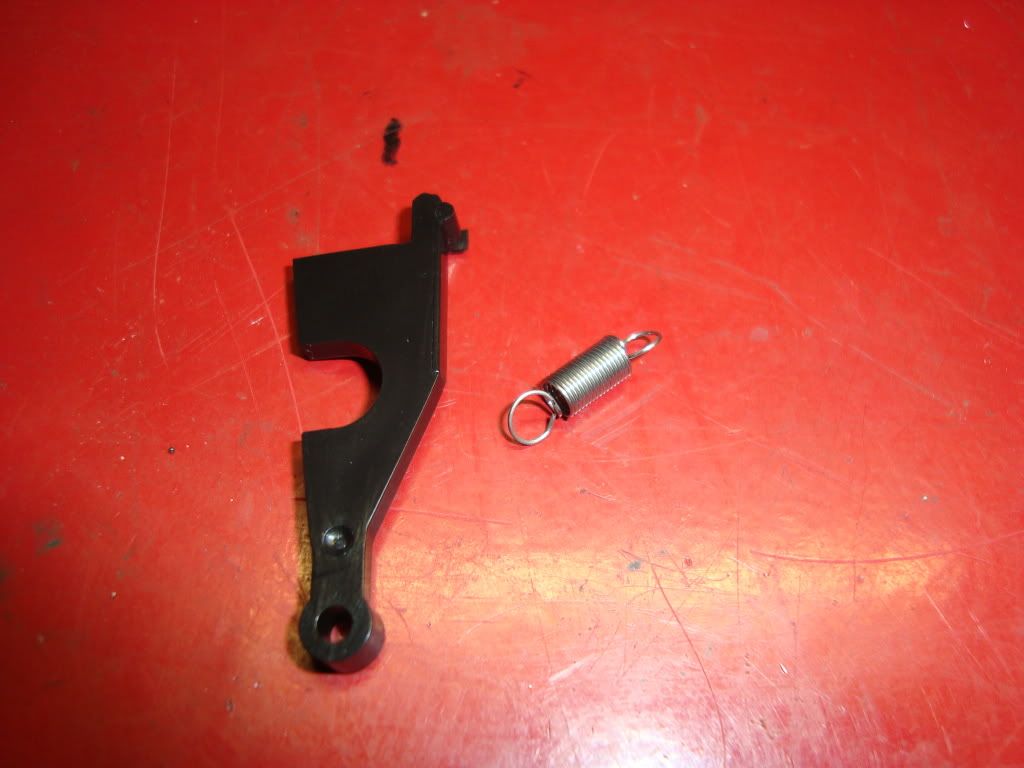
Now there's two parts we need. A lever arm and a spring. Its a piece of cake to remove it, just pop the spring off with a tiny jewelers screwdriver, being careful not to let it fly off, then push the stick all the way in one direction which lets you slide the lever arm off its pivot.
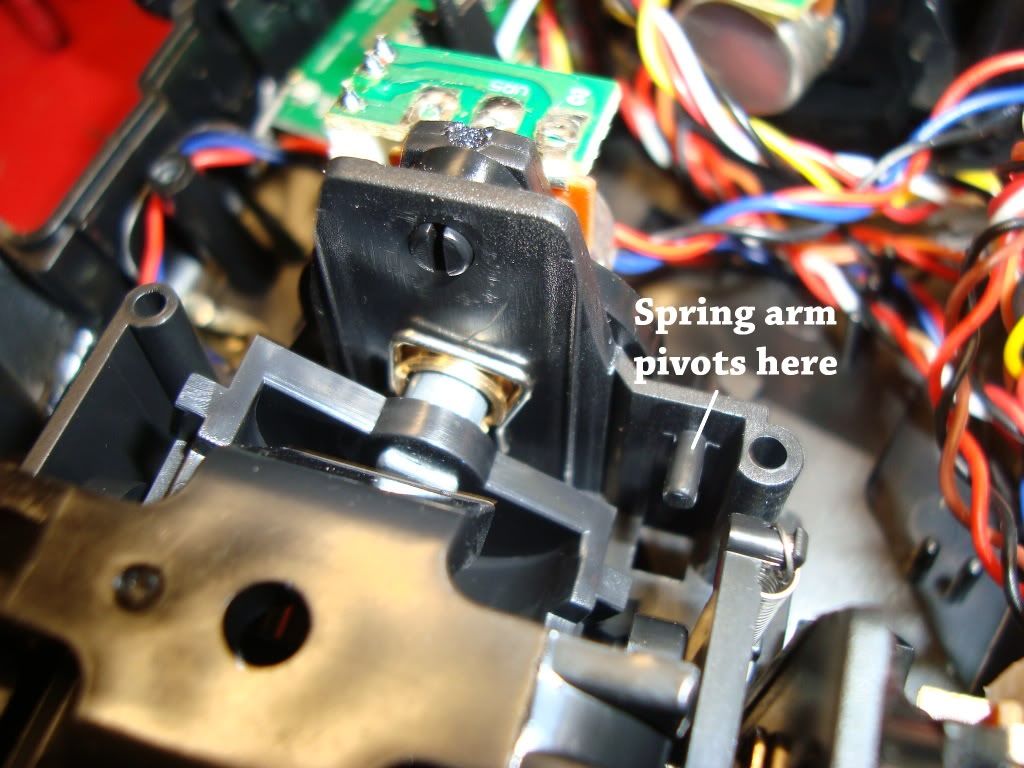
Then just install them on the other side in the reverse order and your done basically! This is where the lever arm mounts to -
Reinstalling the spring can be tricky, i found the best way was to hold the looped end with a flat blade jewelers screwdriver then slide the spring back on with a fingernail.
The completed assembly!
Bung it all back together and make sure it works and your good to go ;D You may have to change all your mixing and reciever settings as the channels used will be different so be wary of that.
There are no comments on this page. [Add comment]