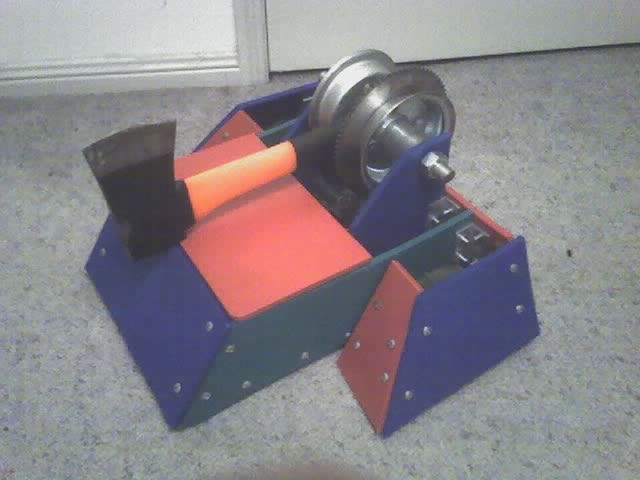
Practice = Building an Axe
This section will come first as more people would be interested in how to build a weapon like this rather then knowing all the maths behind it. This setup is the same used Avenger, built by Hellfire Labs, Qld.
The parts you will need are:
- 1 x Oatley Electronics 300W Scooter motor (Scooter300wMod) -> $36
- 1 x Oatley Electronics Chain Set -> $12
- 1 x fibre glass handle hatchet or hammer or pick -> $10-$15
- 2 x 200mm or 250mm Pneumatic wheels -> $15 each or you can 2 on a $15 hand trolly
- 2 x long bolts and nuts -> $1.50 each
- 1 x threaded rod -> $4
- 1 x Single channel drive setup -> Your Choice
- 24V worth of Batteries -> Your Choice
- 1 x frame or robot to put it all into -> Your choice
Before we start I have to let you know the main problem you will face and that is the weight of all the parts. You will have about 6 -7kg worth of parts and you still havn't added your drive motors, wheels, electronics or even a frame. So don't start thinking you can add 5mm thick steel plate all over the robot. Thats why I like chopping boards and Polycarb.
The first thing you will need to do is rip your nice new wheels apart. The part we are interested in is the bearing side of the hub. So you undo the four nuts and bolts holding the wheel together and it should fall apart. The hub has 2 ball bearings and a nice flat surface to bolt things too. Perfect for weapons.
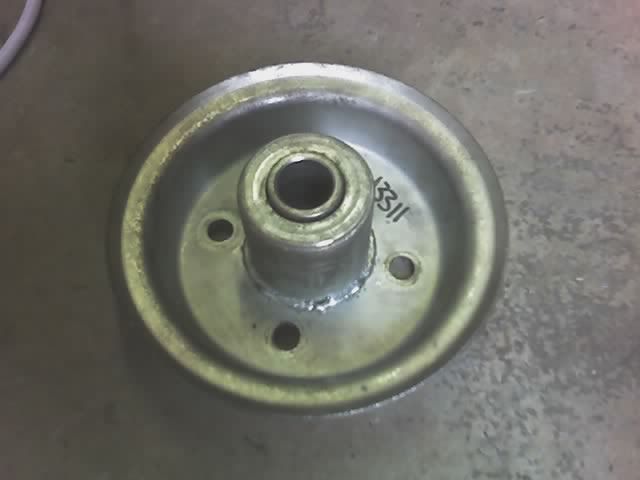
The threaded rod you brought has to be the same size as the bearings in the hub. This will act as your axial for the axe.
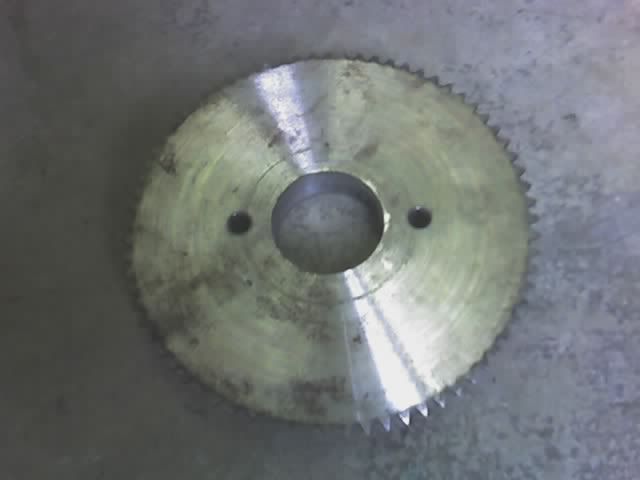
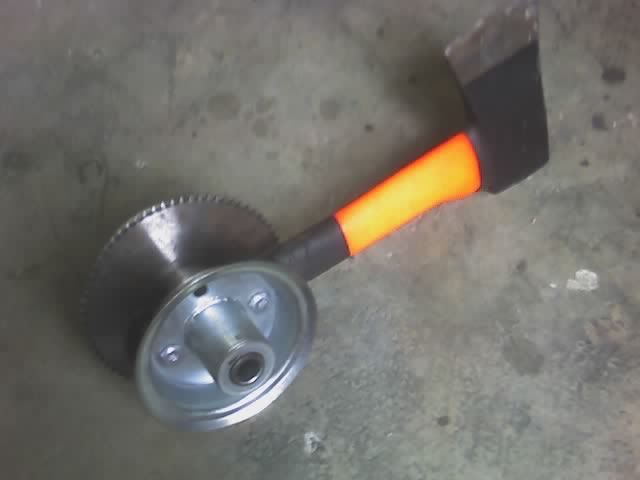
You next step is to bolt the big sprocket from the chain set to one of these hubs. First you need to make sure the hole down the center of the sprocket is bigger then the axial. Use a drill, file, dremel, lathe or any tool to make the hole larger if needed. Then sit the sprocket on the hub, making sure it is properly in the center, and mark the four holes used to bolt the wheel together onto the hub. You only need to drill two of the holes on opposite sides of the hub.
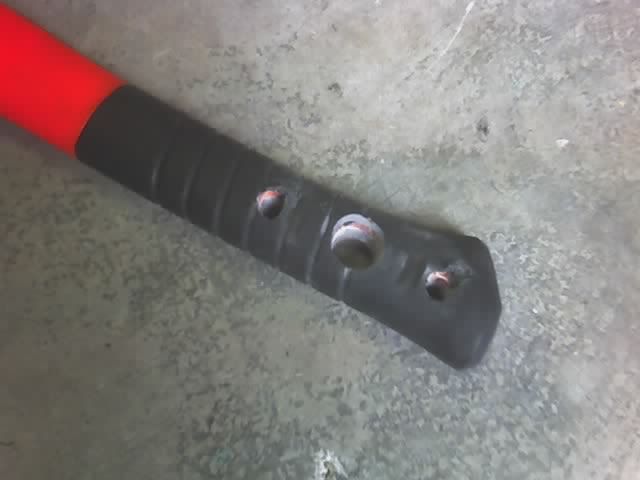
Next you need to drill 3 holes in the handle of the axe. I use only the orange fibre glass handled axes as I found that a wooden handle will snap with the holes drilled in them. The three holes match up to the three holes in the sprocket. Make sure the big hole in the center is large enough that is won't rub on the axial. Try to place them as close to the end of the handle as you think you can get away with.
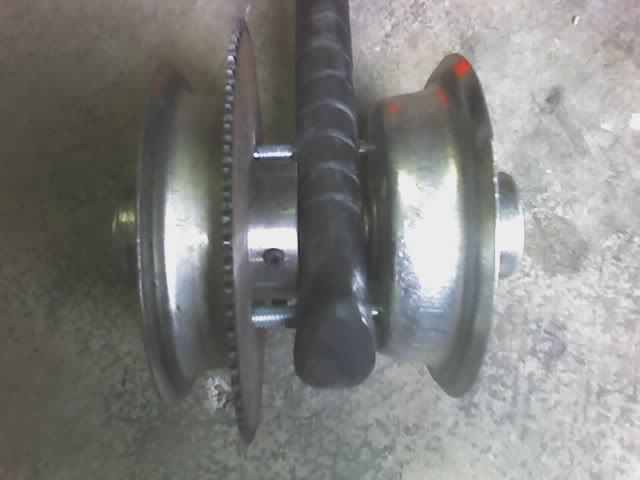
Now bolt the two hubs, the sprocket and the axe together. Make sure the raised hub on the sprocket is pressed against the axe otherwise there won't be enough room for the chain to fit. The two long bolts you have are the same diameter as the two smaller holes and long enough to run through all four parts. Now you have your axe sandwich. Add the axial and make sure it all runs smoothly.
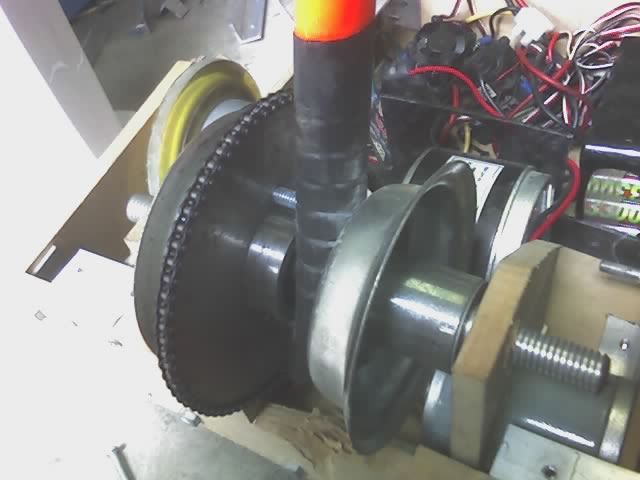
You now need to bolt this into the robot. This section of the frame needs to be the strongest section of your robot. Also make sure the can swing past the horizontal when swinging forward. This is beacuse the robot will always jump into the air and the axe will always go too far. You don't want you robot to get in the way of a good hit.
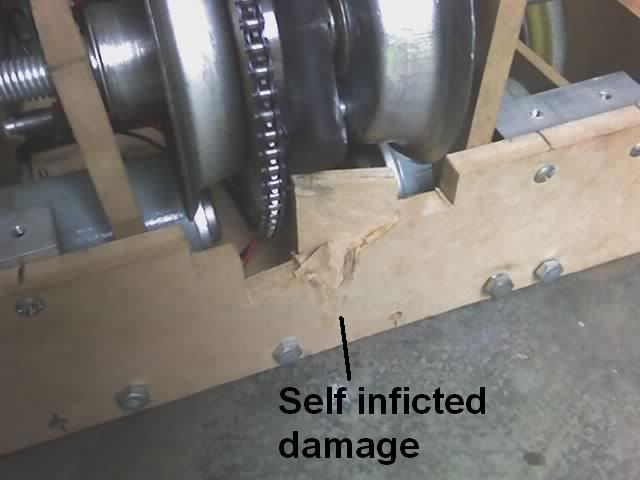
You will also need to make sure the front of your robot is able to take the blows from the axe handle. No matter how hard you try the axe will always get you.
The motor now needs to be bolted in. Put the chain onto the big sprocket and the motor and pull it back to make sure it is tight and perfectly inline. This is most important part of the whole assembly. If it is not inline you will loose the chain every time you fire the weapon. Get someone to hold it in place while you mark the four mounting holes. Then just drill the holes and bolt it in.
The chain can never be too tight. If it is too loose the chain will derail after you fire the axe. I used a piece of chopping board to press into the chain and make it tight.
Now wire up the weapon controller. This will be the same as a single channel speed contoller for your drive. You can use MicroSwitching , custom weopon switches or a single channel speed controller. The advantage of the speed controller is you can "soft return" your axe at only 20% of the full power so you don't end up slamming it back into your own robot, thus commiting suicide. You could also use the Scooter300wMod to reduce the speed when returning the axe and this would also give it a bit more kick when hitting your target. Just remember that you will be using 24V and the motor is always drawing its top rated current, so if you are using switches you will blow up any relay from Jaycar or Dick Smiths on the first shot. Always use solenoids.
Now you can test it. Don't test is on concrete as it will take large chip out of it. Alway lay down a sheet of thick wood. Also make sure the target is closer to the robot then you think it needs to be as when the robot jumps the axe will strike closer to robot then you will expect. Fire the axe as much as you can in15 second to make sure the chain won't derail. If it does you will need to tighten it up.
therory
300W Scooter from Oatley electronics. I'll forget current draw limatations of the batteries.
300W and 2750 rpm at no load.
t=(2 * s^2 * m / P)^0.3333
s = sweep distance of the axe. The hatchet I was playing with it'll have a handle of about 30cm. If it swings though 180 degrees the distance = pi * 0.3m = 0.942m
m = My hatchet weighed 1.1kg.
P = 300W
So
t = (2 * 0.942^2 * 1.1 / 300)^0.3333
t = 0.187 seconds
The energy in the axe = t * P = 0.187 * 300 = 56 joules
The axe is moving at (1/(2*t)) * 60 = 160.4 rpm.
Since the motor will be under load it won't be doing that rated rpm. I'll guess it'll only won't to do half that. About 1375 rpm.
So the best gear ratio will be 1375 rpm / 160.4 rpm = 8.57 : 1.
The sproket set from Oatley is 80:11 or 7.27:1
Not quite ideal. The higher gear ratio means the axe could be faster and have more energy, but will mean the robot will self right easier.
There are no comments on this page. [Add comment]