Joined: 16 Jun 2004
Posts: 9481
Location: Where you least expect
fibreglassing
Got a fibreglass kit thingy today to fix some cracked plastics on the bikes but i want to do a bit of robot work with it too,
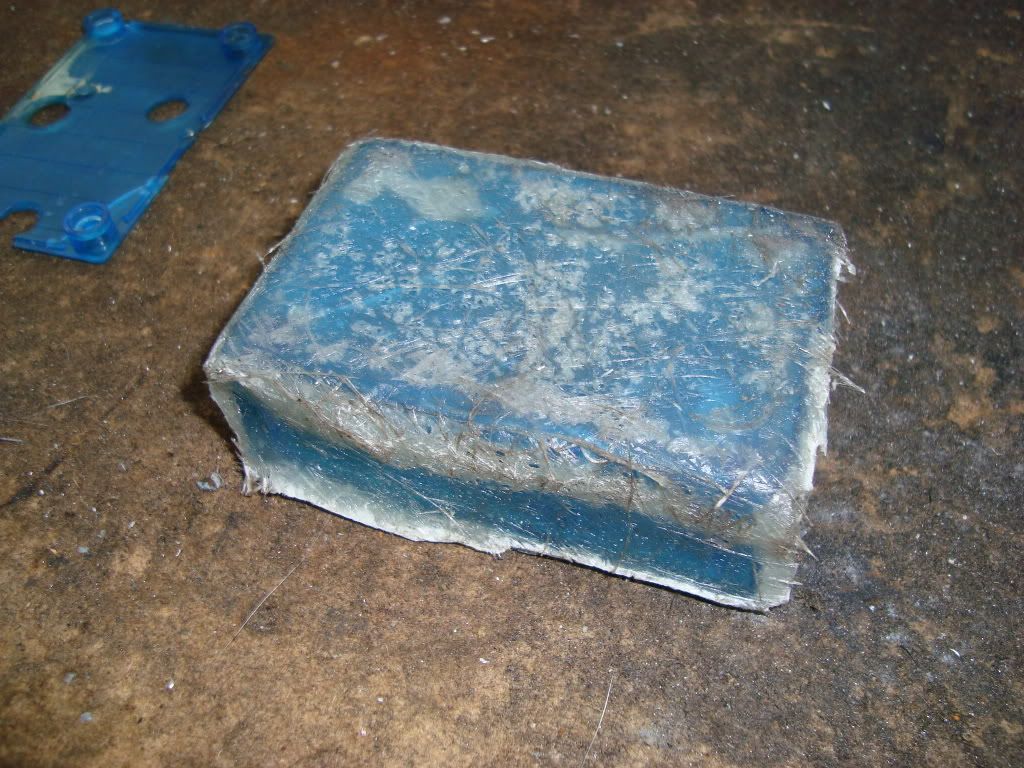
i want to fibreglass over (at least attempt to anyway) the scorpion XXL plastic boxes to make them stronger so they wont crack apart
i can lay down one layer of glass on a piece of plastic okay but doing the box is a bit odd, im not sure how youd fibreglass a 4 sides box and the base of it.
do you do each surface and wait for it to dry or what? cause i had a quick go by cutting the mat into roughly the right template and then trying to fold it all over and do it all at once. was a pretty big disaster the fibres on the sides were getting pushed all over and it looked like crap.
how crucial is a roller too? i dont think i got many air bubbles in there but i could be wrong.
I fibreglass my hockeysticks and surfboards a bit, the roller is important, without it the layers dont become unified and crack off far easier. It took me a while to get the hang of the whole process, but found it easier with two people; one gets messy laying the sheets on and the other person paints the resin on and uses the roller.
Can't help you much with what shapes to use, but if there's any other questions i mihgt be able to help some more. _________________ Chris, Team Collo
:::Is the answer to this question "no"?:::
Fri Jan 08, 2010 7:49 am
Russell
Joined: 16 Aug 2004
Posts: 90
Location: Sydney
There is may answers to what you are trying to do.
I gather you are try to reinforce a jiff box from jaycar? if so you will find that the glass sheet (chopped strand matt or cloth) that you get in the kit will not fold over the corner of the box and just keep on lifting off as it is not meant for this sort of thing. You need a much finer mat or you will have to force it into place. It is to hard to try and explain the ways here with out first seeing the problem.
How obout some photos with size scale in photo
Joined: 30 Sep 2006
Posts: 673
Location: Perth, Western Australia
My suggestion would be to mill out a case of wood (or other) with the required gap between the box and the wood. Put in a layer or so of gladwrap to prevent it sticking. Then add in glass one layer at a time. Say use 2 or 3 layers and alternate which side you trim to make the corner fit. Wet out the glass one layer at a time. We have tended to use old thongs or similar for this part. Then fit the box in and maybe clamp it down until set... or as above maybe a half hour or so for a trim with a knife.
Also you might be better off using a weave instead of the random glass. _________________ They say that he crossed the fine line, from insanity to genius.
Mon Jan 11, 2010 12:21 pm
Russell
Joined: 16 Aug 2004
Posts: 90
Location: Sydney
This will work if the glass you have is not too thickThat is the filaments them selfs
First mount the box up side down so the bottom edge is clear by a few centimeters
second ruff up plastic with 40 grit
Next tear off peaces of glass 'DO NOT cut' around 50mm each enough to cover box twice keeping bit with straight edge separate.
The resin
How much do you need is around 3 times the weight of glass plus what left in the brush Do not over caterilized as this will stuff up the resin
How to put it on
Have a scrape peace of board to wet out on use kitchen glove latex just dissolve most times.
Start at the edge of the box with the peaces of glass that have a straight edge on them by wetting the glass out on the board making sure it is very wet dripping wet it may still look white that ok You must get it on the box quickly before it falls apart. Putting it on the box with straight edge level with the edge of the box now work you way around the box over laping them by 50% do not worry about how it look at this stage.
next layer again over laps the first layer this one looks as if it would be right on the corner of the box this is good continue this till box is covered you can if you want put a second lay on now.
It will have bit stick up in may places, we now start to do some fibre glassing
As you watch it the whiteness will start to disappear this is the binder dissolving and letting glass fiber move around freely
If you have a roller you can start gently rolling it being careful not to push the glass off the sides
If you are using a brush (this is what i would use on this small job) load the it up with resin gently start brushing(lay the brush on the job and lightly bounce the brush up and down while move it along) across the bit sticking up going around do all of them lightly knowing that you will come back to it again and again As you go around there will be less and less of them staying up. You will find if you move in the opposite direction to the way you lay the peaces of glass it will work easer.
If you now want to remove any resin dry your brush out and lay the brush on the job and lightly bounce the brush up and down while move it along regularly wiping resin back in to pot. Be careful not to drag glass of the edge.
Let cure and sand spiky bits off.
Best to griding the edge once cured as this will give the best edge
And the best of luck
Mon Jan 11, 2010 3:01 pm
Glen Experienced Roboteer
Joined: 16 Jun 2004
Posts: 9481
Location: Where you least expect
cool thanks for the info, ill give it another go in the next day or three. tried wetting the glass out on the board first repairing some plastic bike fairings this arvo and it worked out much much better and easier.
You cannot post new topics in this forum You cannot reply to topics in this forum You cannot edit your posts in this forum You cannot delete your posts in this forum You cannot vote in polls in this forum

 RoboWars Australia Forum Index
-> Technical Chat
RoboWars Australia Forum Index
-> Technical Chat