|
|
|
|
|
|
|
|
Dylon
Joined: 09 Nov 2006
Posts: 631
Location: Newcastle, NSW


|
So deciding that Voli is now a just a sportsman bot thought i would transfer the build into this thread to clean things up a bit and allow myself to keep better track of what i have built so here we go...
VOLI (Vol-eee)
Drives -
BANEBOTS P60
16:1 with 3" Colsons. 500kv NTM Brushless on 64:1 geared another 2.25:1 P60 for lifter.
Batteries - 5s 3000mah Lipo.
Weapon - Lifter. 6mm Bisalloy Wedge (Full Class), 6mm Bisalloy Forks (Sportsman).
Electronics - TZ85 for drives, 150amp Hobbyking special ESC for lifter.
Armour - 10mm Aluminium frame. 5mm Aluminium base/top, 15mm Mystery plastic outer armour.
Key part of this robot i felt needed a bright colour and to be bold NO MORE DRILL MOTORS 
I bit the bullet and finally invested is some reputable drive motors as well as wheels while i was at it..
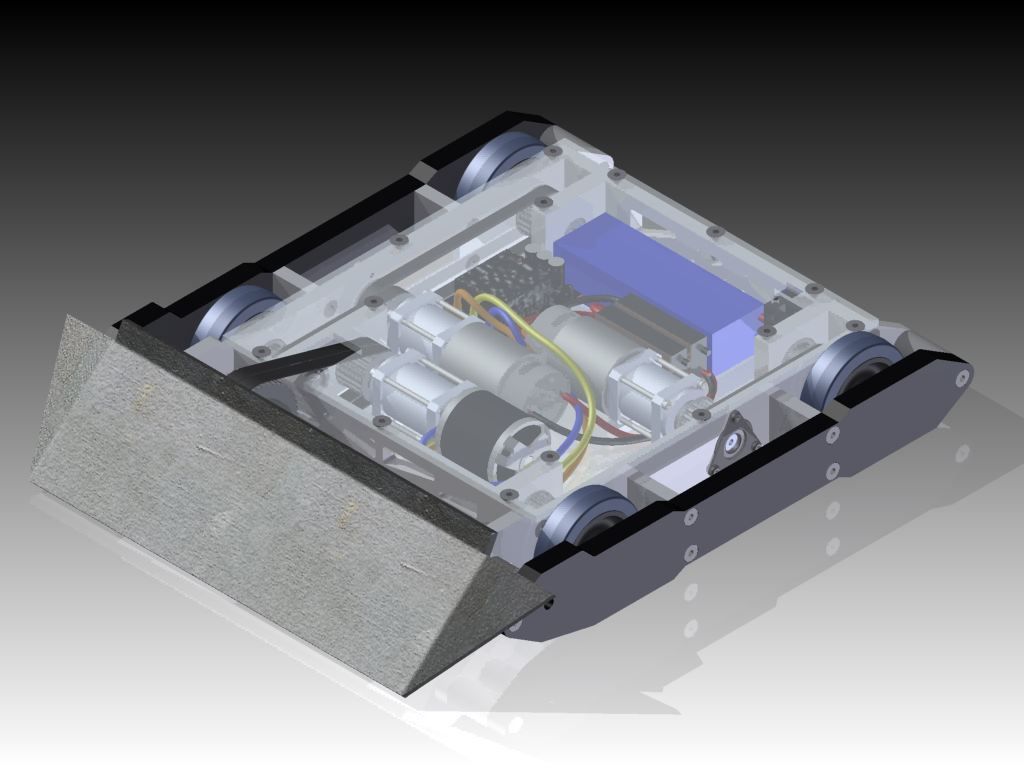
The general CAD i slapped together
At first knowing i wasn't going to Nationals and the next event being who knows when i was like i will just build this robot slowly over a few weeks/months then next you know with the marvels of CNC'ing:
(spam of photos warning)
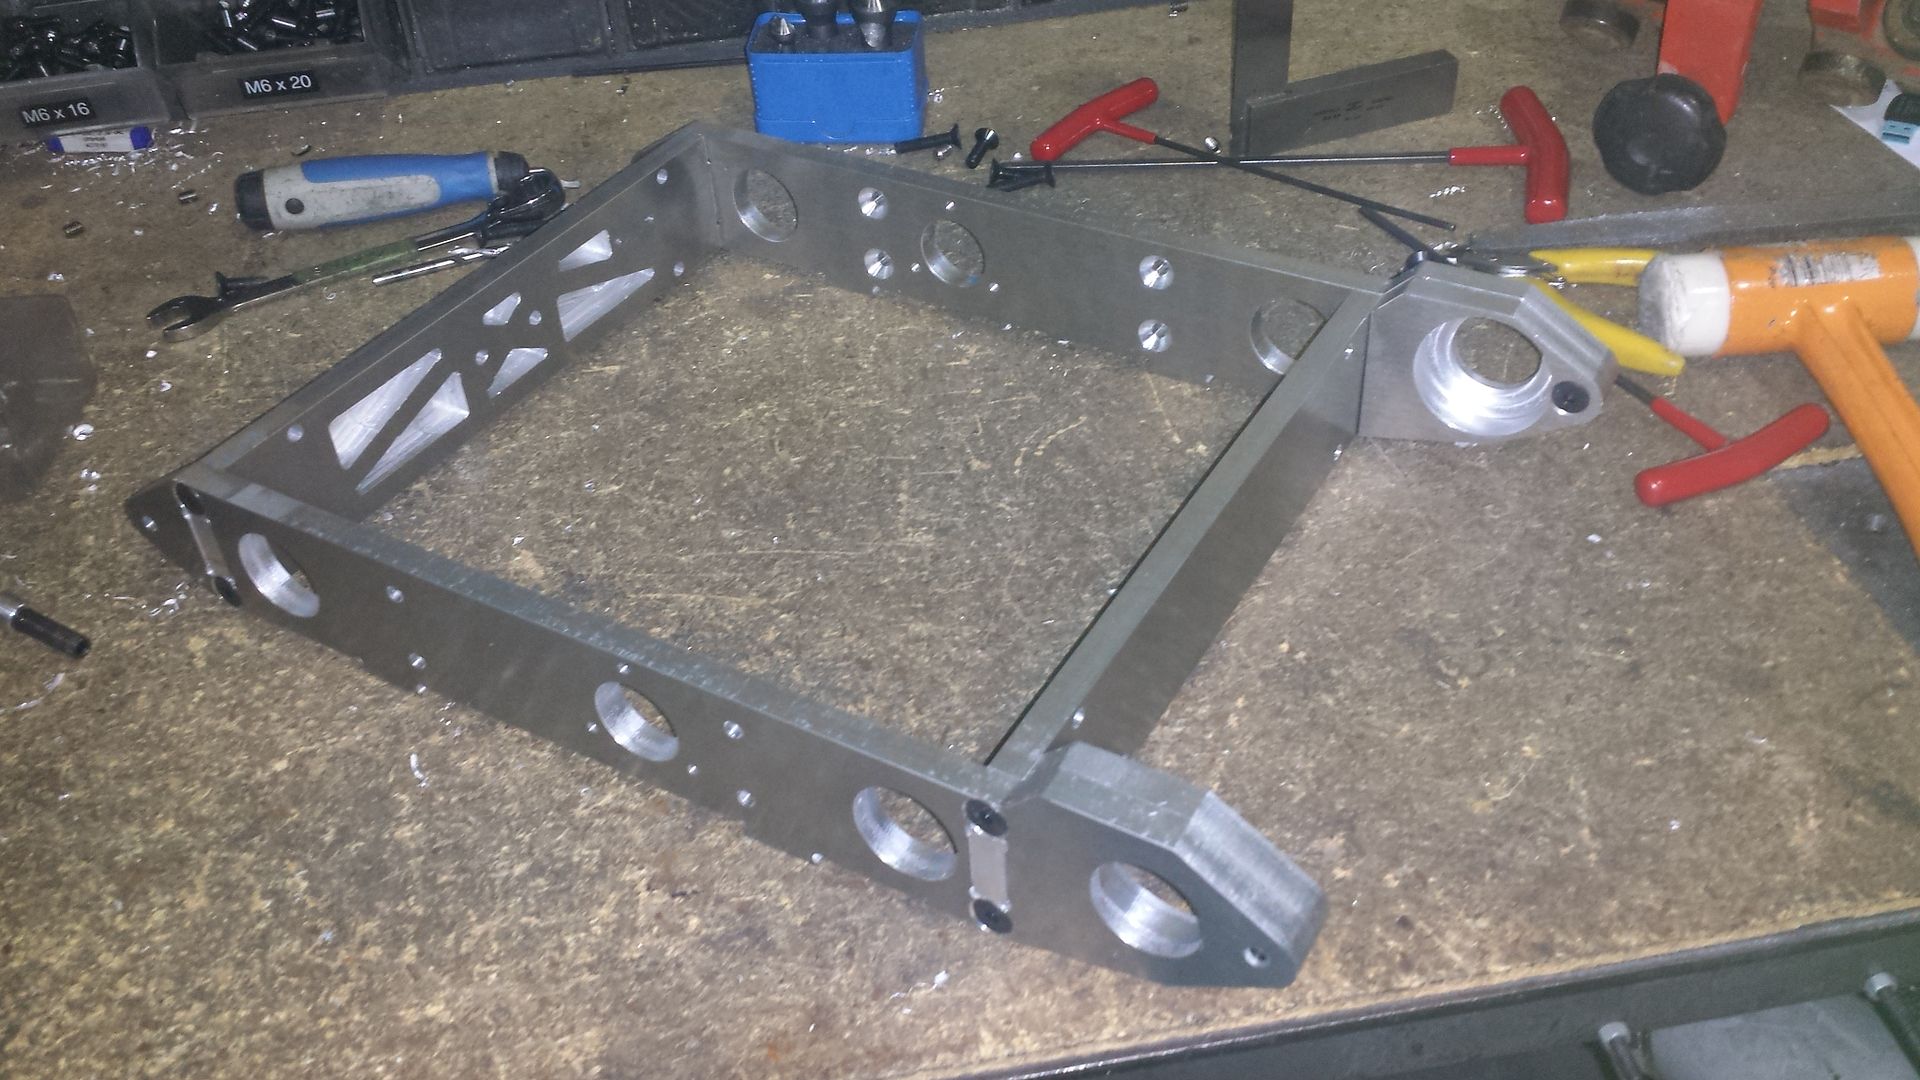
Fitted main part of the frame together, being that the CNC Router i use is quite old and in much need of a service so between the sloppy frame and tool deflection circles are more slight ovals, several very fine passes around the holes and eventually become nice enough to press bearings into them
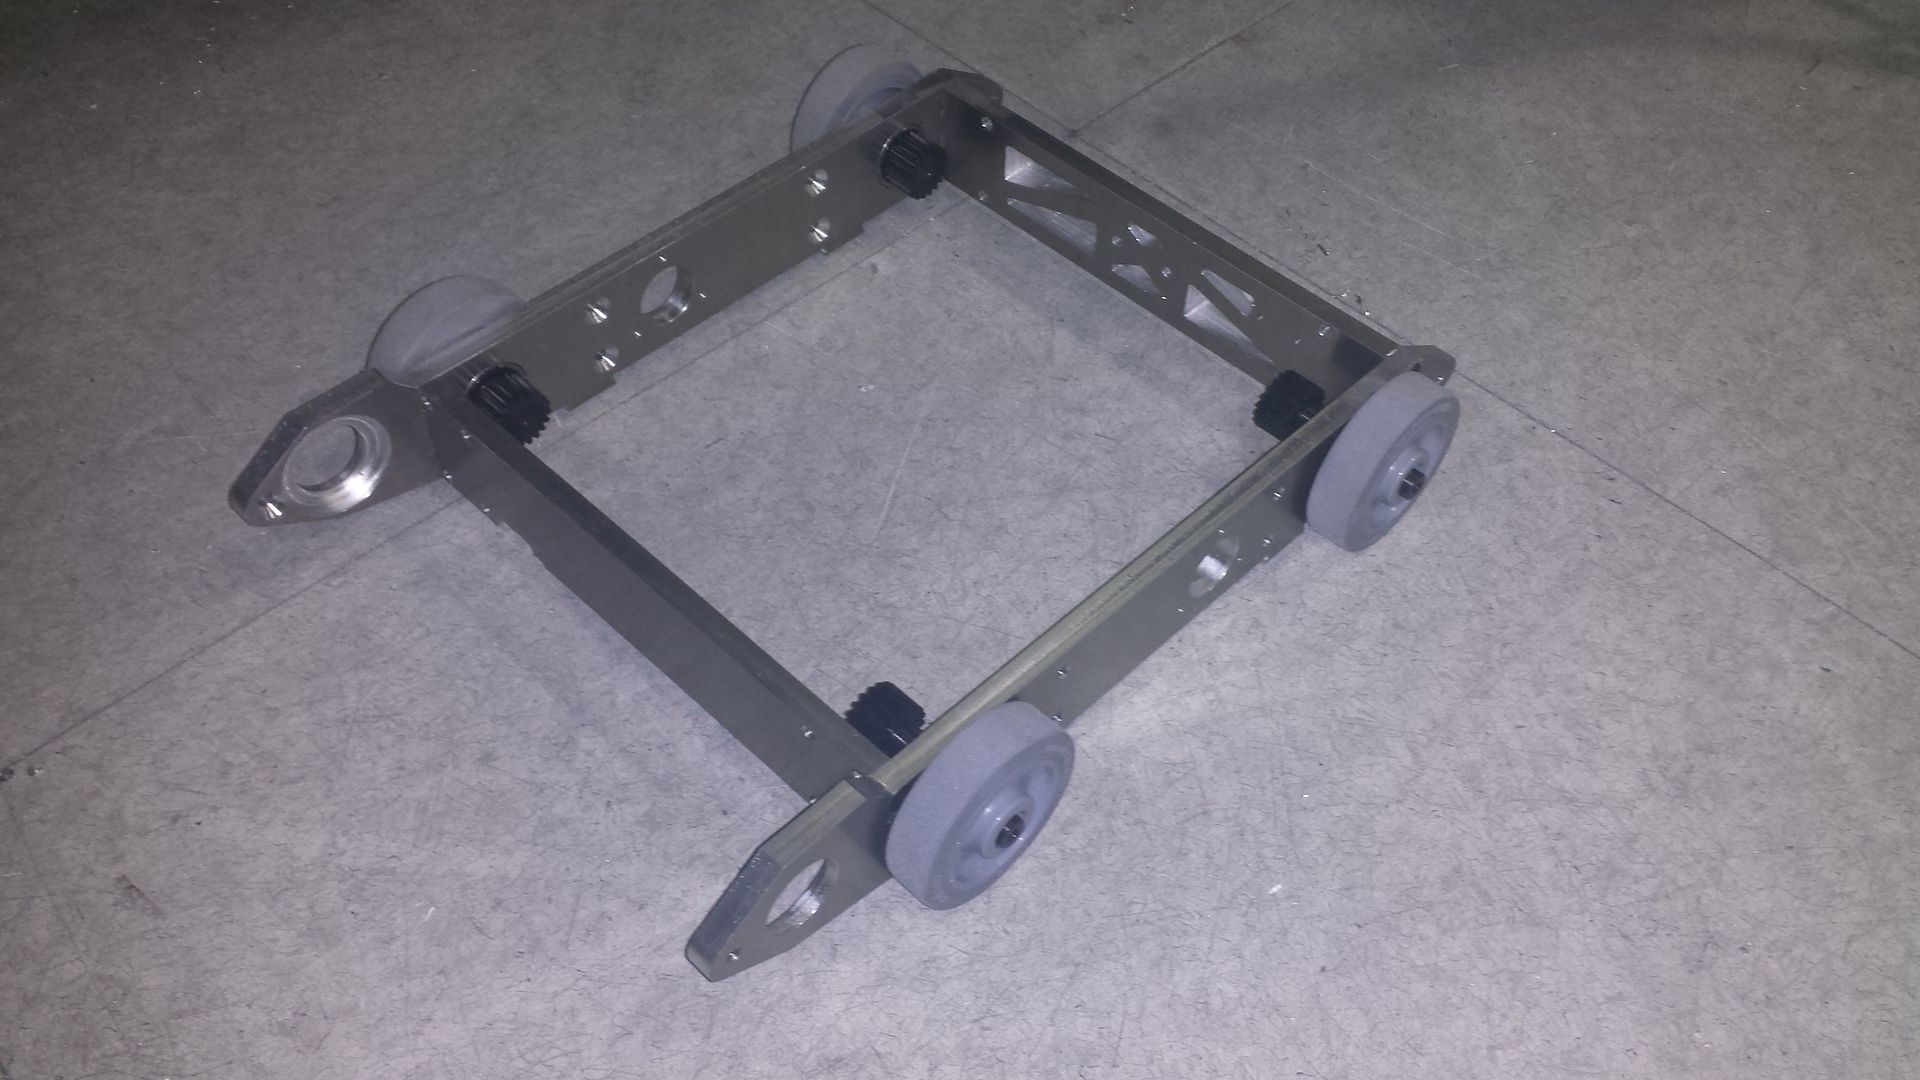
Rough mock up of the drive setup, when designing this time i realised that inventor have this awesome feature where it can calculate the centre distance for a certain belt length using selected pulleys, that would have made hextechs chains a thousand times easier to work out 
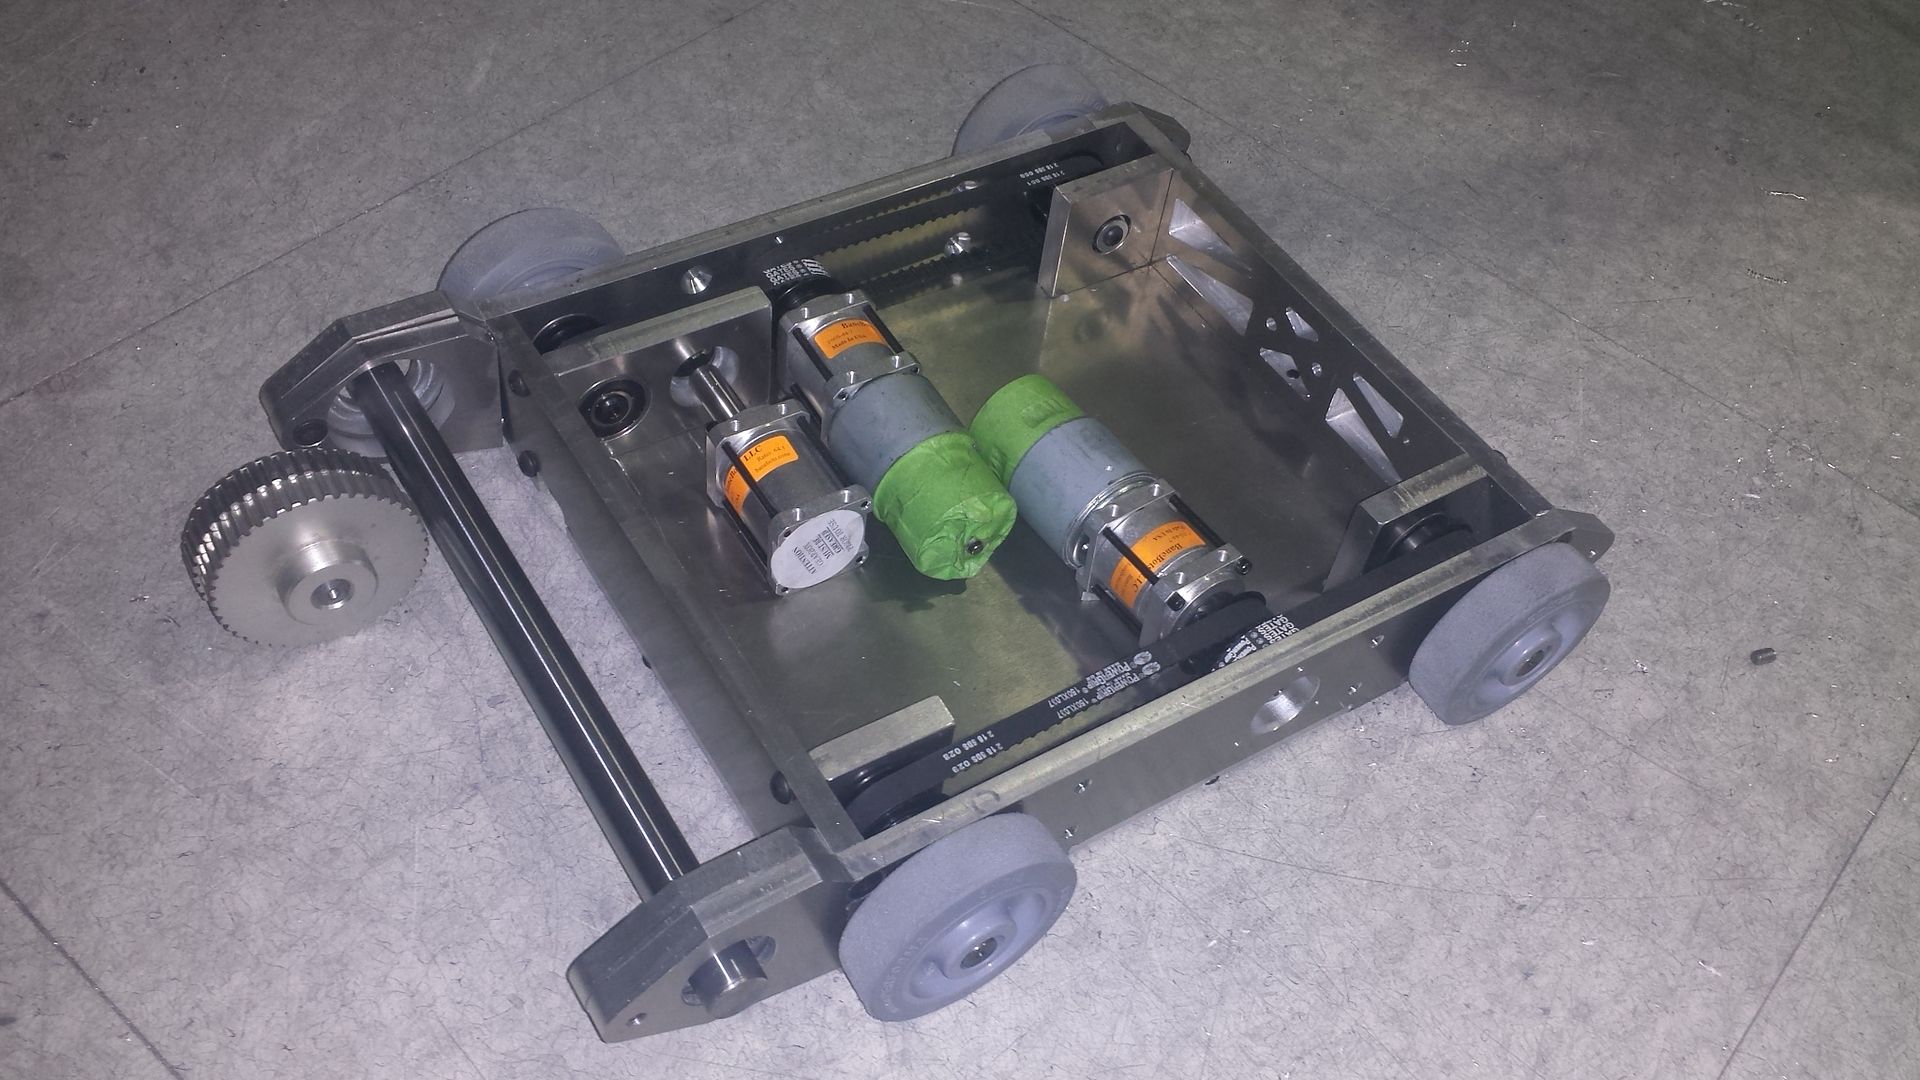
Next was the long tedious work that is lathing, i have become very lazy being around all this CNC stuff, manual work is tough haha
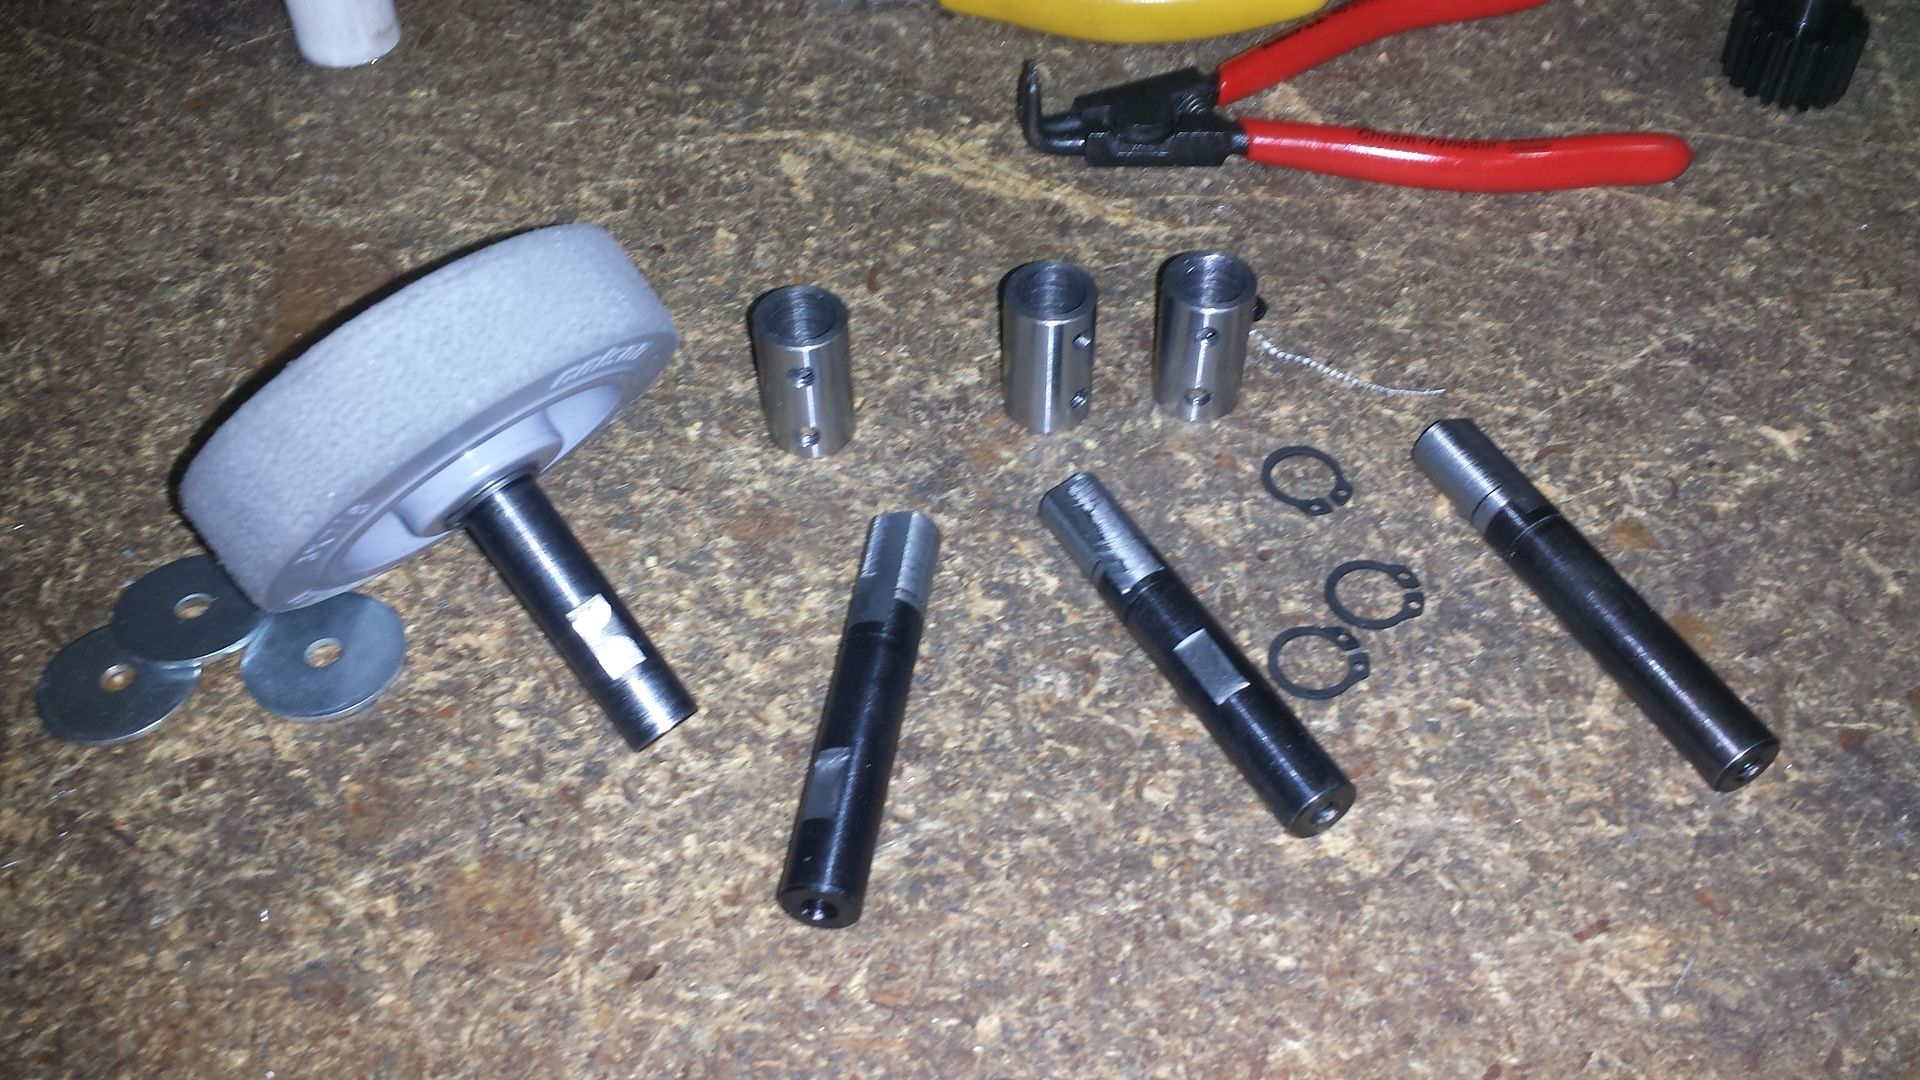
Machined up some press fit sleeves for the colsons, not having an internal broach to make keyways which would have been the ideal way to fit the wheels to the shafts i just milled flats on them and loctited some grub screws in the sleeves to be snug on the shaft
Cut the plastic side plates with the laser, no idea what material it is, feels similar to uhmw but lasers out real nice, some kind of polyethylene i guess
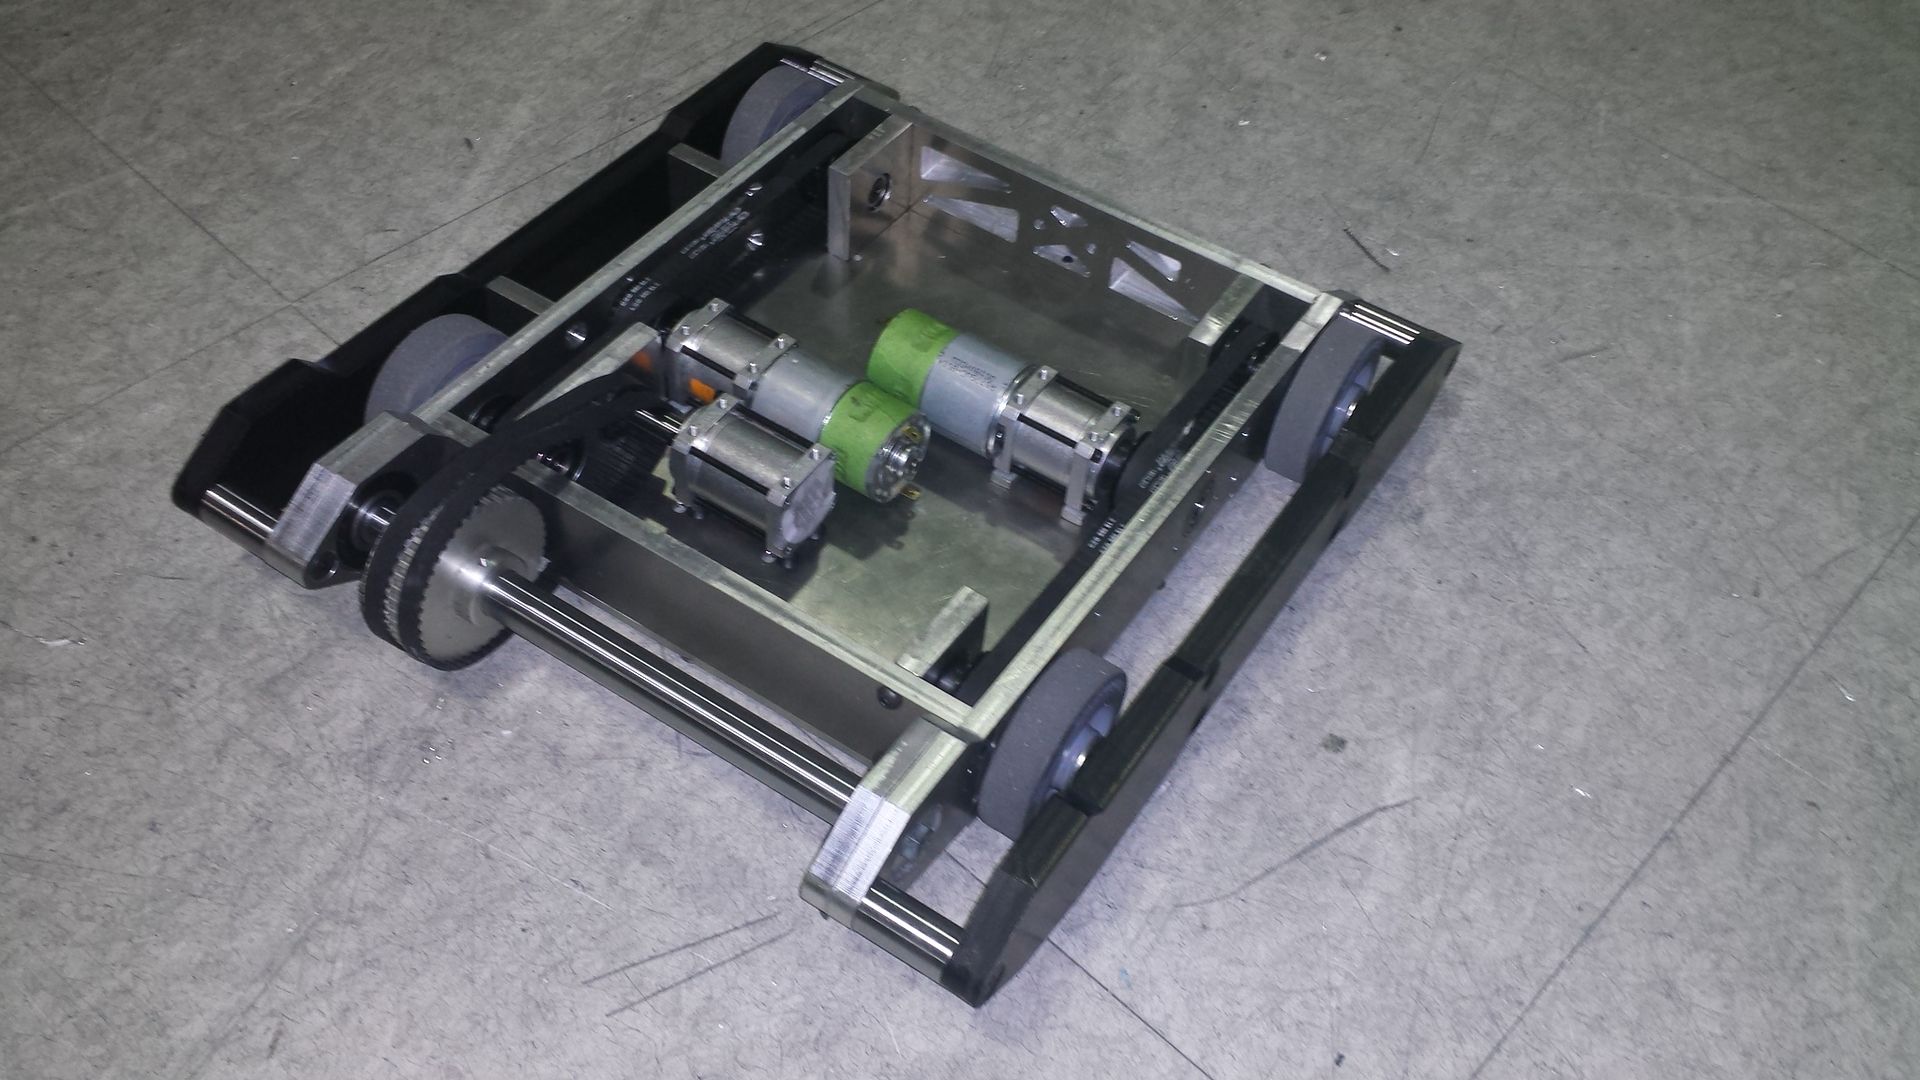
Wired it all up, one day i am going to design a robot purposely around having the neatest wiring possible haha >_>
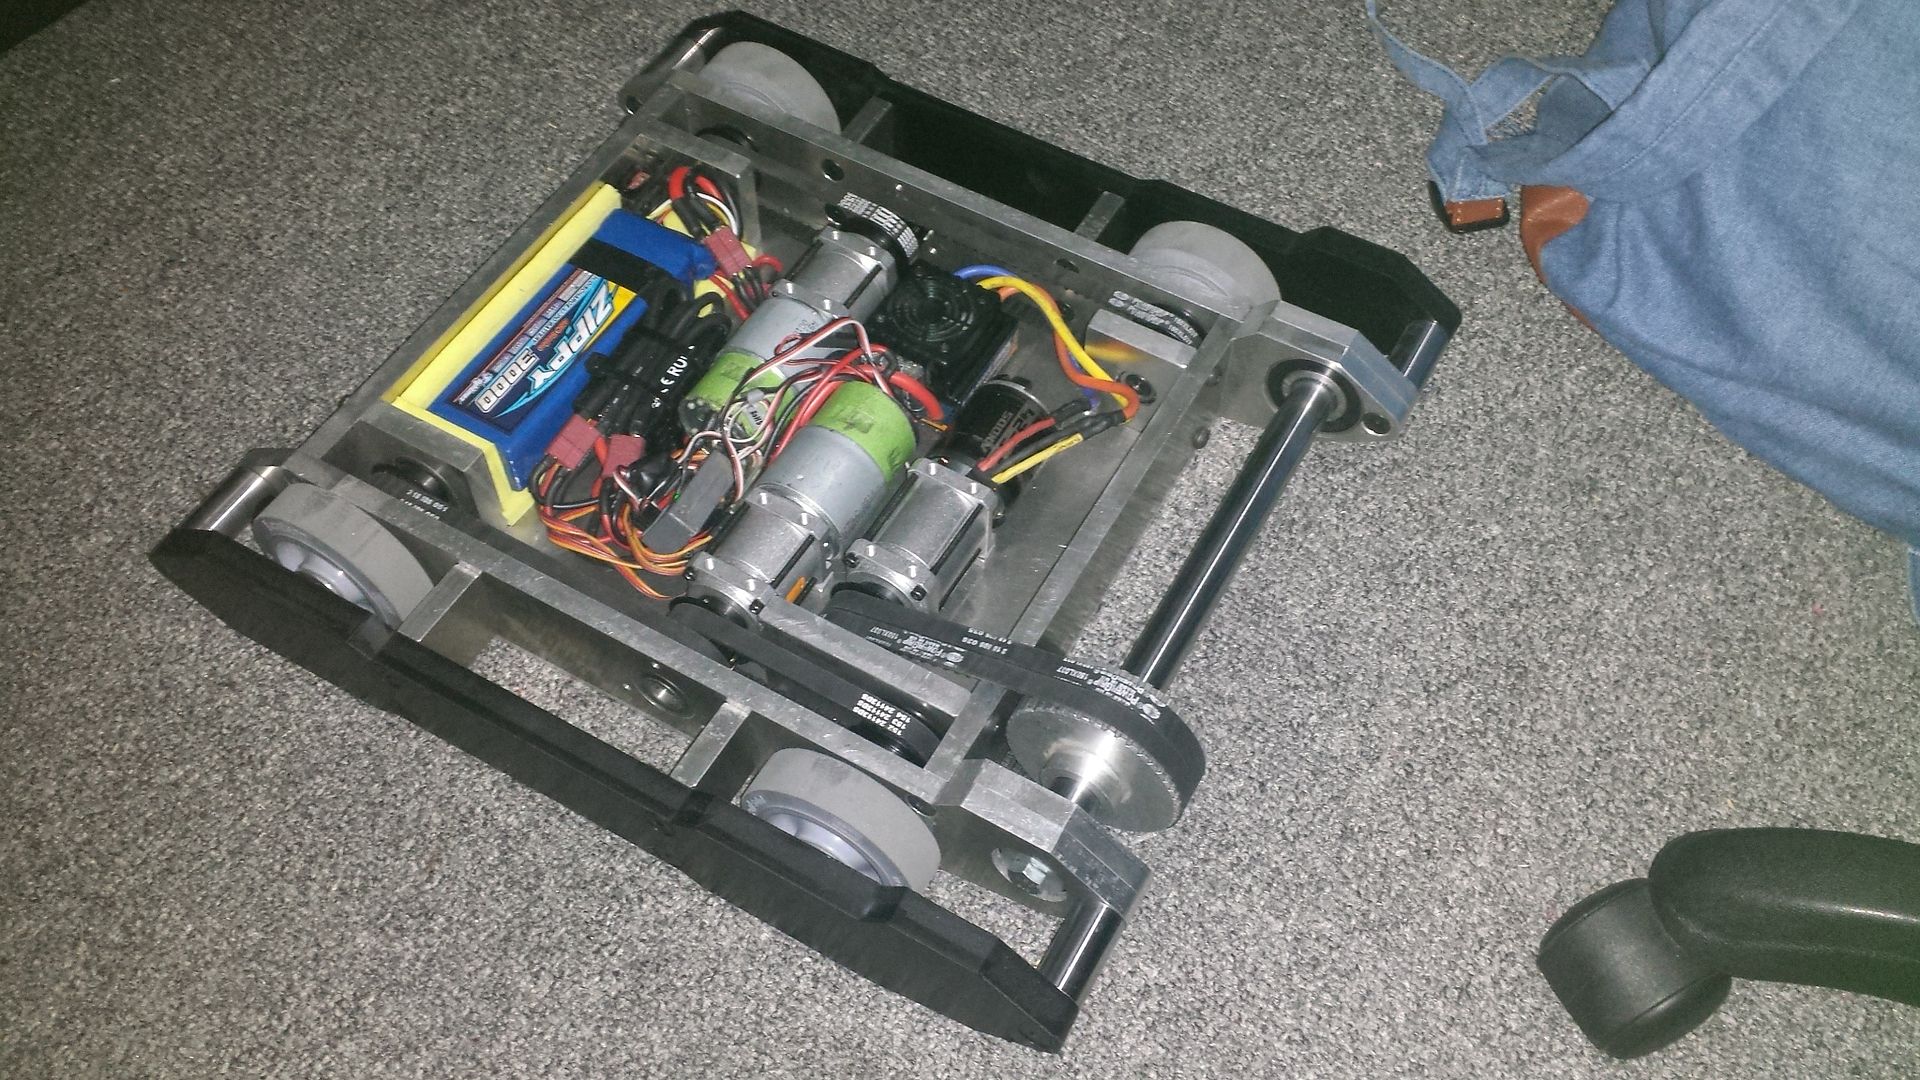
Top cover with smaller removable hatch to get to the battery quicker and yes the grains on the Aluminium run different ways and it bothers the crap out of me but ah well 
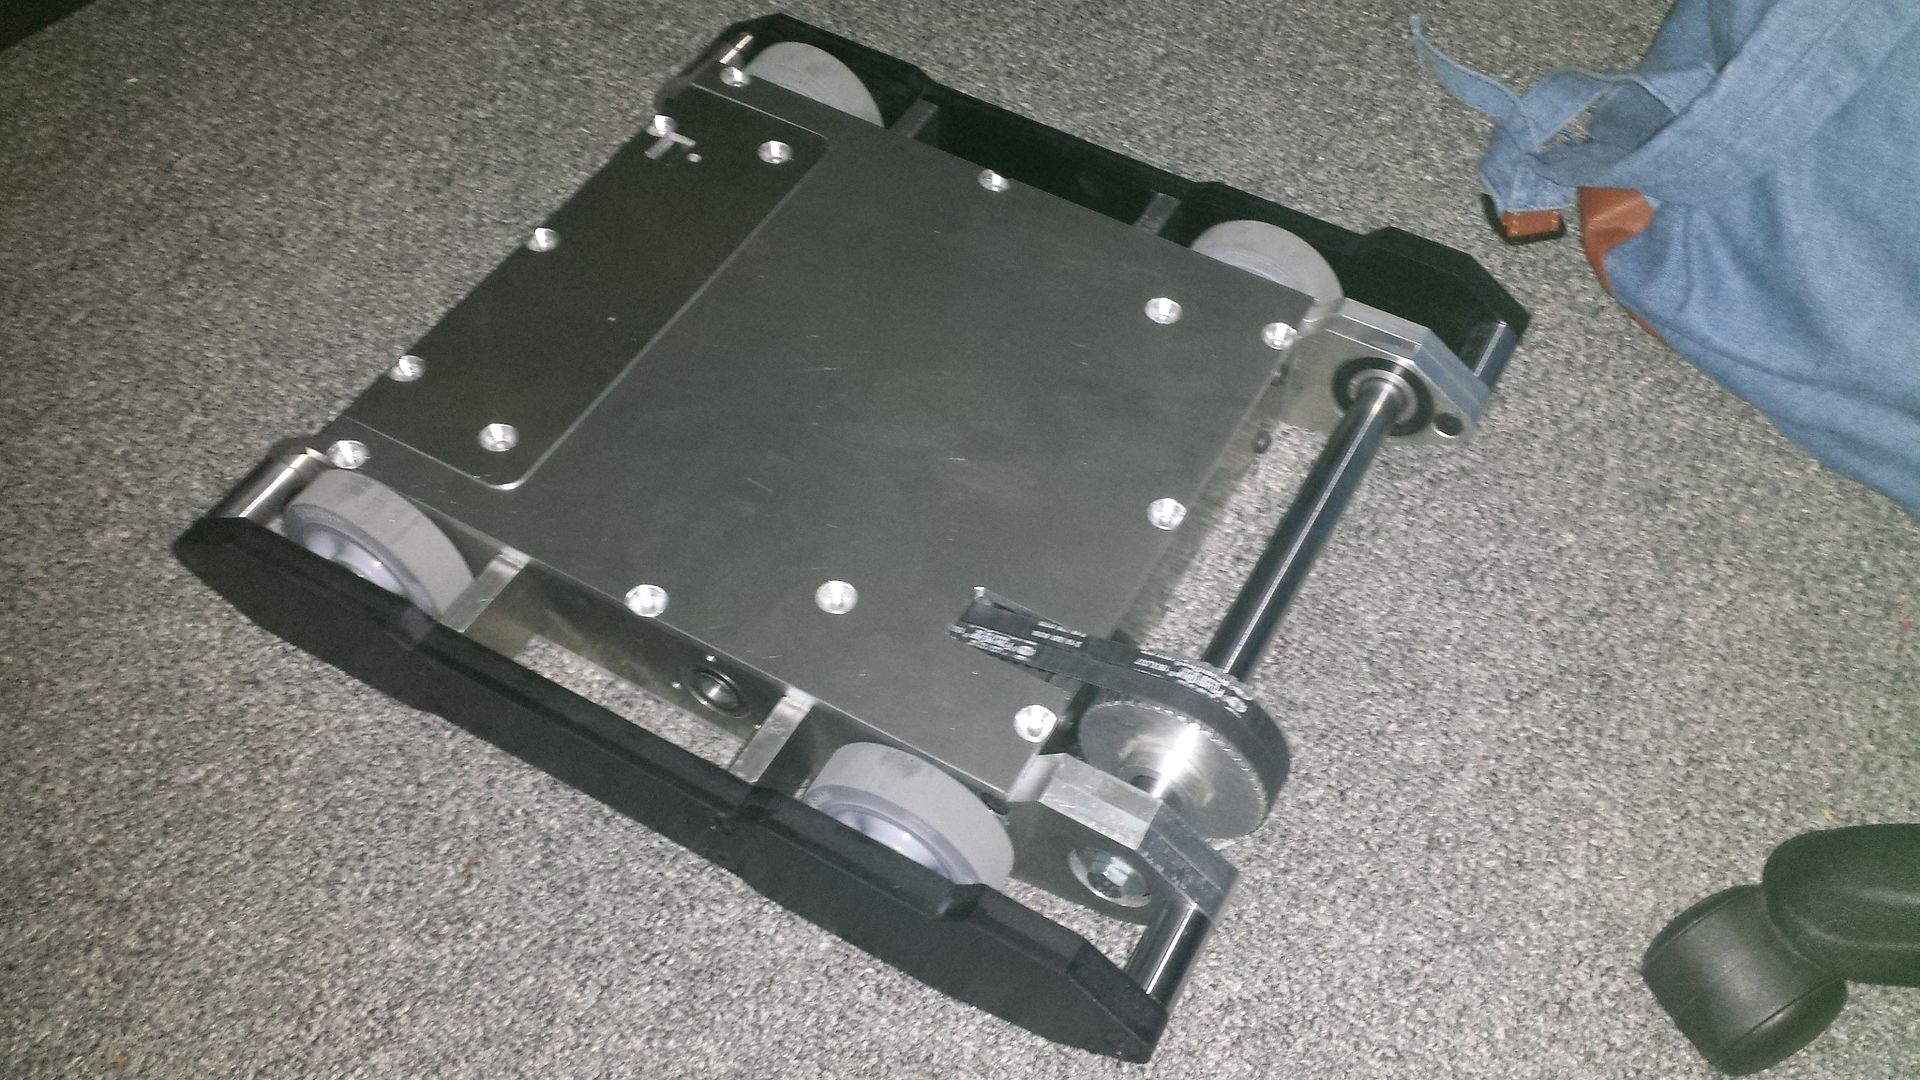
so yeah thats it so far about 15 hours work, if i get fired i will be lost forever at making robots haha.. oh and it drives nicely but didn't get a video yet as my camera was flat at the time.
Left to do is drill all the holes for the top cover and design the front wedge and sportsman forks then get them cut out and put on 
Photo of the 3mm test wedge:
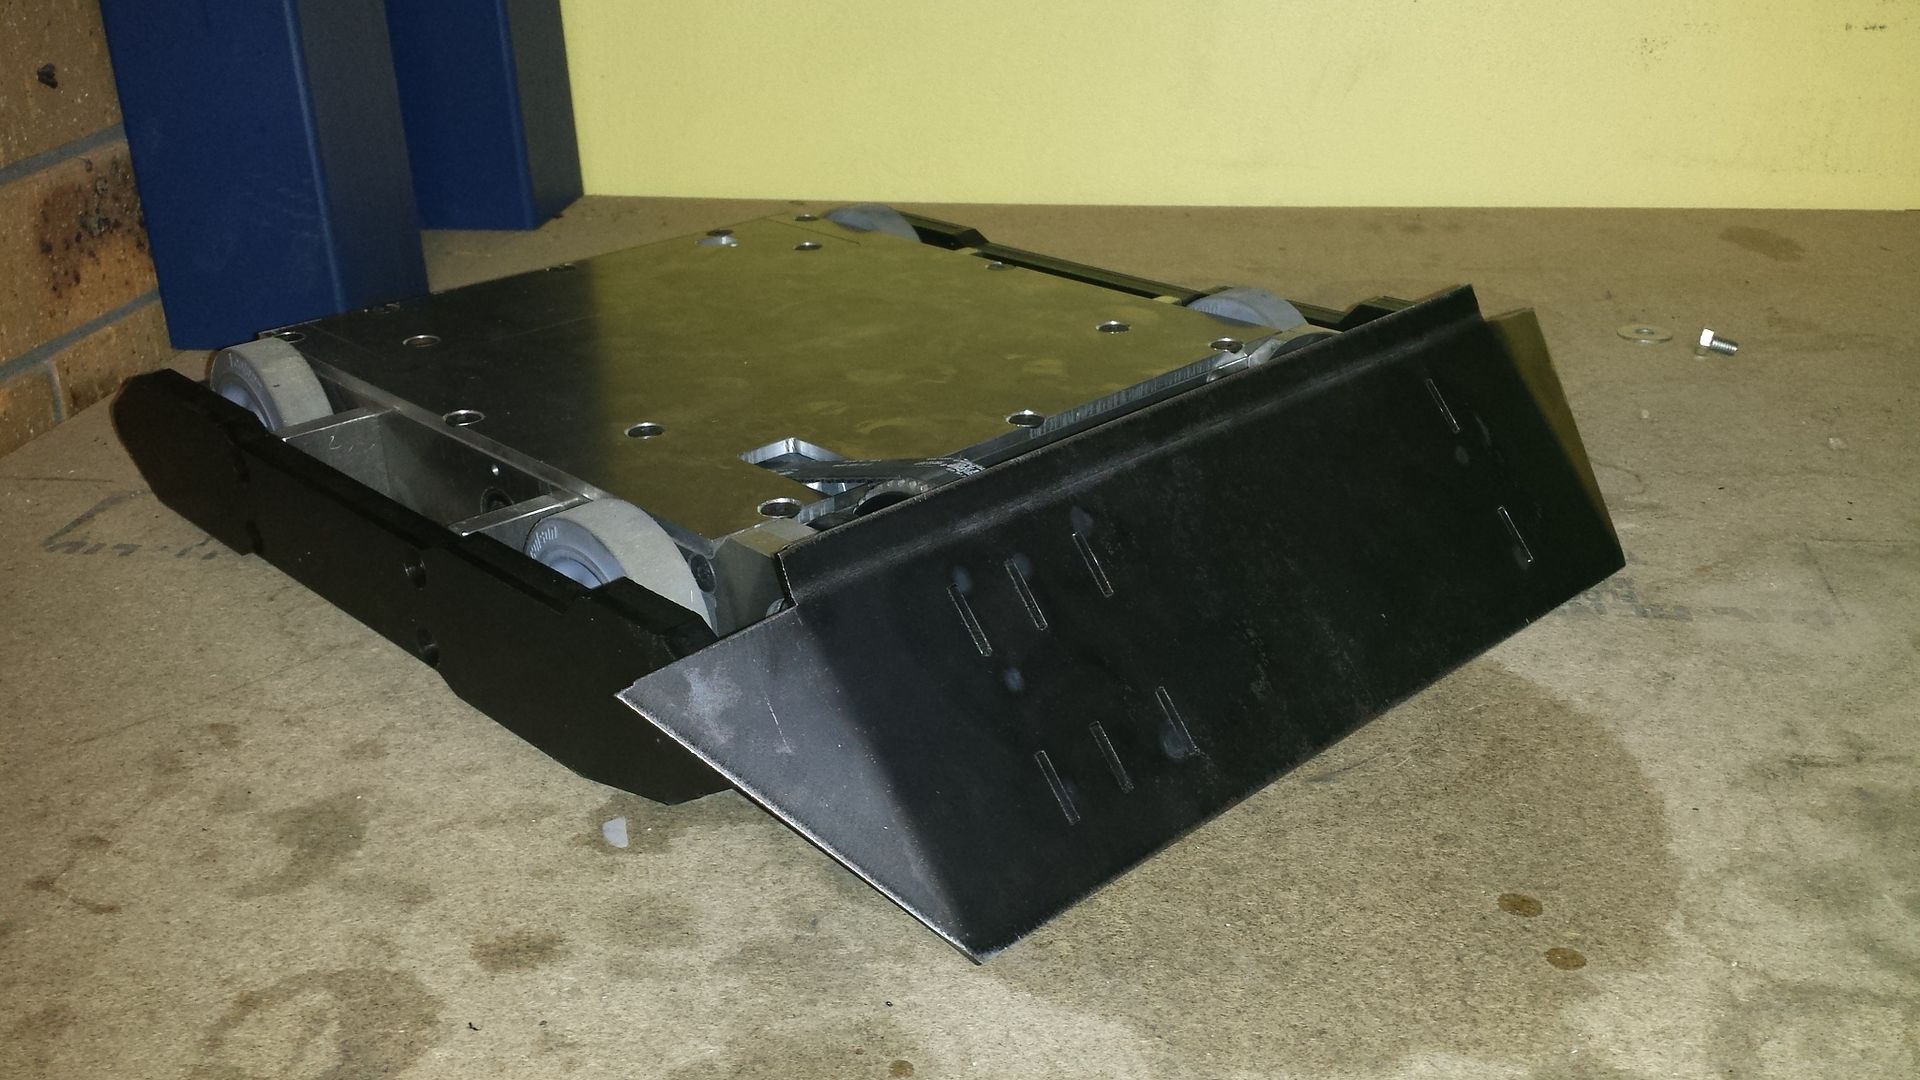
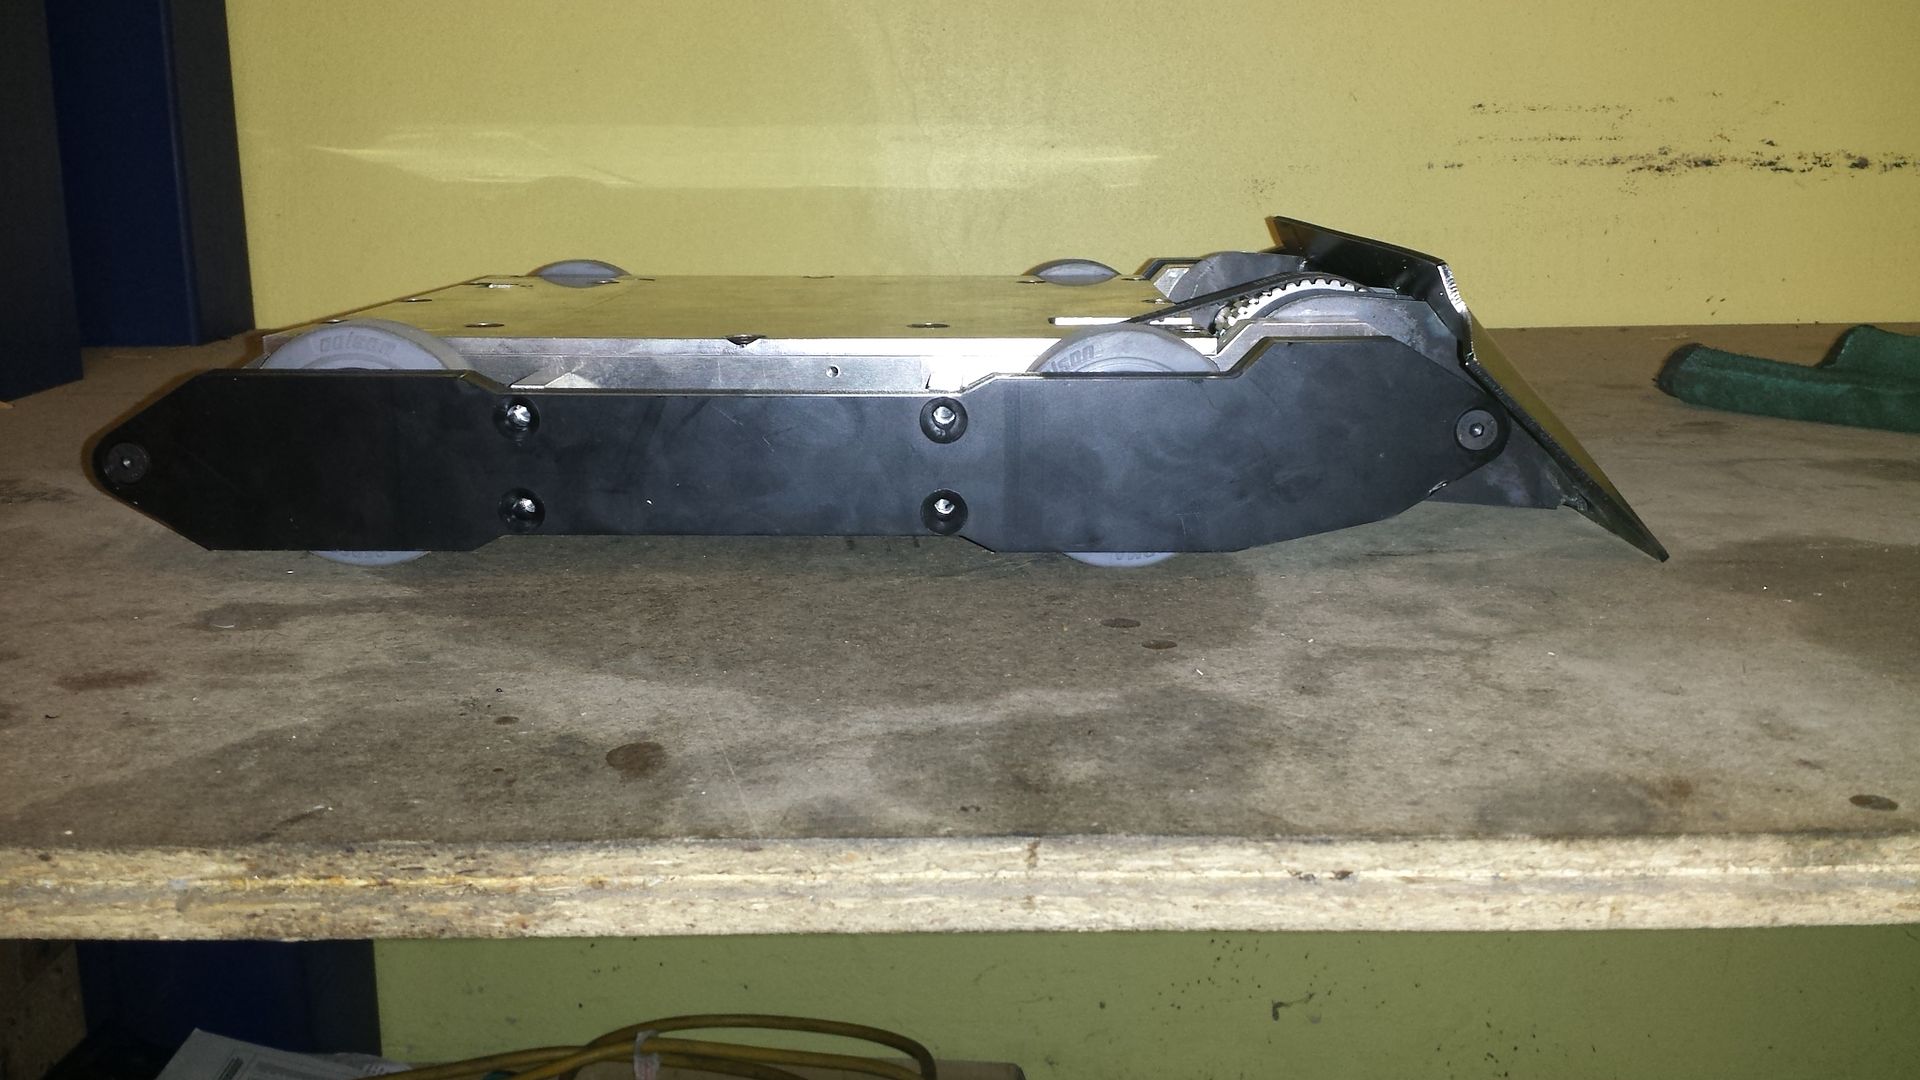
For the Sportsman Class will just have 2 forks as the lifting arm, designed in a way to prevent other lifters getting underneath when the forks are down atleast.
Another addition I am working on is getting the hell away from stick radios, after the years and years of using a pistol grip radio for RC cars and watching my own fights over and over face palming at how bad the driving is due to massively over correcting with the sticks its time to see if i can develop a pistol grip radio with a 3rd proportional channel ie UP and DOWN controlled movement. I see many pistol radios which are 3 channel only have a on/off 3rd channel.
So my idea is firstly to see if the on/off 3rd channel can be swapped out for a potentiometer to get proportionate control forward and reverse.. i Imagine someone here would probably be able to tell me whether it would work or not..
IF it does fail then ill just simply rip a board out of a 4+ channel stick radio and fit it to pistol grip radio with a XBOX/PS toggle (small, has 2 POTS per toggle and has a return to centre spring) around the thumb area
and lastly a video (wedge is just skirting atm, have yet to attach it to the pulley and probably wont until i get the complete wedge, also using a pistol radio so slightly less horrible driving  ) )
https://www.youtube.com/watch?v=NapxRWDDAvc
Little bit of progress with Voli.. mostly just been waiting on some laser stuff to be delivered which arrived today.
Added some extra bracing to the front section of the frame.
Decided to change from using a bearing and just run bushes, gives more material in the front supports to make it as rigid as possible.
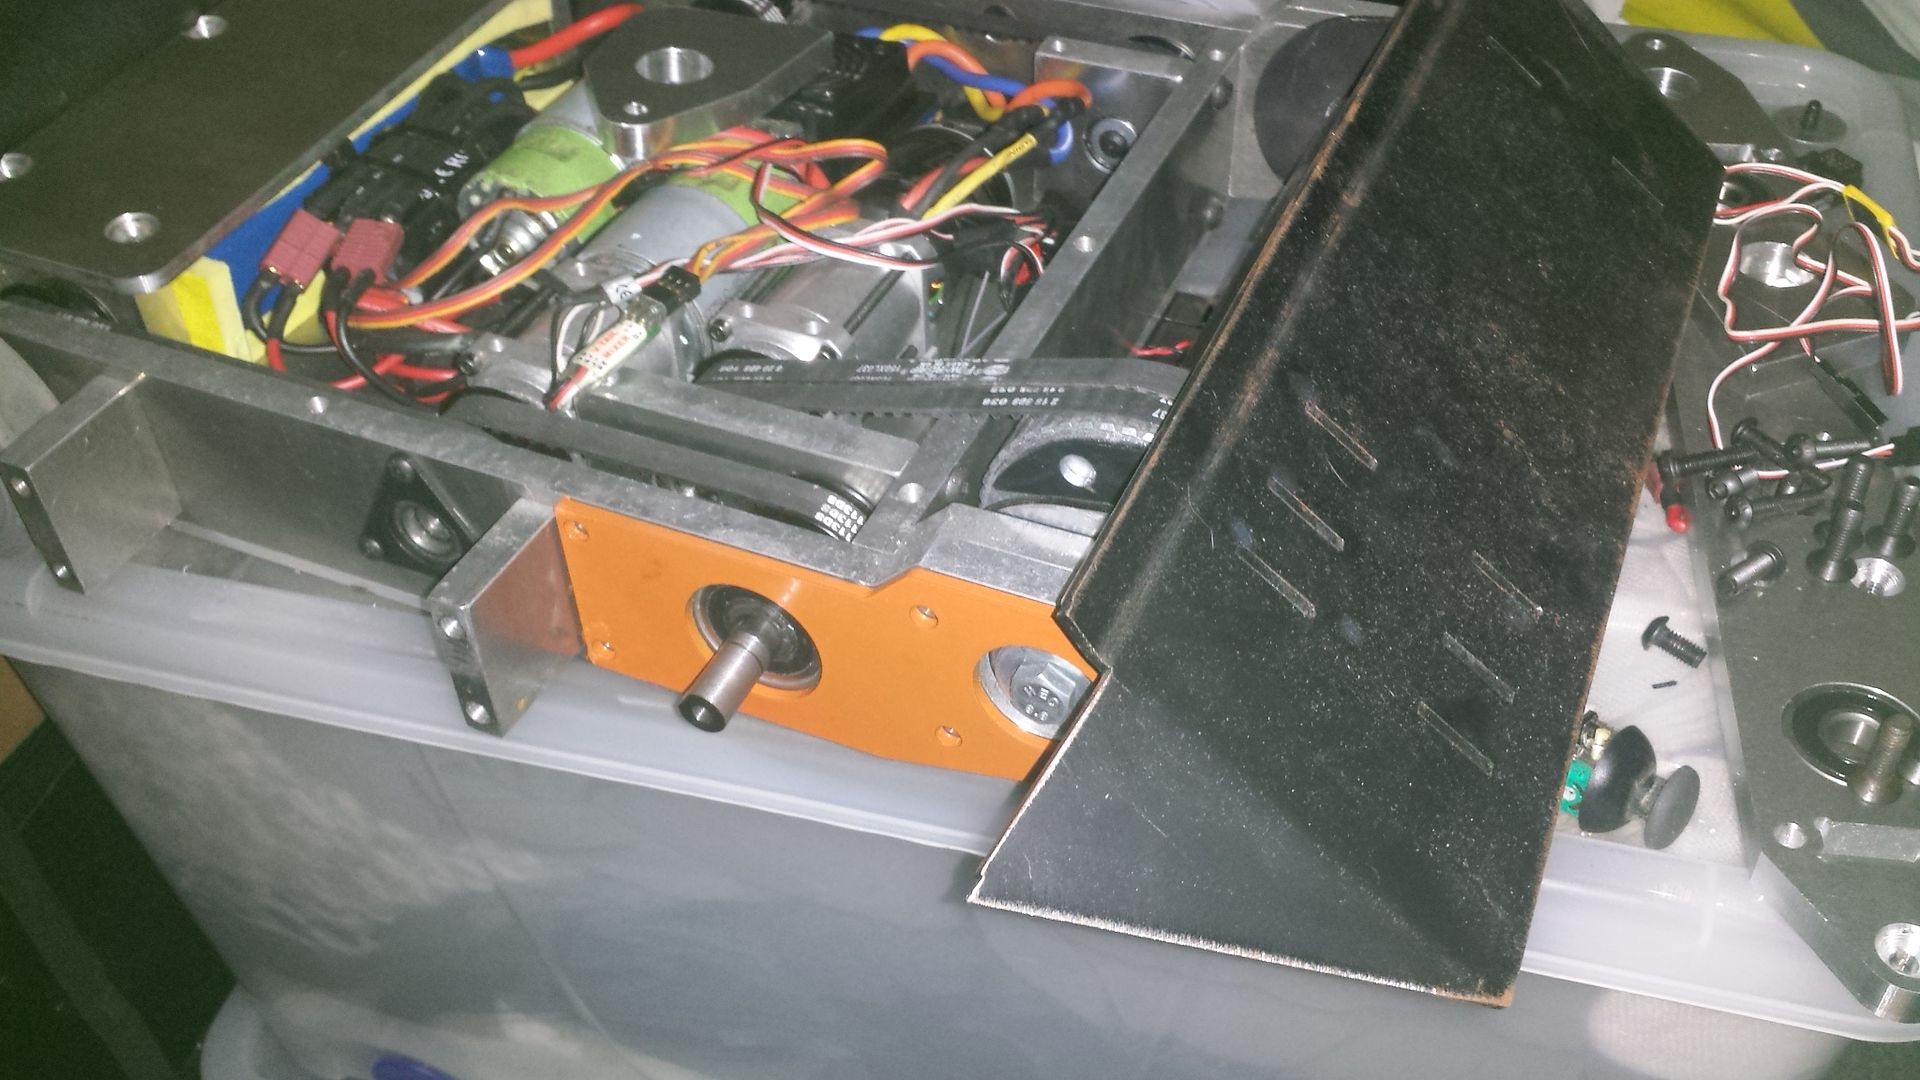
Emailed a bunch of laser cutting places to find the cheapest to get wearplate supplied and cut. Action Laser Cutting in the WA ended up being the best price wise for 6mm Hardox450. Also they appear to have sent extra parts for some reason, only ordered enough for 1 wedge and got 1 extra wedge and 1 extra support of each type, looking at the parts im guessing due to the extra ones not being cut very well so thats nice of them
Spinner Class Wedge:
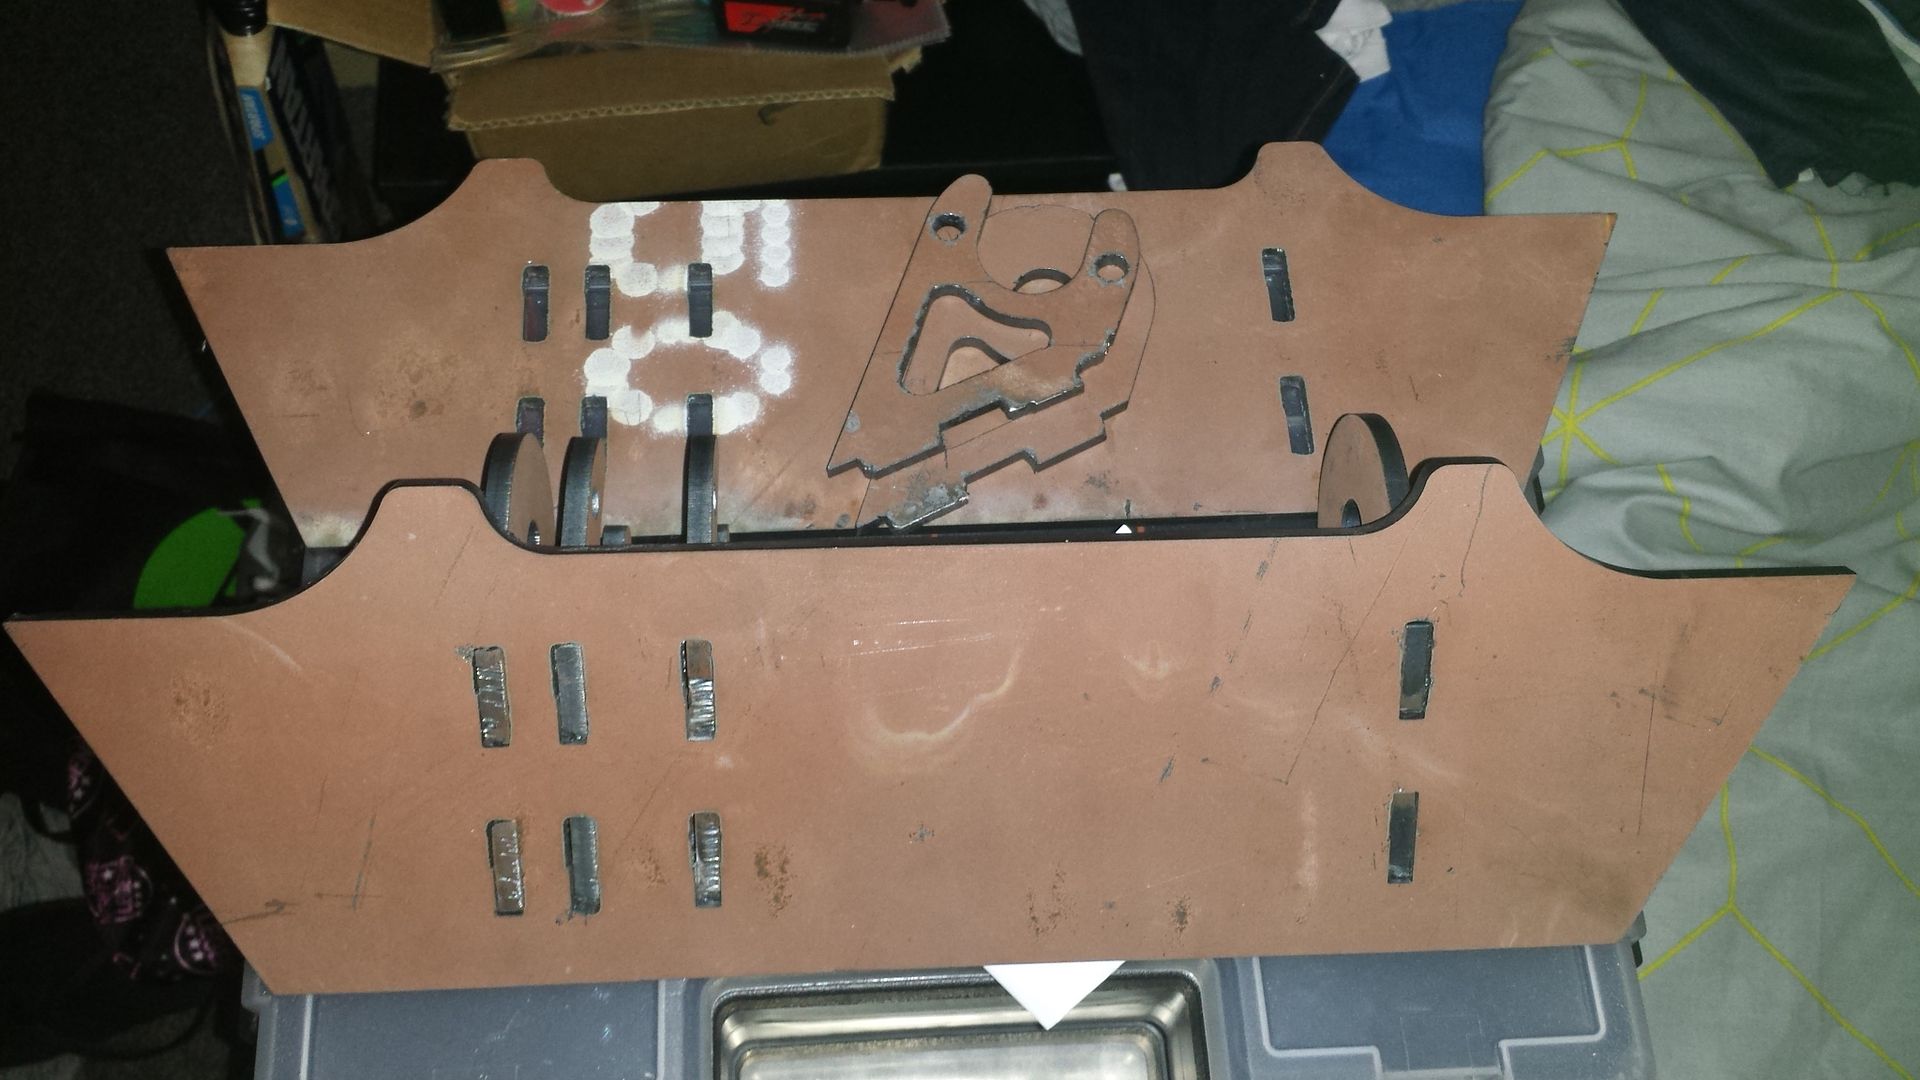
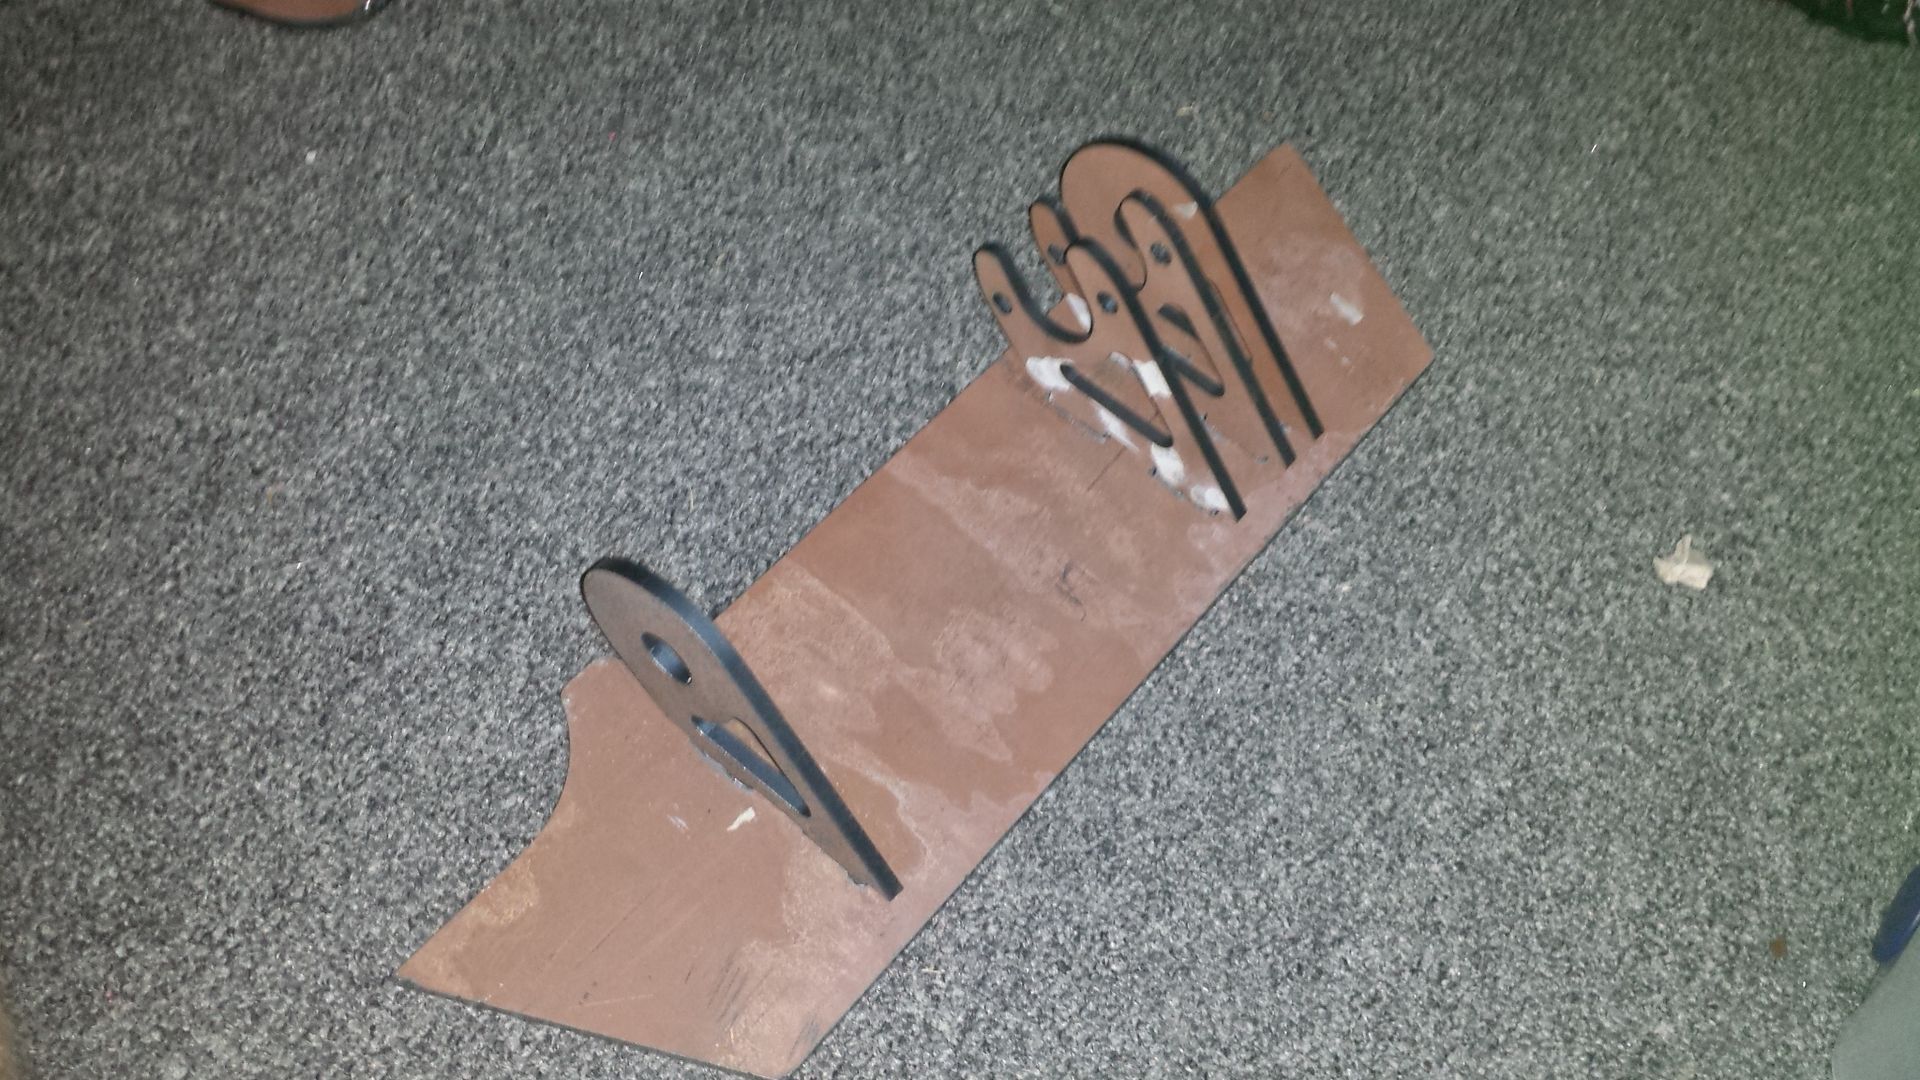
Edges will be bent like the mockup wedge above.
Last thing i have been working on is a new controller to get away from using stick radios which i am just not very good at using due to using pistol grip radios for RC cars most of my life.
Sourced this radio from hobbyking, 4ch pistol grip with gyro intergrated RX (havent played with that but might come in handy one day)
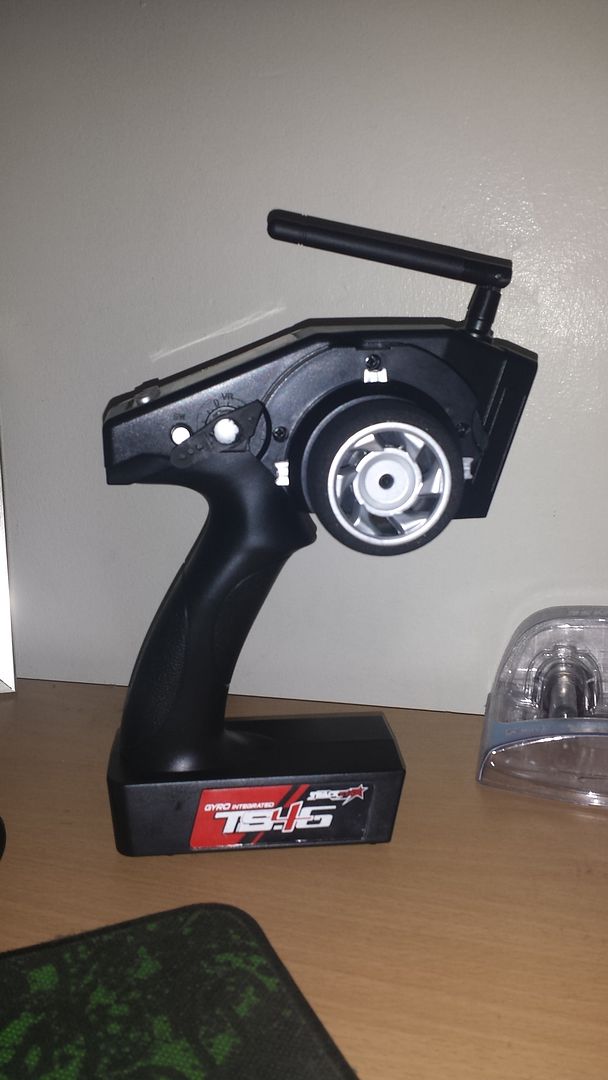
the 2 extra channels are 1 on/off switch and the important one is the variable knob.
just have a servo horn on it atm so i can reach it with my thumb but toying around with ways to get it to return to centre on its own might come up with a nifty 3d printed design
left to do:
-Weld up new wedge
-secure all the wiring and internals a bit better
-design sportsman class lifting arm
looking forward to next years season 
Been a while since an update.
Hadn't touched Voli since last year and with Vivid coming up it was time to drag it out from under the bed and finish it.
All that was left to do since last time was to make a sportsman legal lifting arm.
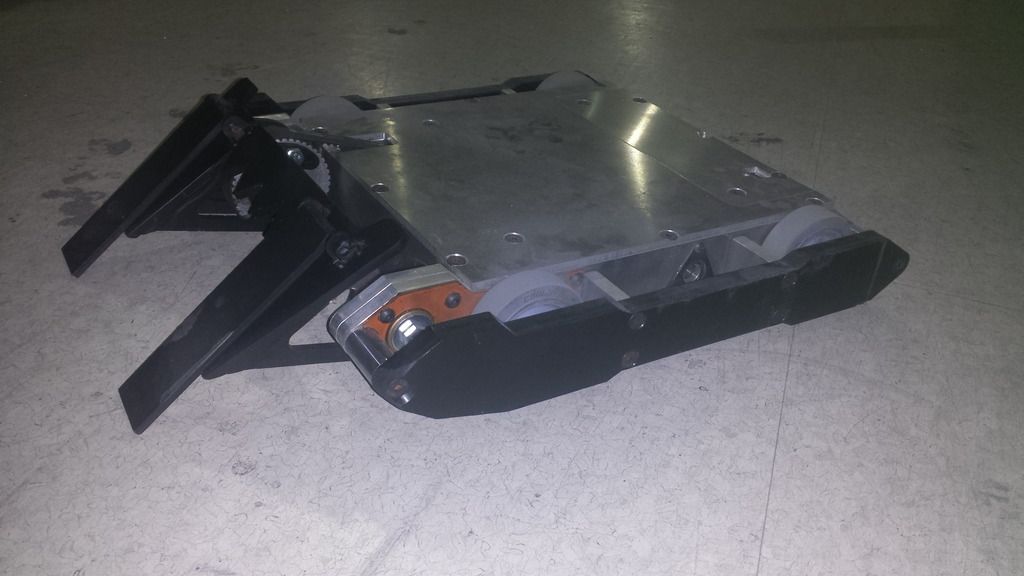
Also I had an idea of changing how the lifter functions instead of how pretty much every other lifter works ie controlling the speed and having to return to the correct positions manually or using limit switches which i dont believe can be done with brushless anyway.
So into the world of Arduino programming I went and with a lot of help from Steve manage to come up with a simple PID controller to operate the lifting arm to control its exact position like an RC Servo.
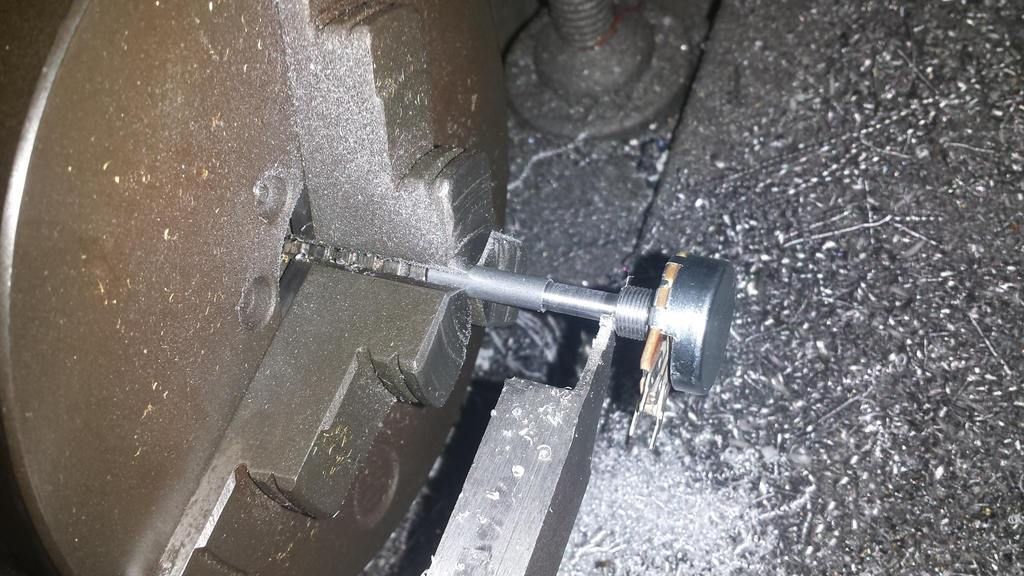
The setup uses a potentiometer on the end of the gearbox shaft as essentially a shaft encoder and well I imagine most people on here know a whole lot more about PID controllers then I do so get the jist of what the end result was.
The lifter is on a ON/OFF button on the tx, I had it on a variable position channel but I figured I only really need full up anyway.
Will pretty it all up with some paint and decals so it looks good for the crowd/videos
and now for the next 2 weeks it just lots of driving practice, it gets a mad 4wd drift going on the workshop floor.
https://youtu.be/FGa4Hm2ds8g
_________________
Barton Robotics Youtube Channel:
https://www.youtube.com/user/dyl30
Barton Robotics Facebook Page:
https://www.facebook.com/BartonRobotics
|
 Sat Jun 11, 2016 1:22 am
 |
|
|
Dylon
Joined: 09 Nov 2006
Posts: 631
Location: Newcastle, NSW


|
now thats sorted.. an update on both bots and an event report.
Start with Voli a little low down on what changes were made for the event. Originally this robot was built for the full class comps sporting a huge 6mm hardox wedge but having to fit into the sportsman rules that was changed to 2 forks. After some testing it was discovered that if the forks went below just touching the floor it would lift the front wheels off and the whole thing drove horribly so the solution to that problem was to allow some backlash to allow the forks to skirt on the floor rather then pushing on the floor. As you can imagine that worked fine but then after having built previous lifter designs and remembering the pain of having to attempt to reposition the lifting arm by just controlling the speed of the motor and trying not to jam the arm on the frame in the middle of a fight while your thinking about a thousand other things was just something i did not want to have to deal with this time around.
So the idea of turning the lifting mechanism to work like a RC Servo where you have complete control of the position of the arm rather then just the speed it rotates came about and the best way to go about this was to make a PID controller using Arduino. Now i have zero knowledge on using an Arduino and well coding all together but with a few weeks of research and tonnes and i mean tonnes of help from Steve managed to piece together something that seemed to work how it was designed 
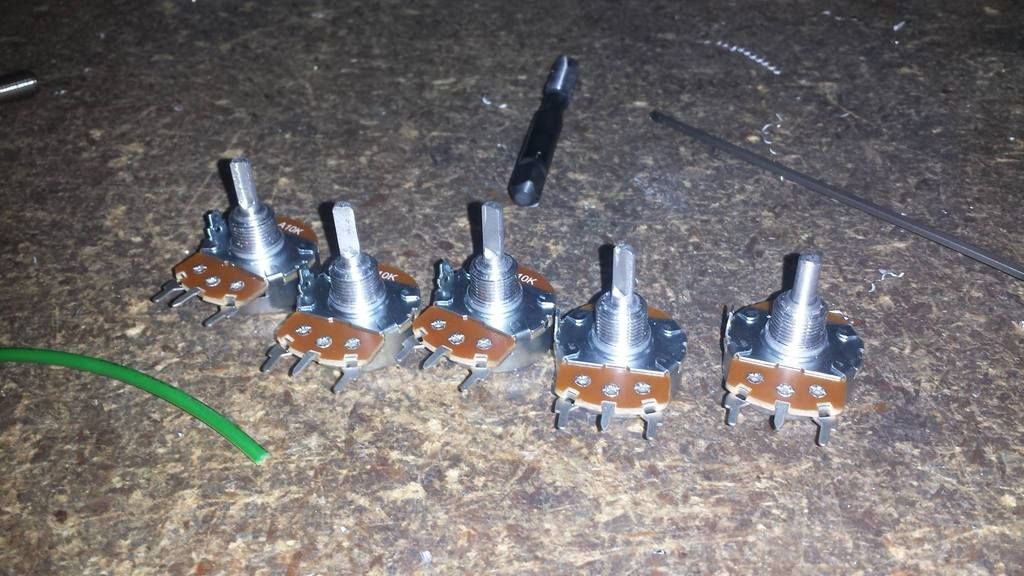
The setup involed fitting a potentiometer to the end of the gearbox output shaft acting as a shaft encoder, this is what tells the Arduino the position of the motor, now being only 270 degree rotation pots and only being available with 1/4" shafts I threw a few in the lathe and well made a few spares in the event that they decided to spin more then 270 degrees >_>
so as you can see in the last video in the above post at the press of a button on the transmitter the lifting arm goes to the up position then at another press it returns to the down position, easy as that 
The last change was adding these cute little feet that i doubt anyone would have seen at the event as they were hidden underneath
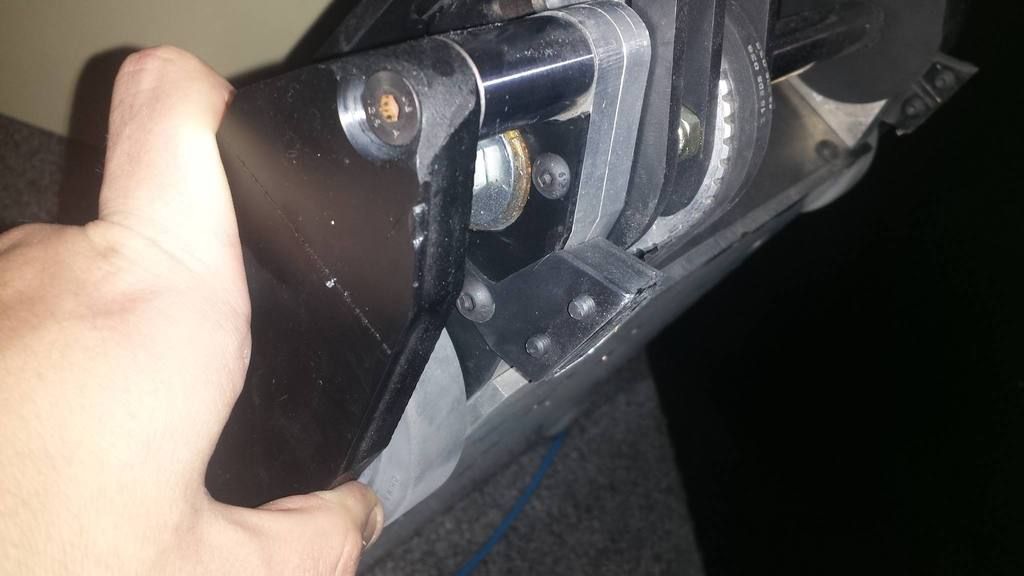
Apart from getting caught on all the giblets from other robots on the floor they worked great, allowing to pick up robots with the furthermost point of the lifting arms and not nose dive keeping all 4 wheel on the ground for maximum traction.
So what happen at Vivid well Voli ran perfectly all event, drove like a dream how good are P60s! much love.
The only issue it had which happened in every single fight was when slamming robots into the wall the timing belt on the lifting arm would jump a few teeth and because of the PID setup what it thought was the correct position was actually wrong because it had slipped teeth. The solution for that is 1 less stretchier belts and 2 an idea Aaron mentioned that Ellis did with his timing belt lifter was to had a tensioner that wrapped the belt more around the pulleys allowing more teeth to bite helping it not slip under impacts, so will see how that goes.
Brutus ran decently, had a few electrical problems at the start of the day but once that was fixed ran solidly for 3 minutes straight with plenty of axe blows. Could have very easily pinned its opponents in a corner and went berserker with the axe but being a show event a few cheaky shots then backing away for a taunt seemed the way to go 
I will most likely part ways with the current version of Brutus as Adam is very keen to design and build something even better, i want to see axe pierce through top covers 
Event was good fun as always, after having to do so many damn interviews! and being asked the same questions like how long have you been doing this etc and i said eh you know only 10 years, afterwards I was like wow that is a long time I was only 13 when i remember googling building a combat robot and i stumbled across this forum and going to events in a dodgy suburb in sydney in some guys backyard (who was awesome to have put that much effort in to allow even that to happen) haha but to see how far we have come, there are plenty of those here who have been around way longer and its crazy to think about but so cool at the same time, with all the hard work Steve and Co have and are putting in things will just keep getting better and its great to see all these new people getting involved and the biggest thing is you never stop learning in this sport, you always gain from an event all these new ideas and knowledge to build something better and even cooler which is definitely what draws you in and makes you so addicted.
_________________
Barton Robotics Youtube Channel:
https://www.youtube.com/user/dyl30
Barton Robotics Facebook Page:
https://www.facebook.com/BartonRobotics
|
 Sat Jun 11, 2016 2:46 am
 |
|
|
|


 RoboWars Australia Forum Index
-> Builders Reports


