|
|
|
|
|
|
|
|
|
|
Nick
Experienced Roboteer

Joined: 16 Jun 2004
Posts: 11802
Location: Sydney, NSW


|
I used the ERA CC50A urethane and was happy with the results. When I used an additive to reduce the hardness, the results were terrible; the wheels picked up far too much crud from the floor and the urethane tore too easily. I also tried a 65 durometer urethane but it had less traction on Jeff's old arena floor. wWith a higher traction painted floor, the harder urethane might wear better and still grip. There is also a new product RT60A that might be an all-round compromise.
Keep in mind that ALL the cold cast urethanes from every manufacturer are relatively low performance. The high temp urethanes all have vastly superior performance but demand the pro mixing systems. If we ever get access to a hot-mix urethane system, I would definitely be interested! Another thing to remember about cold-cast urethane is that it takes several days to fully cure at room temperature. I had to build a curing oven to get the urethane to cure in a reasonable time.
For the hubs, I found that the CC urethane did not stick well to plastic or aluminium, even with a bonding agent. I used a combination of deep rims and radial grooves to stop the cast treads coming off or spinning in place; I never had a tread give out, even when deeply cut. I would go with your 2nd render, but with much deeper radial cuts.
If you want to go in a group urethane buy, I could definitely be interested in re-making some of my old wheels...
|
 Tue Sep 10, 2013 7:05 pm
 |
|
|
dyrodium
Experienced Roboteer

Joined: 24 Aug 2004
Posts: 6476
Location: Sydney
|
Cheers guys for all the valuable info!
You're spot on Nick, in the world of reaction casting the demolding times and strengths they can get now are unbelievable...  There was a mixing gun on kickstarter some time ago that was designed to fit on the end of a cordless drill. Would love a tool like that! There was a mixing gun on kickstarter some time ago that was designed to fit on the end of a cordless drill. Would love a tool like that!
I ended up going with the flexicast45 pretty much on availability and price - $33 for 1KG of resin ain't half bad and I wasn't in a rush to demold. Shame it's an opaque yellow, tried to colour it to orange but didn't put enough pigment in.
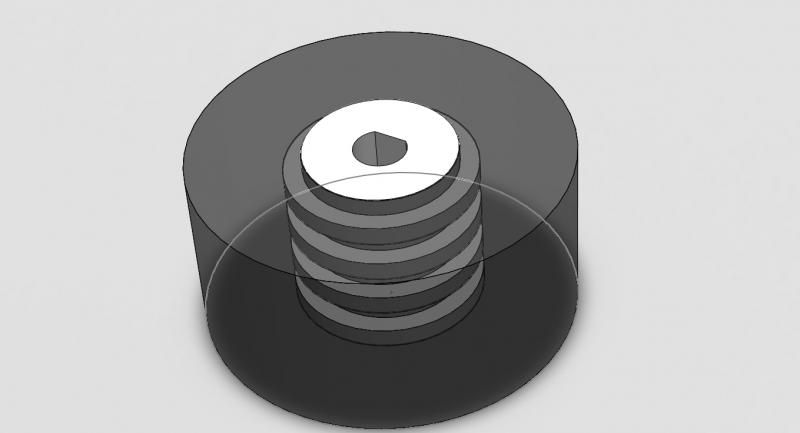
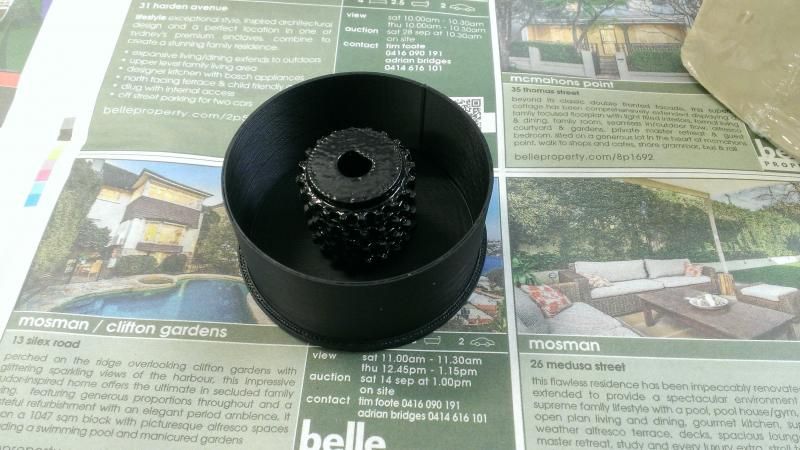
This is the mold I made, so it's got a base which has a rim cut into it, and a peg to centre the hub, the rim of the mold is a super thin wall 3D Print and presses into the base, with some klean clay to stop any leaks (actually they went broke haha its called something else now).
Light coat of release went on the mold, then I scuffed up the hub and put it in place.
The mix and pour was uneventful, though I need a bit of practice pouring to stop bubbles, I reckon if I get into doing this more I'll make a DIY vacuume chamber to help release the bubbles. Highly recommend the 3 cup mixing method, measure part A and B in separate cups, then combine then pour into one final cup to ensure no unmixed resin makes it to your mold.
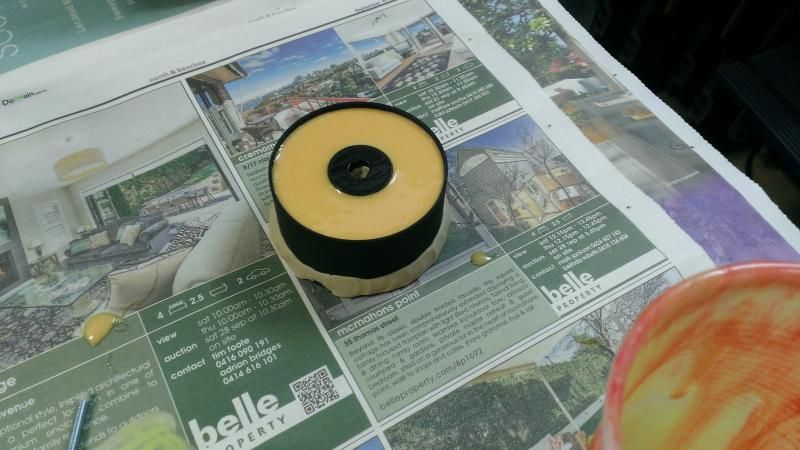
18hrs or so later... Need better tolerances on the hub centring peg to keep it locked down on the bottom a bit better, it was a bit too loose for this first test.
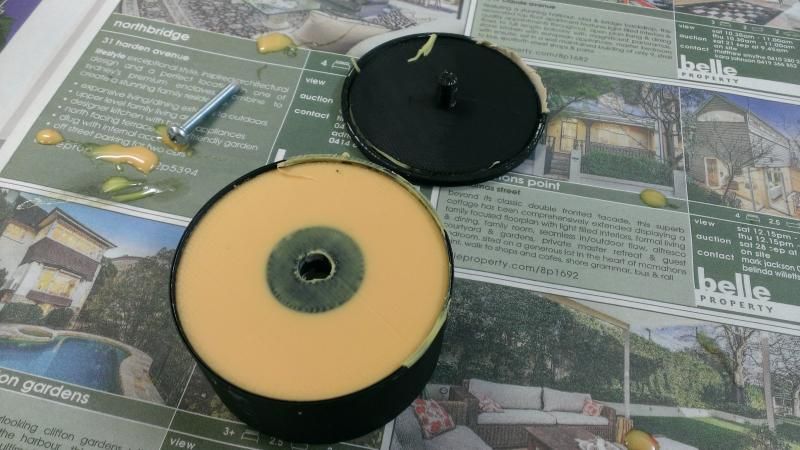
Wheel freed from mold jail, I split the outer ring in half to remove it, but am now thinking I could actually just design it with a split, plug that with klean clay during the cast and it'd easily just flex away - reuseable woot.
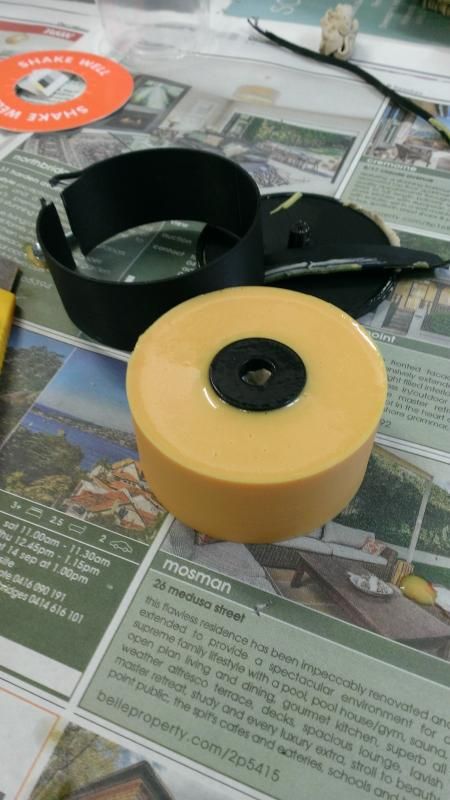
Emegerd wheel :3 Shame I've given up on coming with a new featherweight for this years nats >_> but if anything, I reckon this casting method has a huge potential for ants... going to try a set of ant wheels next. Need to do a bit of testing to see if the hardness of the rubber is suitable for wheels first.

_________________
( •_•)
( •_•)>⌐■-■
(⌐■_■)
YEAAAAAAAAAAAAAAAAAAAAAAAAAAAAAAAAAAAAAAAAAAAAAAAAAH
|
|
Fri Sep 13, 2013 9:59 am |
|
|
|
|
|
|
|
|
|
|
|
|
|
|
|
|
|
|
|
|

 RoboWars Australia Forum Index
-> Technical Chat
RoboWars Australia Forum Index
-> Technical Chat