www.robowars.org

RoboWars Australia Forum Index -> Builders Reports

Team Demon Robots - NSW
Goto page Previous  1, 2, 3 ... 95, 96, 97 ... 113, 114, 115  Next

Post new topic   Reply to topic
  Author    Thread
Glen
Experienced Roboteer


Joined: 16 Jun 2004
Posts: 9481
Location: Where you least expect


 Reply with quote  

You know, thats kinda my thoughts for the next version, whats the point of using expensive, tricky to get, tricky to handle CO2 if you are artificially limiting the power of the system.

Surely using a huge bore ram (100 +) with unlimited flow at ~300-400psi would be the go, no more arsing around filling CO2 and all this other such. Something to play with come the time anyways.

Got my 22kg of co2 today from BOC. only $67 which isnt horrendous but still not cheap considering. Grabbed some sheets of 3mm steel and fabbed up the arm parts. Plasma cutter is mah new fave toy <3

Its heavy at a bit over 2kg, but whatever. Long as its strong. i can always plasma more metals out later on if it survives. But this is how it came out without any grinding. Not bad for free hand plasma cutting. (the top piece is just plonked there thats why it doesnt line up Razz)


Gotta lathe up another hinge tube and chop some 1.6mm RHS to sit inside the front of the arm then i can welderate it all together.

Also grabbed these rockin bottle clamps from pirtek. So nice. Never again will i be a bitch to dodgy hose clamps.


_________________
www.demon50s.com - Minimoto parts
http://www.youtube.com/user/HyzerGlen - Videoooozzz

Post Sat Jul 20, 2013 4:21 pm 
 View user's profile Send private message Send e-mail Visit poster's website MSN Messenger
assassin


Joined: 27 Jun 2004
Posts: 1105
Location: SunshineCoast


 Reply with quote  

i think you may have miss the point about unlimited flow being a bad thing, but anyway... Rolling Eyes
_________________
Imagination is more important than knowledge. Knowledge is limited. Imagination encircles the world.
Albert Einstein.

Post Sat Jul 20, 2013 6:18 pm 
 View user's profile Send private message Send e-mail
Glen
Experienced Roboteer


Joined: 16 Jun 2004
Posts: 9481
Location: Where you least expect


 Reply with quote  

So i did! Should probably sit down and actually read instead of glossing over posts Embarassed But yeah i do get that any cv over what the system needs just translates to firing the unloaded ram to increasingly higher speed.

Although, i'd be curious to know if that just applies to firing the ram with absolutely zero load on it or with a flipper arm with say 20kg-50kg of bungy tension on it too however as it would be in the robot. Because building something with huge flow rate, really is just looking easier and cheaper than making do with off the shelf parts - $70 hydraulic hoses, $100+ taps, $50 bottles etc etc vs $50 of aluminium and machining time. Guess you could just machine the entrance into the ram body to an appropriate diameter tho.

Mario?
_________________
www.demon50s.com - Minimoto parts
http://www.youtube.com/user/HyzerGlen - Videoooozzz

Post Sat Jul 20, 2013 7:06 pm 
 View user's profile Send private message Send e-mail Visit poster's website MSN Messenger
maddox


Joined: 21 Dec 2006
Posts: 786
Location: Belgium


 Reply with quote  

One of the tricks we use in Hannibalito 3 is a "pulser", using the Burkert as a kind of regulator.
Just opening it long enough to get the best bang for the buck, and extend the amount of flips from the 12 oz main tank, and avoiding liquid CO21 issues. This means we have as much flips as an equaly strong 20oz main tank user.
Other advantage is limiting the strain on the frame as the ram "sees" only 400-500 psi in the end.


And Glen. Your flipperarm is a 2 kg sledgehammer mounted on top of your machine. I suggest, in my humble advisory role, that you try to lower that moving mass. Otherwise I suspect , you'll end up turtle every flip.

Post Sat Jul 20, 2013 7:08 pm 
 View user's profile Send private message Send e-mail Visit poster's website MSN Messenger
Glen
Experienced Roboteer


Joined: 16 Jun 2004
Posts: 9481
Location: Where you least expect


 Reply with quote  

PHEW where did the week go. So much crap raining down on me at once lol. Dat adult life. Forgot my new bikes nearly out of rego and frantically had to have it rebuilt in 3 days. All good now!

I forgot where i was up to previously, but this is what i've done.

Couldn't find the taps anywhere new for <$250 for all 3. The best ebay store in the world aka stores.ebay.com.au/Toolingstation?_trksid=p4340.l2563 tooling station provided all 3 in HSS for <$30. All of them are razor sharp too. Had a peek over the guys backyard while i picked them up, fuck me dead! he has SO MUCH STUFF IN THERE. Shocked

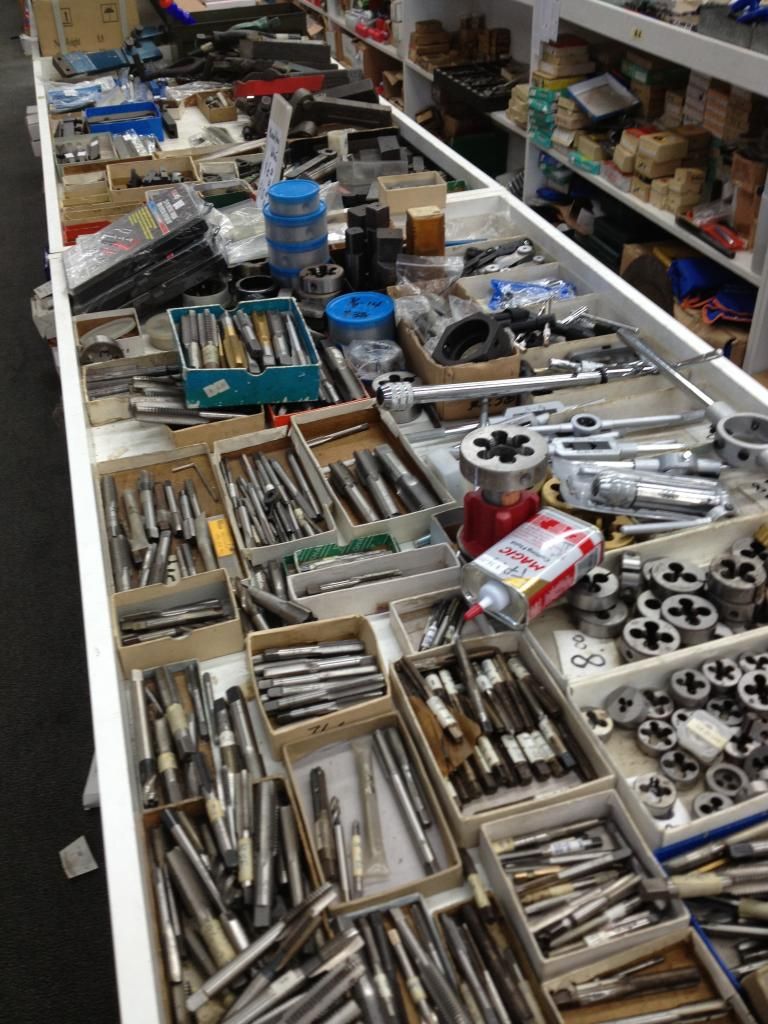
Next up was mcjing, needed a 15mm drill bit for the 3/8 bsp tap. $16 later and thats that. Have to say, everyone -needs- to go here for a shop if you own any machining tools. It's a heaven on earth. Here's 1x tiny bit of a table in there. Imagine this x 100. Place is huge and has everything. Great prices too compared to hafco.


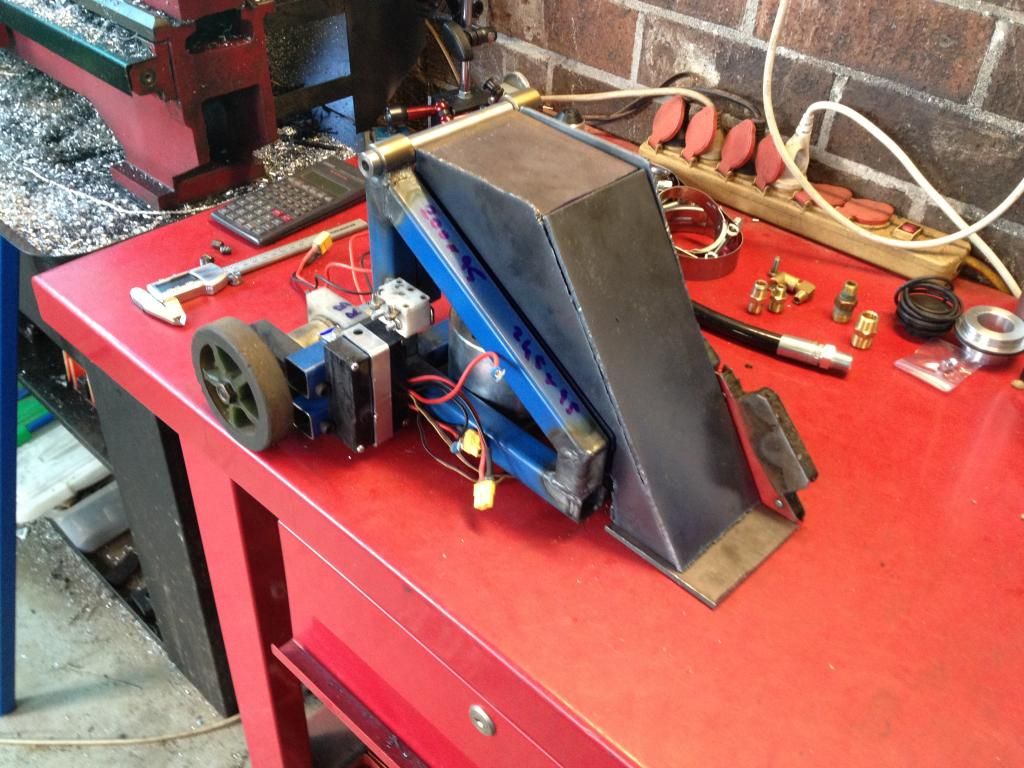
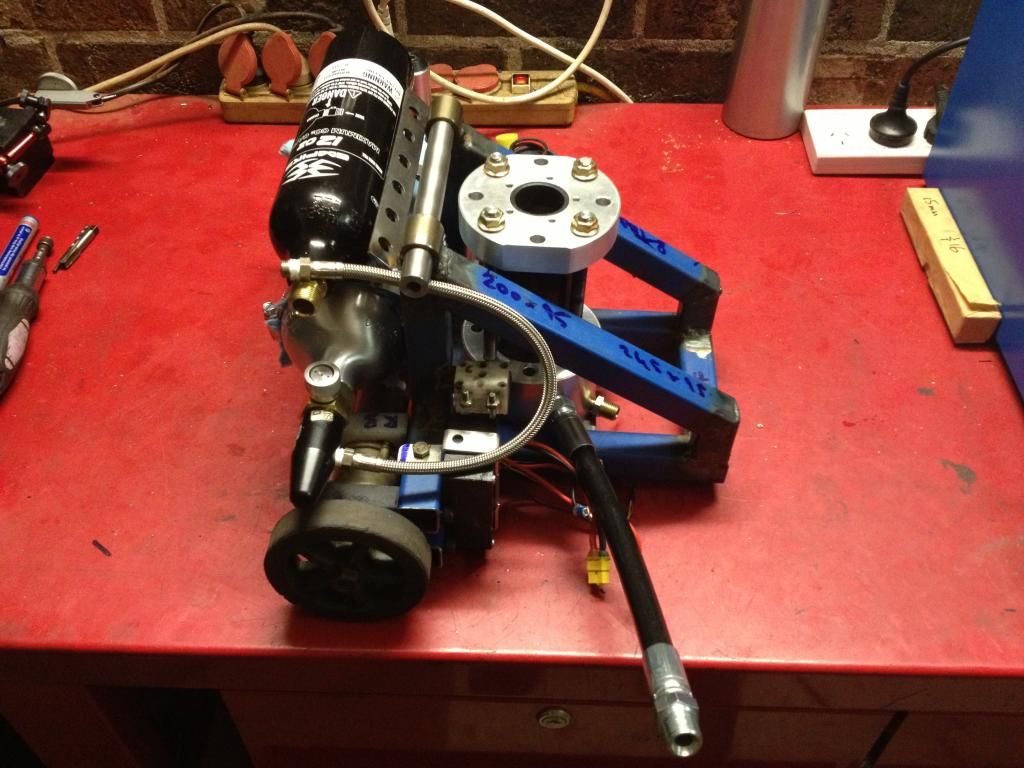
Anyway back to the robot. Got the drive motors swapped over for some 12v kmart drills. Quite odd, one gearbox had all metal gears, the other had plastic and metal. But they both have 4 screws holding the motor plate to the gearbox and a D shaft and pinion making swapping pinions super easy. not bad for $20.

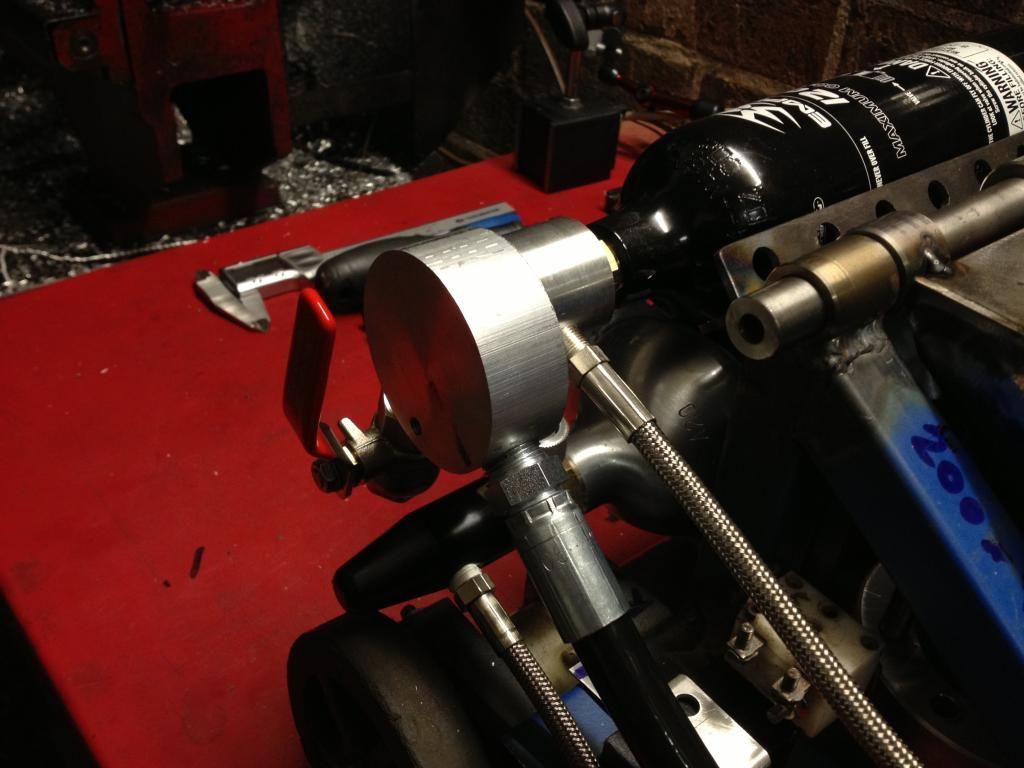
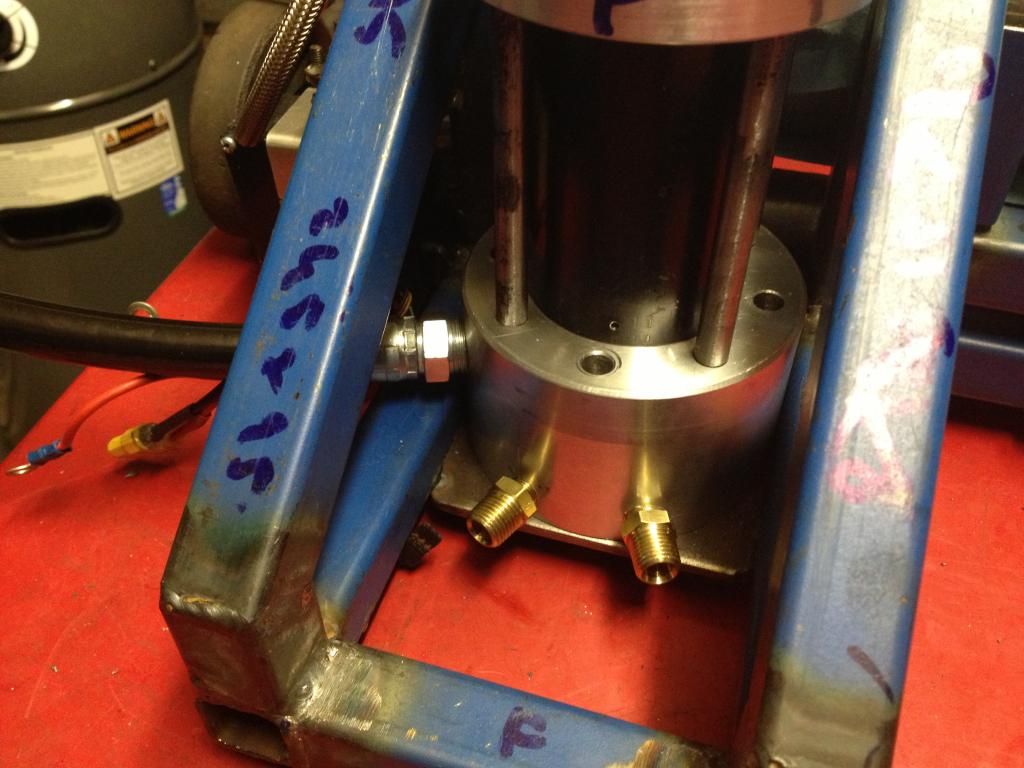
Both the bottles are mounted. Need to trim the top buffer mount down some but otherwise thats all good. Drilled and tapped all the holes in the ram. I accidentally tapped one of the 1/8 bsp holes to 1/4 and had to grab an adaptor, but thats good. means i can use a 1/4 bsp nitro valve for testing later Razz


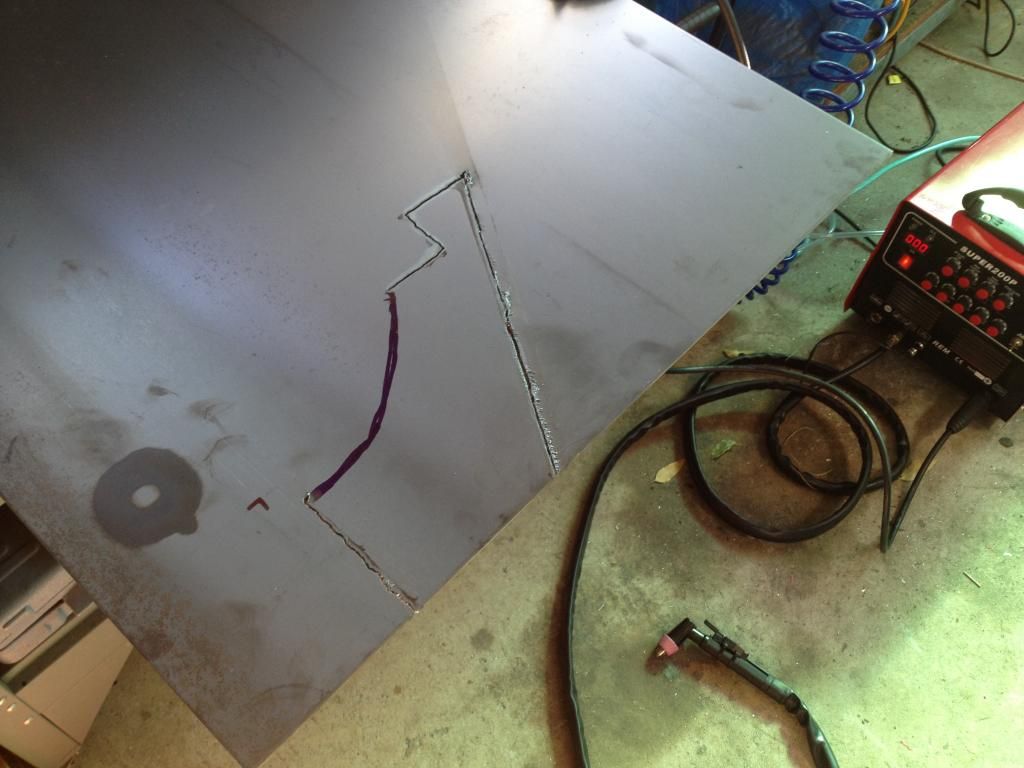
Flipper arms all tacked into place. Cut 500g out of it but still pretty heavy. Dont give a shit lol. How sick are plasma cutters though. LOVING IT. Just have to bolt some aluminium i beam into the arm and weld it all up.


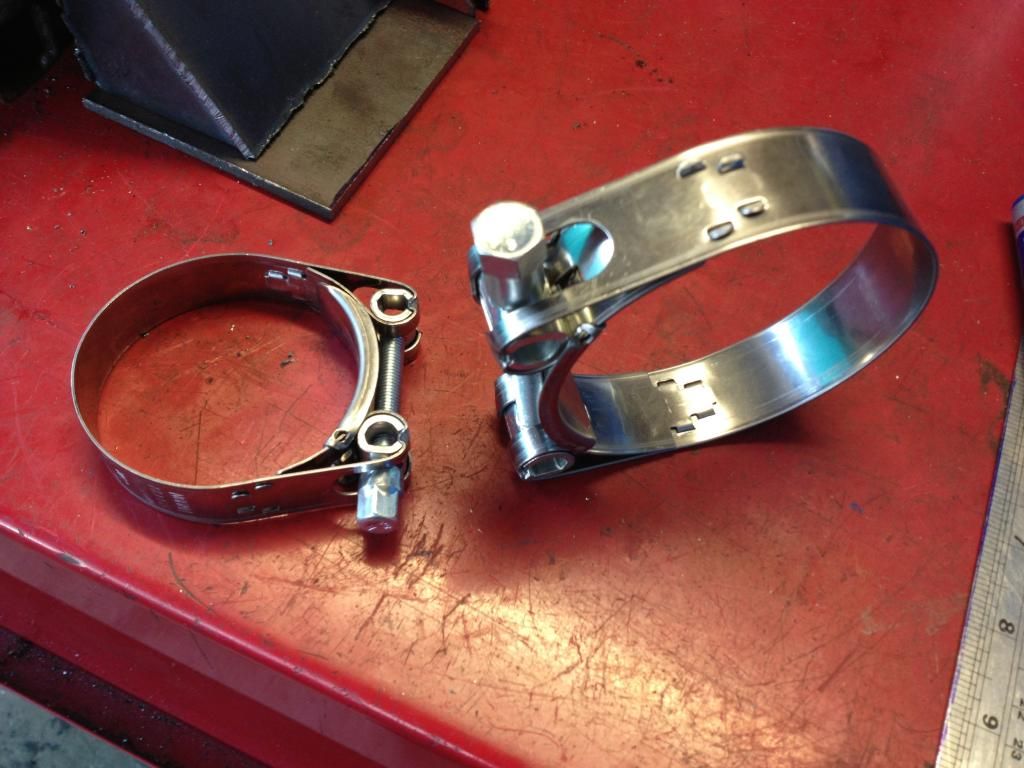
Last of the pnuematic stuff showed up so no excuses not to finish it now. These on off paintball valves are so freaking body though lol. Drilled and tapped the buffer bottle which went smooth as silk even though i was shyting myself at the prospect of ruining it.

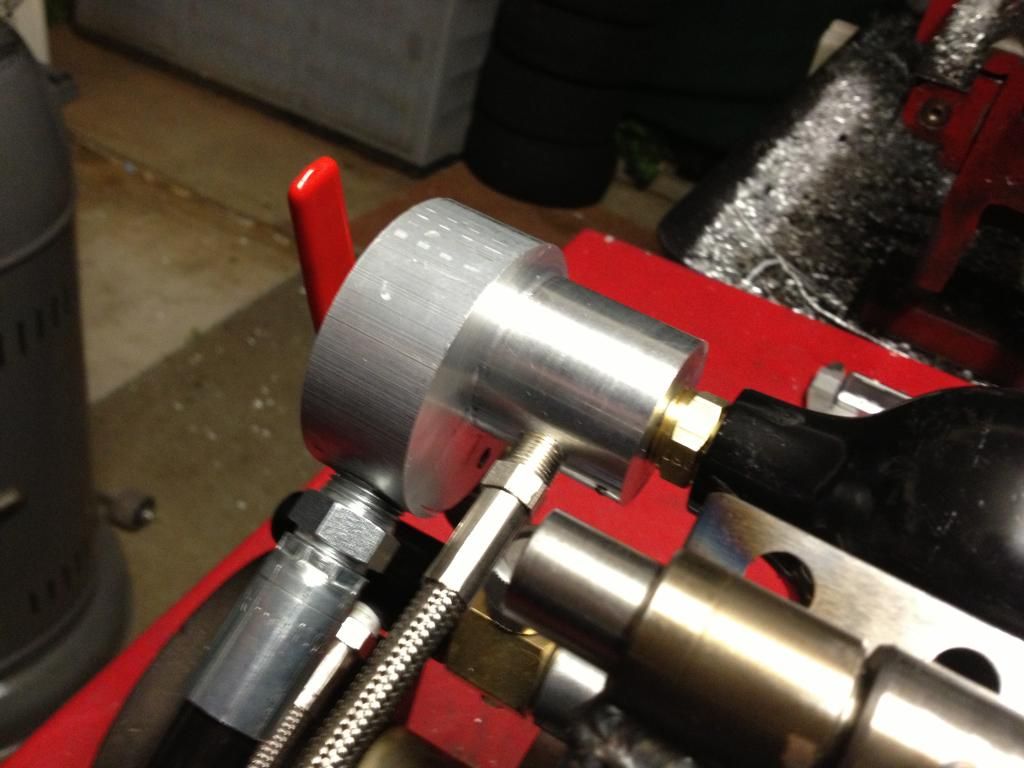
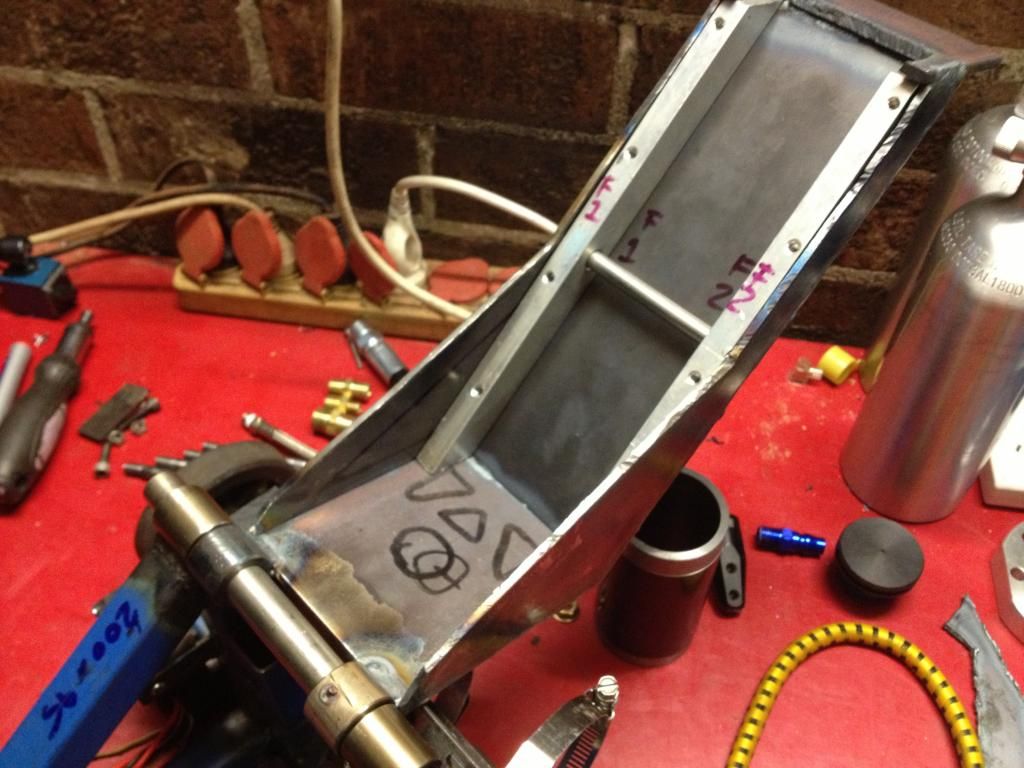
Last piece of the puzzle is making the manifold where all 4x hoses plumb into. Will be quite a complex piece requiring offset boring and all kinds of wierd crap, but im sure i can manage.


Biggest thing now is that hobbyking royally f*cked up my order for the batteries, they charged me $40 too much somehow then after taking the money out of my account have my order noted as unpaid, and i cant get in contact with them about it after 4 days. SO LIVID. So yes i think ill just buy from their resellers on ebay now. Been screwed around by them so much as of the last year. Sad

So yeah getting there. Bits to do:

- make manifold
- Battery mount
- armour! no idea what to do yet.. 3mm polycarb and chopping board hello
- finish flipper arm
- finalise welding the rest of the chassis

Hoping all next week can be spent on the armour and working out the pneumatic flaws.. hopefully Rolling Eyes
_________________
www.demon50s.com - Minimoto parts
http://www.youtube.com/user/HyzerGlen - Videoooozzz

Post Wed Jul 24, 2013 10:01 pm 
 View user's profile Send private message Send e-mail Visit poster's website MSN Messenger
Jaemus
Experienced Roboteer


Joined: 01 Apr 2009
Posts: 2674
Location: NSW


 Reply with quote  

All looking rather excellent Smile Can't wait for the test fire videos!
_________________
<Patrician|Away> what does your robot do, sam
<bovril> it collects data about the surrounding environment, then discards it and drives into walls

Post Wed Jul 24, 2013 11:51 pm 
 View user's profile Send private message Send e-mail MSN Messenger
miles&Jules
Experienced Roboteer


Joined: 19 May 2010
Posts: 3973
Location: ipswich QLD


 Reply with quote  

looking genius Very Happy
_________________
Miles Blow - Julie Pitts
www.mulesfilm.com.au
www.wombokforest.com.au

-Pickasso- Vivid Sportsman champion 2015

Post Thu Jul 25, 2013 12:08 am 
 View user's profile Send private message Send e-mail Visit poster's website
maddox


Joined: 21 Dec 2006
Posts: 786
Location: Belgium


 Reply with quote  

The neck of the buffertank has enough meat to drill a few 1/8bsp holes in it.
And the bottom is thick enough to hold a PRV.

Post Thu Jul 25, 2013 12:09 am 
 View user's profile Send private message Send e-mail Visit poster's website MSN Messenger
Glen
Experienced Roboteer


Joined: 16 Jun 2004
Posts: 9481
Location: Where you least expect


 Reply with quote  

Good to know next time Smile

Manifooooooooold. spent my lunchbreak punching this out. The poor 3/8bsp tap was on its last legs lol but ach. all done.

Theres a little m6 hole in the side for a support to bolt to. Surely the weight of it will snap the hex nipple off, so best to add some mounts to hold it in place.


Hobbyking were pretty quick to fix the order and sent out the batteries via courier which i got today. Pretty happy after all Razz

Big weekend job is armour. If you call 3mm lollycarbonate that. Oh the humanity. Rolling Eyes
_________________
www.demon50s.com - Minimoto parts
http://www.youtube.com/user/HyzerGlen - Videoooozzz

Post Fri Jul 26, 2013 9:57 pm 
 View user's profile Send private message Send e-mail Visit poster's website MSN Messenger
marto
Experienced Roboteer


Joined: 08 Jul 2004
Posts: 5459
Location: Brisbane, QLD


 Reply with quote  

Polycarb, its like going back 8yrs.

Steve
_________________
Steven Martin
Twisted Constructions
http://www.botbitz.com

Post Fri Jul 26, 2013 10:27 pm 
 View user's profile Send private message Send e-mail MSN Messenger
Glen
Experienced Roboteer


Joined: 16 Jun 2004
Posts: 9481
Location: Where you least expect


 Reply with quote  

XD least i'll be able to see whats blowing up inside of it.
_________________
www.demon50s.com - Minimoto parts
http://www.youtube.com/user/HyzerGlen - Videoooozzz

Post Fri Jul 26, 2013 10:30 pm 
 View user's profile Send private message Send e-mail Visit poster's website MSN Messenger
maddox


Joined: 21 Dec 2006
Posts: 786
Location: Belgium


 Reply with quote  

Pity about the expensive, heavy and cumbersome hose between the solidly mounted buffertank and solidly mounted ram. I would have use a steel 15*1.5 hydraulic tube.

Post Fri Jul 26, 2013 10:56 pm 
 View user's profile Send private message Send e-mail Visit poster's website MSN Messenger
Glen
Experienced Roboteer


Joined: 16 Jun 2004
Posts: 9481
Location: Where you least expect


 Reply with quote  

Everythings easy in hindsight isnt it. To late for could'ves now, just have to make it work full stop Smile
_________________
www.demon50s.com - Minimoto parts
http://www.youtube.com/user/HyzerGlen - Videoooozzz

Post Fri Jul 26, 2013 11:00 pm 
 View user's profile Send private message Send e-mail Visit poster's website MSN Messenger
maddox


Joined: 21 Dec 2006
Posts: 786
Location: Belgium


 Reply with quote  

Let me rewrite it.

I don't use hoses anymore. Unless the setup needs the flexibility.[/img]

Post Sat Jul 27, 2013 12:54 am 
 View user's profile Send private message Send e-mail Visit poster's website MSN Messenger
Glen
Experienced Roboteer


Joined: 16 Jun 2004
Posts: 9481
Location: Where you least expect


 Reply with quote  

Lol i know, but the event is in 5 days, there is no time to do anything differently to how its done now, thats what i was implying. But yeah for sure i will probably do that afterwards. Do you just weld the tube to special BSP fittings or are you making your own?

WWELLITY WELL time flies. Bit annoyed bunnings stopped selling polycarb, so i didnt get the armour done. But i did work out the shape and mounting of it, so will have to go to plastix in the week and get some 6mm HPDE to do it out of.

The manifold was looking real heavy so i chopped a big ole sliver off it. Bandsaw horror 101


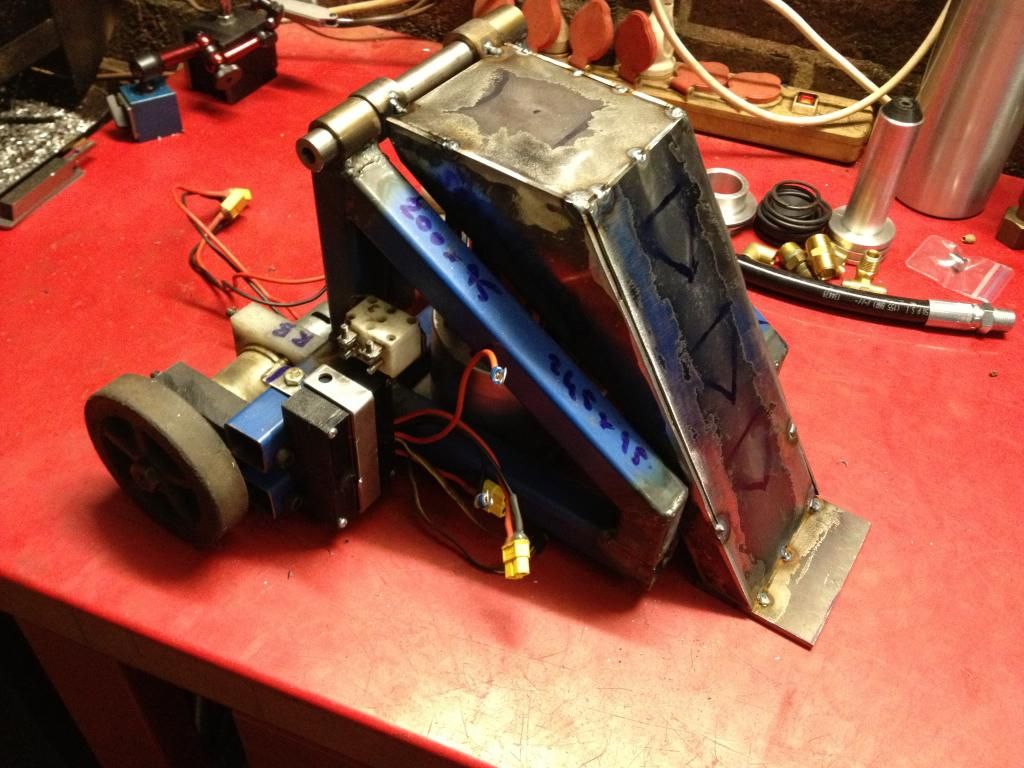
Got the flipper arm welded up. I ended up bolting two strips of aluminium inside it to stop it bending, meaning i can carve up the plate on the front to save weight ++. the strips add 300g but ill take 600 out of it, so all good. It also holds the 8mm bar the bungey + tether will attach to.


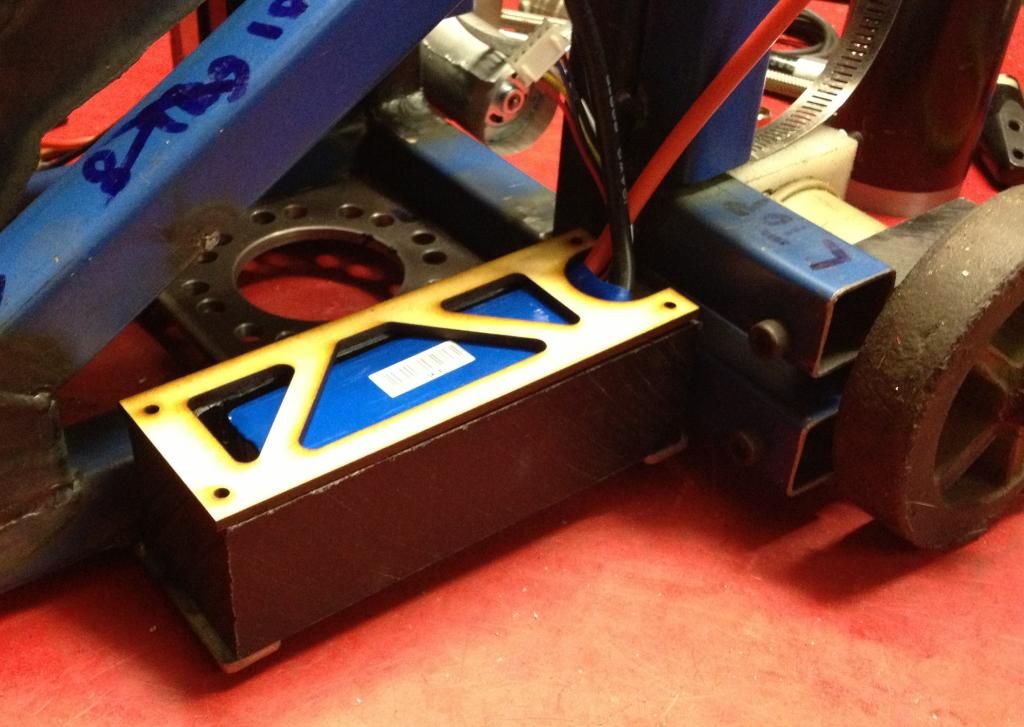
Cooked up the battery bay out of uhmw. Very light. Also lazored out a cover too lol. Will probably redo it out of hdpe or something. Or ill just leave it as wood just because :3


As for the pneumatics, cheers Phil for the metho tip, cleaned everything in metho in the ultrasonic and its all so shockingly clean lol. Just have to slap it all together and plug my compressor in (found a funky 1/4 bsp nitto fitting at a random toolstore) then i can test sometime.

Slowly chipping away.. I think the end is somewhere in sight.
_________________
www.demon50s.com - Minimoto parts
http://www.youtube.com/user/HyzerGlen - Videoooozzz

Post Sun Jul 28, 2013 9:14 pm 
 View user's profile Send private message Send e-mail Visit poster's website MSN Messenger
  Display posts from previous:      

Forum Jump:
Jump to:  

Post new topic   Reply to topic
Page 96 of 115

Goto page Previous  1, 2, 3 ... 95, 96, 97 ... 113, 114, 115  Next

Forum Rules:
You cannot post new topics in this forum
You cannot reply to topics in this forum
You cannot edit your posts in this forum
You cannot delete your posts in this forum
You cannot vote in polls in this forum


Last Thread | Next Thread  >
Powered by phpBB: © 2001 phpBB Group
millenniumFalcon Template By Vereor.